Funky Pumpkins, Brightly Coloured Knitted Pumpkins, Free Knitting Pattern.
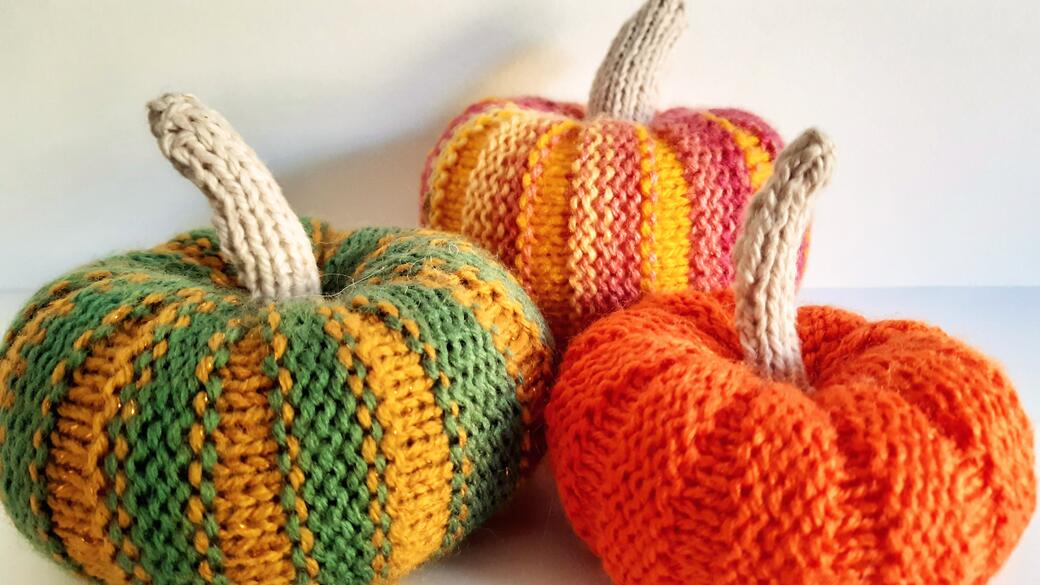
Did you know a Pumpkin is a fruit? The large orange variety has long been associated with Harvest Festival and Halloween bringing a welcome injection of colour as the nights draw in and the days get shorter. Whether you like your pumpkin as a bowl of warming soup or carved into a Halloween lantern there’s no mistaking the pumpkin is colourful and versatile. Why not ring the changes with these brightly coloured, knitted pumpkins with this free knitting pattern? They are easy to make for beginners, using only knit and purl stitches and worked flat in two pieces. The secret is in the making up which uses small stitches to gather and sculpt the simple knitted rectangles into these Funky 3D Pumpkins.
Autumn...The Festival of Colour

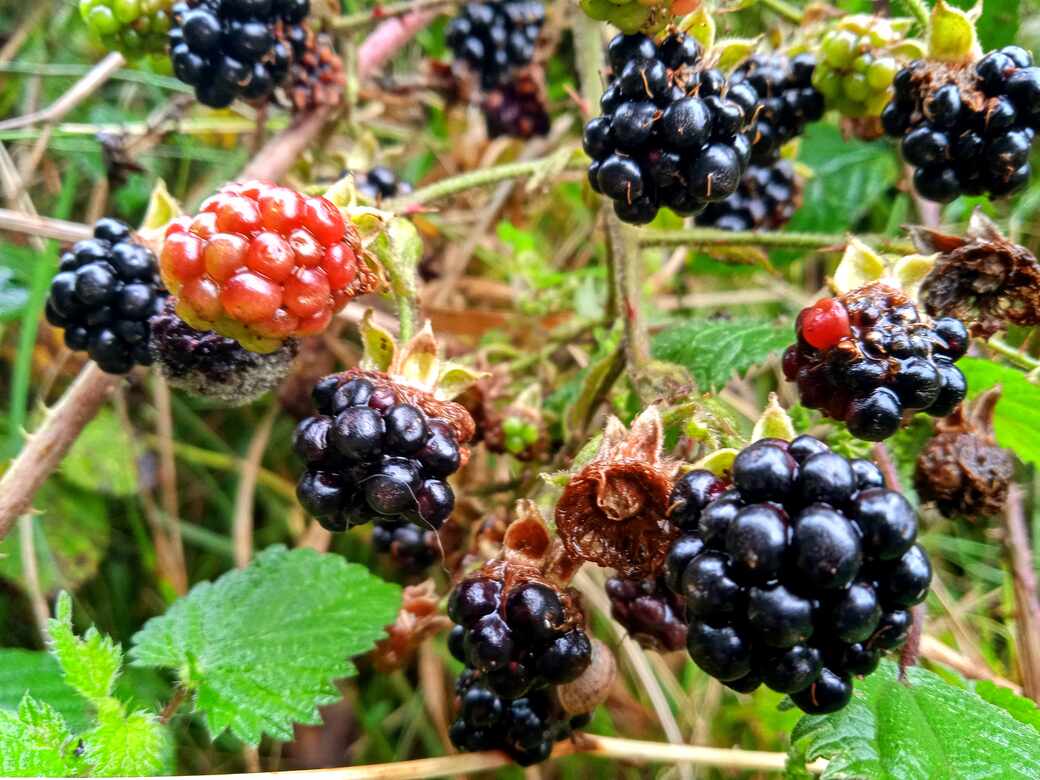
Autumn has always been one of my favourite times of the year when long summer days give way to crisp morning walks, cosy nights in front of the fire and the countryside ablaze with colour as the trees prepare to shed their leaves for winter. Having recently returned from Spain where the intense heat of the summer lingers long into November I have rediscovered my childhood fondness for autumn and am reminded of what it was like growing up in the British countryside at this time of year.
Growing up in an Oxfordshire village meant narrow lanes lined with blackberry bushes and crabapple trees, muddy farmers fields with windmills, scarecrows and flocks of birds following the tractors as they plough their straight furrows, bell-ringing in the local church on Sundays followed by an enormous roast dinner and an afternoon nap in front of the telly. I appreciate this probably all sounds quintessentially British, reminiscent of an Agatha Christie novel but with a few less dead bodies, but this is what country life in the UK really was like, well for me anyway.
Village life in autumn meant the Harvest Festival, significant among Christian and farming communities like ours, when thanks would be given for the summer’s harvest, a bounty of food that would get us through the long, cold winter months. My childhood memories of October are imprinted with images of the church adorned with magnificent displays of fruit and vegetables, donated by the community, as the village prepared for the Harvest Festival. The centrepiece of the harvest table was always a harvest loaf that had been made especially for the occasion but for me the stars of the show were the brightly coloured pumpkins. The produce collected would later be boxed up and delivered to the elderly or needy residents of the village.
Funky Pumpkins free knitting pattern is also available as a free PDF download on Ravelry and Patreon*. Use the links below.
*Patreon
Subscription based access to exclusive, content and patterns.
Just £5 per month.
INTRODUCTORY OFFER – FREE*
A way of showing your support and appreciation for my work.
~
*Green Dog Dolls is new to Patreon so for a limited time, membership and access are FREE.
This gives me an opportunity to add exclusive content, build a community and test out the platform before introducing a membership fee.
Why not head over to Patreon now and be among the first to join my community and beta test the service.
Funky Pumpkins ~ Free Knitting Pattern
© GREEN DOG DOLLS 2024
UK English version
Level – Easy
You will need:
Needles: 3.25mm knitting needles, knitters sewing needle (Tapestry needle)
Yarn: Double Knit, small amounts 10-25g. I used: James C Brett Top Value DK, Stylecraft Merry Go Round DK in Rainbow (Large pumpkin), King Cole Glitz DK in Antique Gold (Medium pumpkin), James C Brett Its Pure Cotton (Stalks)
Gauge: Not important for this pattern.
Small amount of polyester stuffing and a few pins.
Abbreviations: K (Knit), P (Purl), sts (Stitches), CC (Change colour), WS (Wrong side), RS (Right side),
Stst (Stocking stitch)
Large Pumpkin body (2 colours): Make one
Using 3.25mm knitting needles and Double Knitting yarn cast on 30 sts.
Row 1. Wrong side. Knit
Row 2. Right side. Purl
Rows 3-6. Stst starting with K row.
Row 7. * CC, P
Rows 8-10. Stst starting with a K row.
Row 11. CC, K
Rows 12-16, Stst starting with a P row.*
Rows 17-106. Rows 7-16 make pattern, repeat from * to * 9 more times.
Row 107. CC, P
Rows 108-110. Stst starting with K row.
Cast off purlwise, cut yarn leaving a long tail (50cm) for sewing up the back seam.
Medium Pumpkin body (2 colours): Make one
Using 3.25mm knitting needles and Double Knitting yarn cast on 25 sts.
Row 1. Wrong side. Knit
Row 2. Right side. Purl
Rows 3-5. Stst starting with K row.
Row 6. CC, P
Rows 7-9. Stst starting with a P row.
Row 10. * P
Rows 11. CC, K
Rows 12-14. Stst starting with P row.
Row 15. CC, K
Rows 16-18. Stst starting with a K row.
Row 19. CC, K
Rows 20-22. Stst starting with a P row.
Row 23. CC, K
Rows 24. P
Rows 25-27 Stst starting with a P row. *
Rows 28-99. Rows 10-27 make pattern, repeat from * to * 4 more times.
Cast off purlwise, cut yarn leaving a long tail (50cm) for sewing up the back seam.
Small Pumpkin body (1 colour): Make one
Using 3.25mm knitting needles and Double Knitting yarn cast on 20 sts.
Row 1. * Wrong side. Knit
Row 2. Right side. Purl
Rows 3-5. Stst starting with a K row
Rows 6-8. Stst starting with a K row. *
Rows 11 – 88. Rows 1-8 make pattern, repeat from * to * 10 more times.
Cast off purlwise, cut yarn leaving a long tail (50cm) for sewing up the back seam.
Stalk: Make one
First size is Large (Medium and Small in brackets)
Using 3.25mm knitting needles and double knitting yarn cast on 12 (10, 7) sts.
Row 1. Knit
Row 2. Purl
Rows 1 and 2 make Stocking stitch
Rows 3-20 (3-16, 3-14) Stst starting with a K row.
Cast off, cut yarn leaving a 30cm-40cm tail for stitching seam and securing stalk to pumpkin.
Making up:
- Create a pumpkin tube: Fold the pumpkin body in half so the ribs run from top to bottom as seen in the picture but make sure the RS is inside the fold and the WS is facing you. The cast on and cast off edges should be together at the right and will form the back seam of the pumpkin when stitched together.
- Pin the cast on and off edges together, thread the 50cm tail of yarn at the cast off edge through the tapestry needle and stitch the two edges together using whip stitch, back stitch or running stitch. (I prefer whip stitch, this seam will be inside the pumpkin so will not be seen.) to create a tube. Secure the end with a couple of stitches.
- Leaving the yarn tail in place, turn the pumpkin RS out so the WS and back seam are inside the tube.
- Close the bottom of the pumpkin: Using the tapestry needle threaded with the cast off tail yarn, gather the bottom edge of the pumpkin. Use small running stitches all the way around the bottom edge of the tube, then pull the thread tightly to gather up the stitches and close that end of the tube. Secure with a couple of stitches. You should now have a small bowl- like shape. At this point do not cut off the yarn tail.
- Stuffing: Use polyester fibre stuffing, (it is lightweight and pliable to create shapes) you can buy this in craft stores or use an old pillow that has been washed and dried. Create a fat donut shape, a little bigger than your pumpkin bowl, with your stuffing and insert into the pumpkin. Add small amounts of stuffing to fill voids and give a nice even shape but no not fill the centre, leave a hole like a ring donut and take care to not overfill the pumpkin or you will see the stuffing through the stitches.
- Close the top of the pumpkin: Cut a length of matching yarn (30-40cm) and use the tapestry needle to secure one end to the inside of the back seam at the top edge of the pumpkin with a couple of stitches. Like with the bottom edge, use small running stitches around the top edge and pull tightly to gather the stitches and close the top of the bowl/tube so you now have a ball-like shape. Secure the thread with a couple of stitches, again do not cut the thread tail at this point.
- Soft sculpting: Soft sculpting is a term used by doll and toy makers and refers to small adjustments made to the shape of a fabric form using stitches after stuffing. Here we are using it to accentuate the curves of the pumpkin by creating a dip through the centre where the stalk goes. Pass the threaded tapestry needle through the centre of the pumpkin from the centre top down through the hole in the donut of stuffing and out through the centre of the bottom of the pumpkin. Pull the thread tightly to create a dip in the centre top and secure it with a couple of stitches. Pass the threaded needle back up through the middle of the pumpkin and out at the centre of the top, again pulling the thread tightly to form the dipped centre and secure the thread with a couple of stitches.
- Lose the thread tails inside the pumpkin: Pass the threaded needle back down through the middle and out of the bottom of the pumpkin pull the yarn slightly and cut the yarn close to the surface of the pumpkin taking care not to cut the pumpkin. Repeat with the other yarn tail. By using this method we are not cutting the yarn too close to the securing stitches which helps to stop the stitches unravelling.
- Making up the stalk: Take a small amount of polyester stuffing and roll it between the palms of your hands to make a cigar shaped roll of stuffing, remove or add stuffing and re-roll until you are happy with the size and it closely matches your knitted stalk. You need to be able to wrap the knitted stalk around the rolled stuffing and stitch the two long edges together so you have a filled knitted tube to create the stalk.
- Wrap the knitted stalk around the rolled stuffing, RS on the outside, WS on the inside and secure with a couple of pins. Thread the tapestry needle with the yarn tail (30cm) and stitch the two edges together along the length of the stalk. I like to use ladder stitch when working on the RS of knitted pieces but you can also use whip stitch if you prefer.
- Stitch closed one end of the stalk with small running stitch, pull the yarn to gather the stitches and close the end, secure with a couple of stitches. Do not cut the yarn.
- Shape the stalk: Use the threaded needle to make small running stitches back along the stalk seam from the top to the bottom. Pull the yarn slightly to gather the stitches but only enough to curve the stalk slightly and secure with a couple of stitches.
- Stitch the stalk onto the pumpkin: Place the open end of the stalk into the centre top dip of the pumpkin and secure with a couple of pins. Stitch around the base of the stalk to attach it to the pumpkin. I do this one stitch at a time, making a small stitch in the base of the stalk and then a small stitch in the pumpkin and work my way around the base of the stalk until it is secure. Secure the tread with a couple of stitches. Do not cut the yarn.
- Finishing touch: You can’t see it in the picture but on the base of the pumpkin there are a couple of decorative stitches forming a cross. Pass the threaded needle through the centre of the pumpkin with the needle coming out a few stitches off centre of the base. Make two stitches that pass over the centre point in the base to create a small cross. This represents the blossom end or belly button of the pumpkin as it is sometimes called at the centre point of its base. Pass the needle back up through the centre of the pumpkin and secure the yarn with a couple of tiny invisible stitches at the base of the stalk and then pass the threaded needle back through the pumpkin and cut the yarn end close to the pumpkin to lose the tail inside the pumpkin.
SAFETY NOTE: Not suitable for children under 3 years of age.
This design includes small parts. Small parts can present a choking hazard for young children. Please take extra care if giving ‘Funky Pumpkins’ to a child. Make sure materials and construction methods used are age appropriate. Please see Terms & Conditions for full details.
If you notice any errors in this pattern please let me know by sending me a message via the contact page.
Have you tried this project yet?
Was it easy to follow?
What other projects would you like to see?
Leave me a comment below.
© GREEN DOG DOLLS 2024
‘Funky Pumpkins’ design, pattern, text and images remain the property of Green Dog Dolls and may be withdrawn at anytime without notice.
Thank you & Happy Knitting x


Pingback: 14 Knitted Pumpkins Free Patterns - Knit-Knit