Make your very own Creepy Cute Monster Doll with this free sewing tutorial and pattern.
Easy to follow step-by-step instructions with over 40 detailed photos.
+ Free Bonus mini-tutorial: How to dye fabric for a vintage look.
This free sewing tutorial and pattern includes:
- downloadable template for the first two characters in the Creepy Cute Gang, super cute Nigel and his brother Reg.
- Easy to follow step-by-step instructions.
- Over 40 detailed photos.
- Useful sewing guides for beginners.
- Pro-tips for professional results.
- Free bonus mini-tutorial: How to dye fabric for a vintage look.
The Creepy Cute Monster Doll tutorial is suitable for beginners although some experience of sewing would be an advantage.
If you are a completely new to sewing and have no previous experience, you may wish to start with my sewing tutorial for beginners.
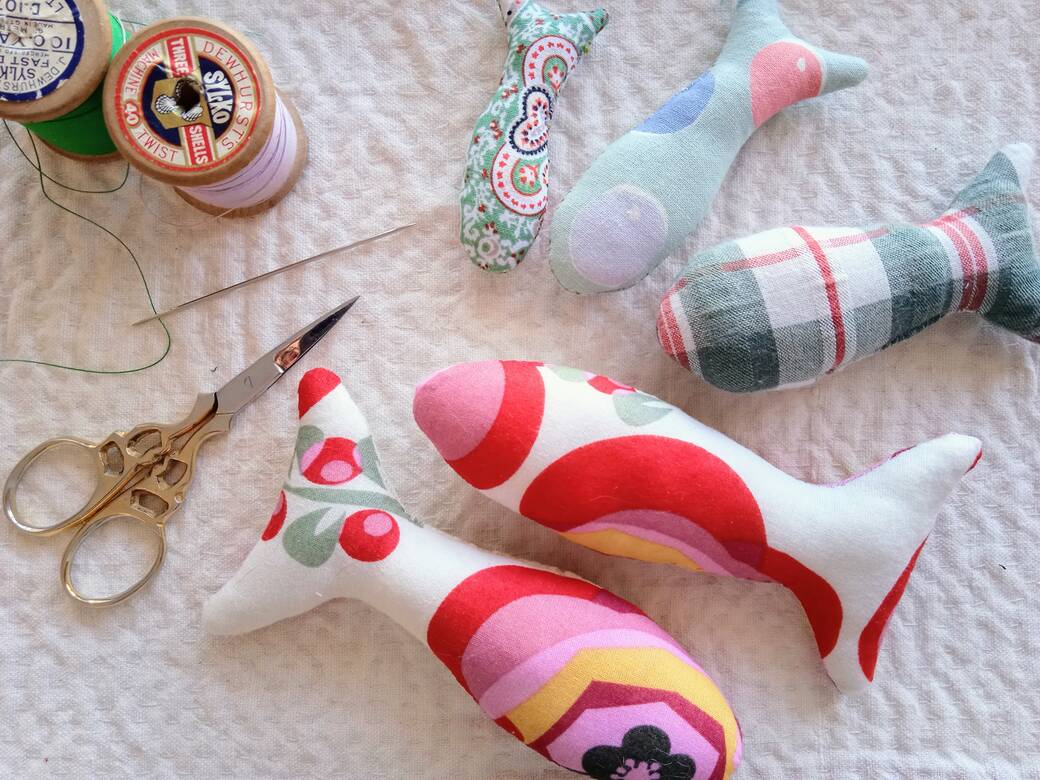
Fishy Dolls Free hand sewing tutorial for beginners – Part 1.
Having said that, Creepy Cute Monster Doll is a fun project designed to develop your sewing and doll-making skills.
Whether you’re just starting out or you’re more advanced, there are numerous helpful links to free resources and practical tips to assist you at every stage.
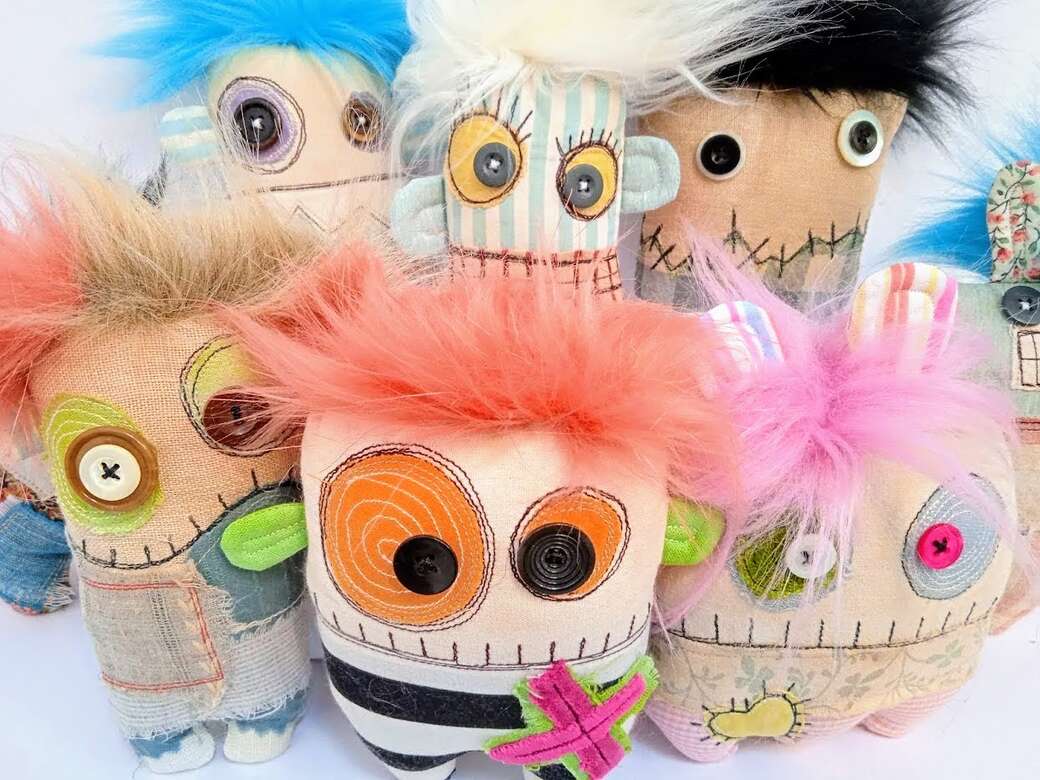
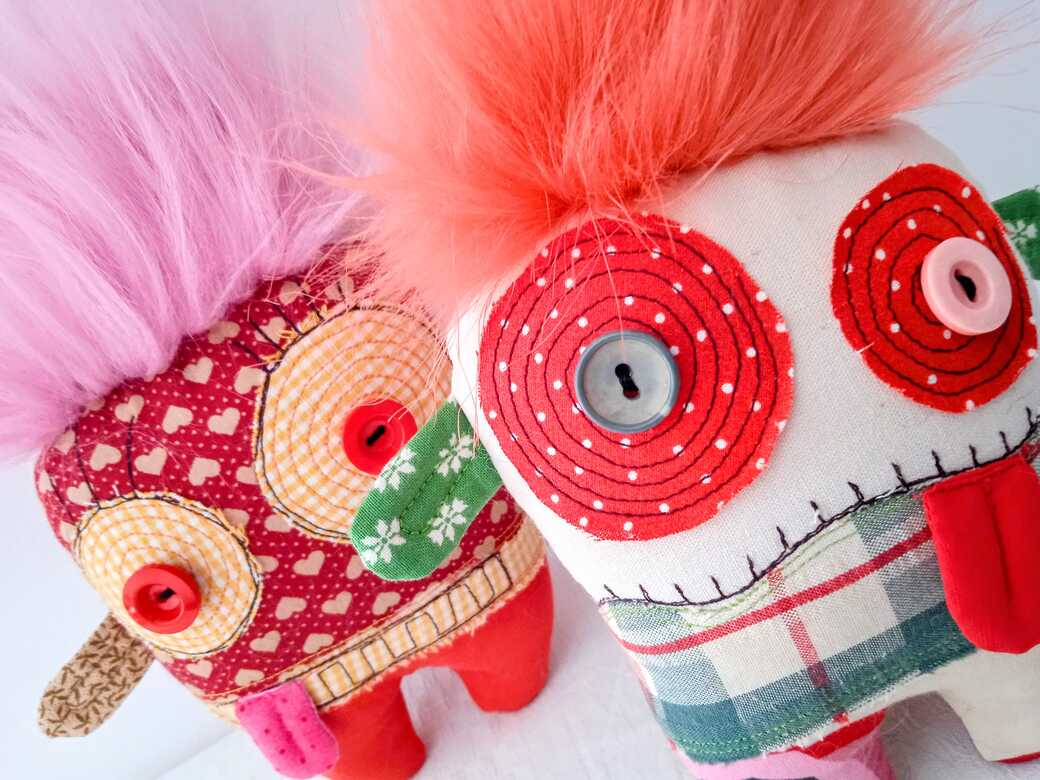
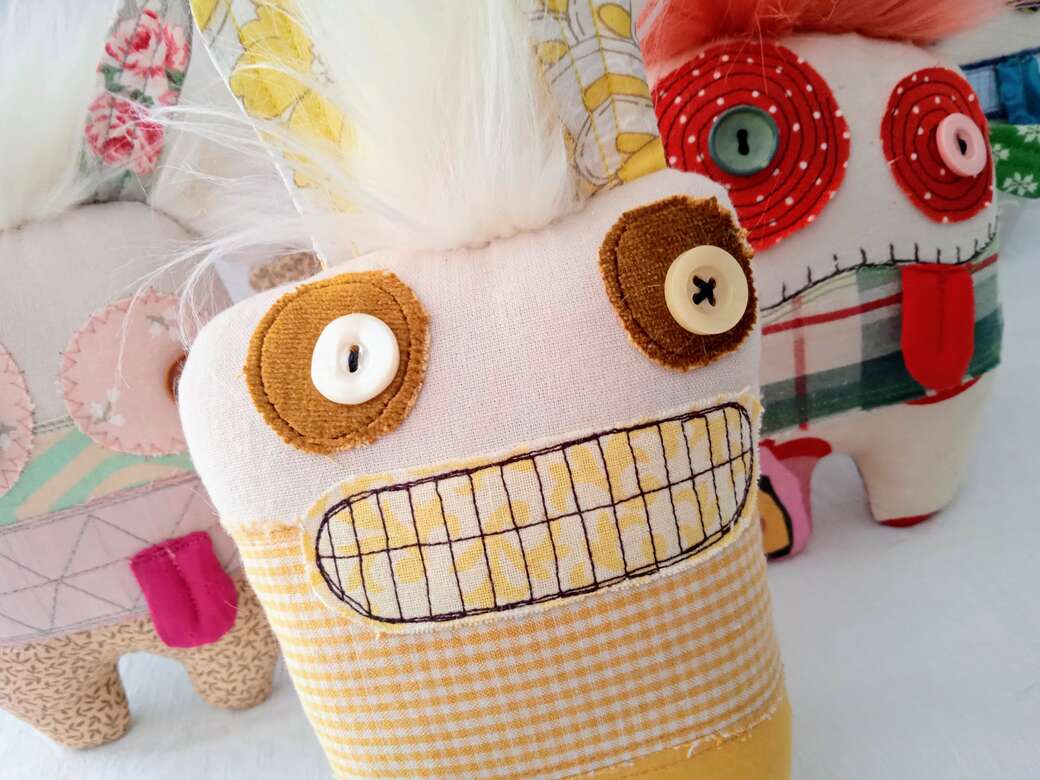
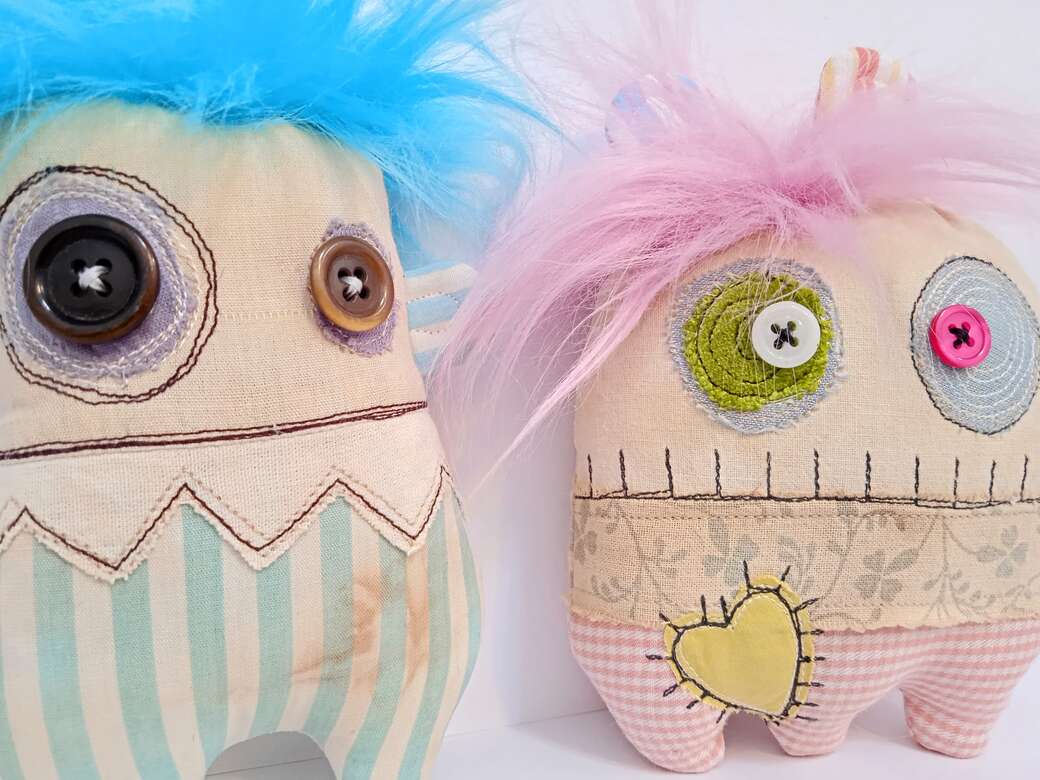
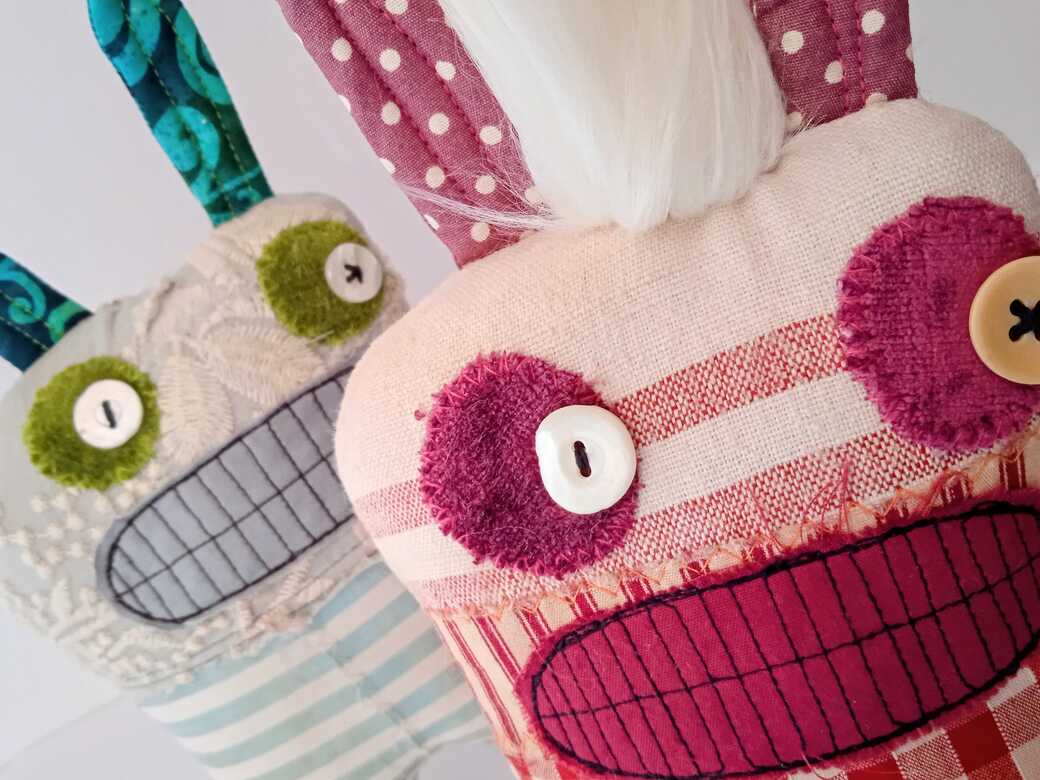
Creepy Cute Monster Doll Nigel and his brother Reg.
These little guys are bursting with character and make great companions.
Measuring approximately 20 cm from top to toe they are small enough to go everywhere you go, so whether you’re backpacking around the World or working in the home office, there’s always room for a Nigel or Reg or two.
Nigel and Reg never fail to bring a smile to my face and are always on hand to lend an ear and listen to my woes.
They are made using recycled materials and dyed using pre-used tea bags to give that vintage pre-loved look.
It’s a project that’s flexible enough for you to showcase your originality and costs virtually nothing (If anything) to produce.
Why not get started today with these free resources (the pattern template and the step-by-step tutorial) and then join the Green Dog Dolls Patreon Community and be eligible to participate in the FREE Monster Make-A-Long this winter. Monster MAL – Winter 2024: More Creepy Cute Gang members and how to personalise your Monster Dolls.
Did you know the British drink about 100 millions cups of tea daily?
Us Brits really do like a good cuppa. We drink approximately 100 million cups daily.
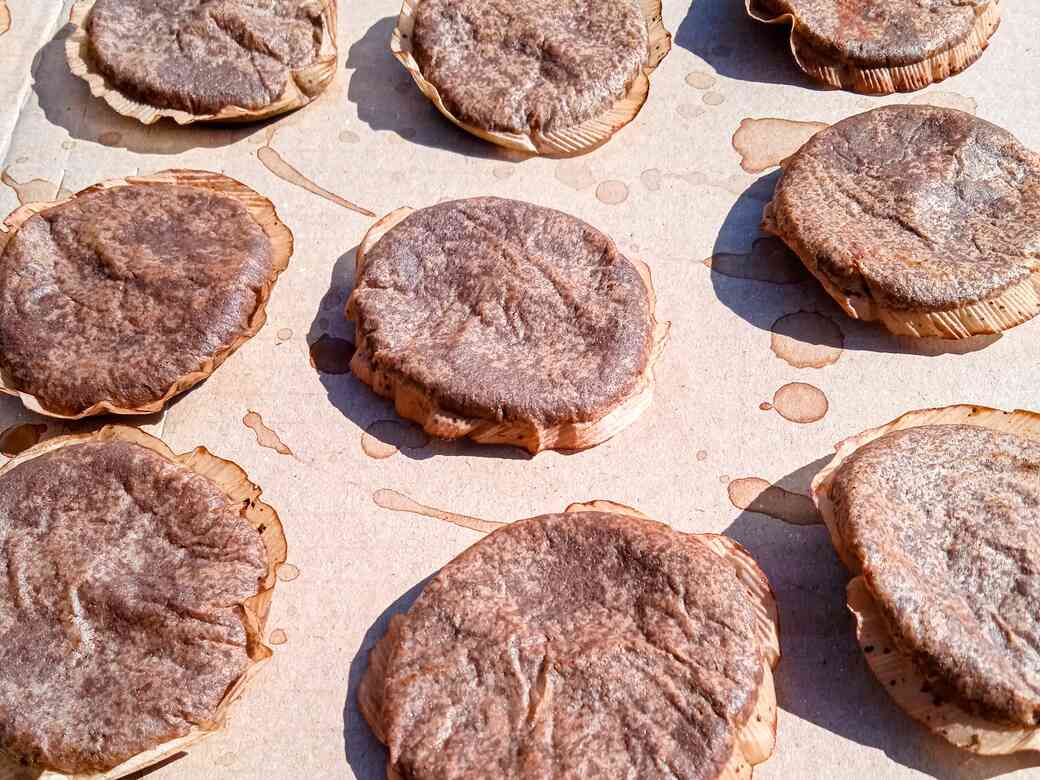
But did you know you can also use Britain’s national drink to dye fabric?
Tea-dyeing, although the name sounds very similar, is not to be confused with tie-dyeing.
Tie-dyeing is a resist-method of dyeing fabric and clothing associated with the 60’s and 70’s Hippy movement, with its brightly coloured patterns and psychedelic music scene.
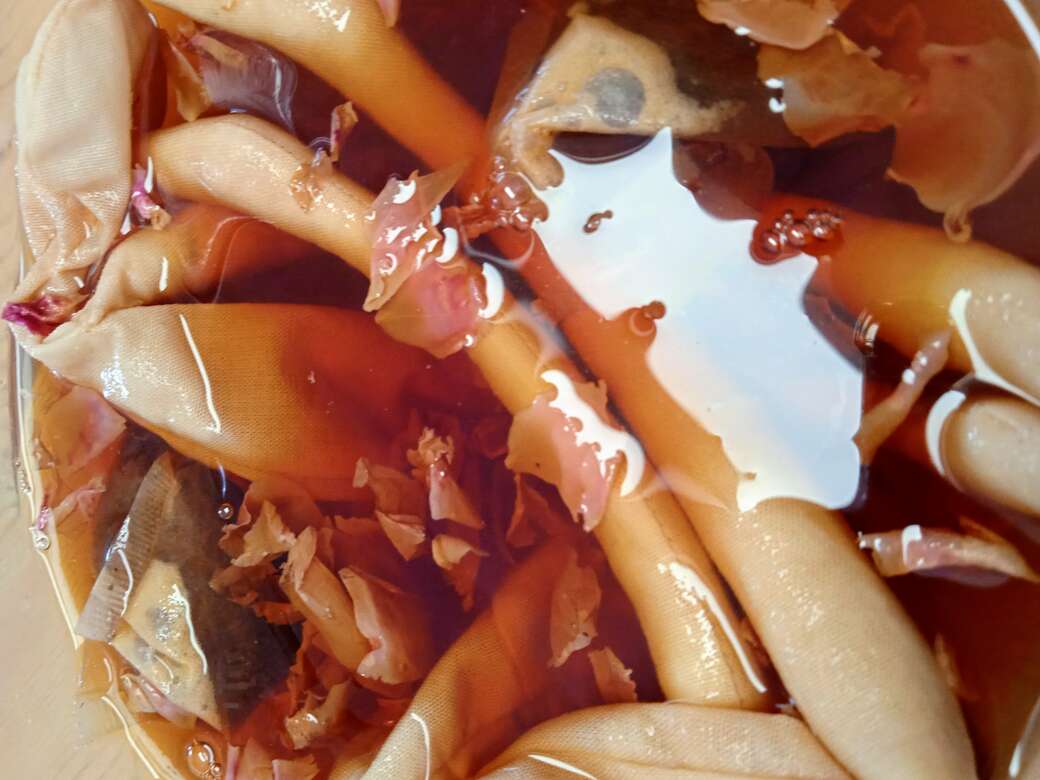
Whereas, tea-dyeing uses a strong cup of tea (no milk or sugar, thank you!) to dye/stain fabric, giving it a time-worn, vintage appearance akin to having been left in the attic for 30 years.
Generally I’ll use the tea-dyeing method when I want to create a fabric that appears to be much older and more worn than it actually is.
You can use tea-dyeing for just a small element of a design (e.g. a neck ruffle) or for some designs, like with these Creepy Cute Monster Dolls, I have used it to dye the whole body and head.
Creepy Cute Monster Doll: Free Sewing Tutorial and Pattern.
+
How to Dye Fabric For a Vintage Look
Skills you will develop with this tutorial:
- Simple decorative machine sewing techniques, applique, quilting, topstitching.
- How to make fabrics appear vintage using ordinary everyday tea bags.
- Doll making Pro-Tips for a more professional finish.
- Sewing on buttons for embellishment.
You will need:
- Printed Creepy Cute Monster Doll Template. DOWNLOAD-CREEPY-CUTE-MONSTER-DOLL-TEMPLATE-HERE
- Basic sewing kit. SEE HERE FOR BASIC SEWING KIT
- Sewing machine (Or you can sew by hand if you prefer)
- Stuffing (I use carded polyester or recycled from old pillows , make sure you wash it before using it)
- A pair of tweezers or forceps for turning.
- Chopstick for stuffing.
- Some large and small fabric scraps, medium or light weight woven fabrics. (e.g. old sheets, printed cottons, small amounts of velvet or faux fur)
- Tea bags, a large glass bowl, boiling water.
Creepy Cute Monster Doll | Free Sewing Tutorial And Pattern
| How to Dye Fabric For a Vintage Look
This tutorial includes full step-by-step written instructions with over 40 detailed photos.
If you prefer you can download a PDF copy available on Patreon*.
Green Dog Dolls is new to Patreon* so membership and access are currently FREE.
Become a Patreon* member now and gain full access to exclusive bonus materials for FREE.
*Patreon is a platform where artists and content creators can share exclusive content with their supporters.
There is often a monthly subscription fee of about £5.
This shows support and appreciation for a creators work and helps to build a community.
There is currently NO CHARGE for membership, while I roll out and test this service.
Patreon Members will have exclusive access to...
Creepy Cute Monster Doll Make-A-Long (MAL) Winter 2025
Mini-tutorial: Dyeing fabric with tea for a time-worn, vintage appearance.
Steps 1, 4 & 5 cover the tea-dyeing parts of this tutorial and can be used separately as a stand alone mini-tutorial.
Step 1. Experiment with different teas if you have them.
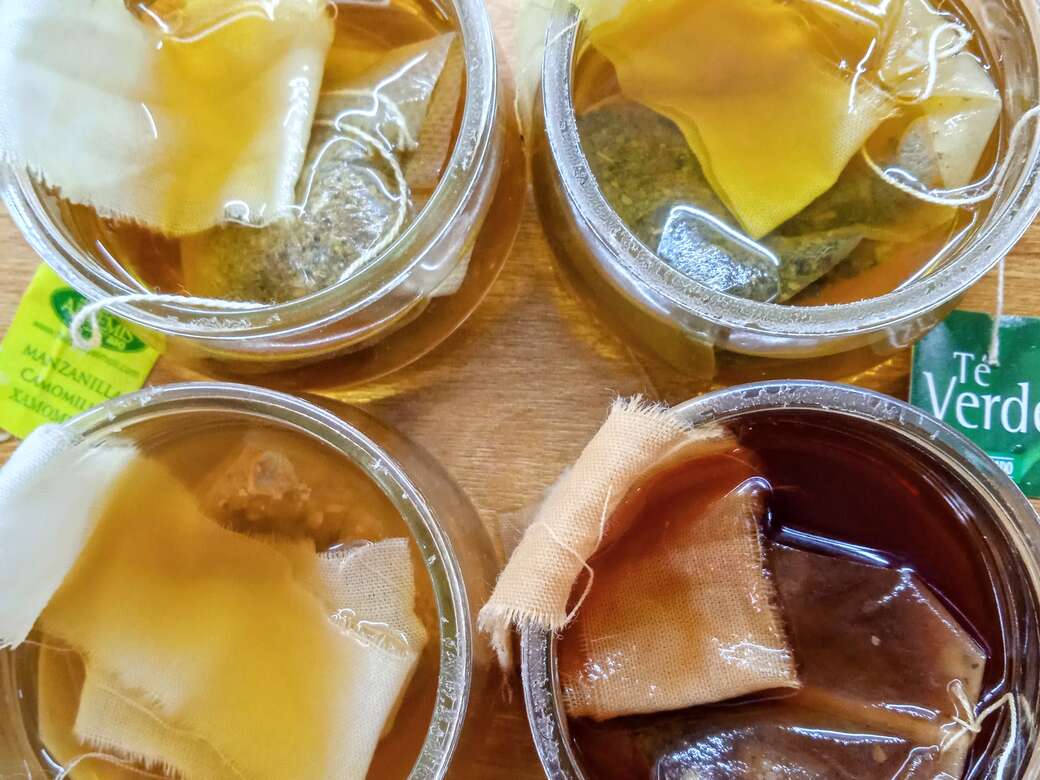
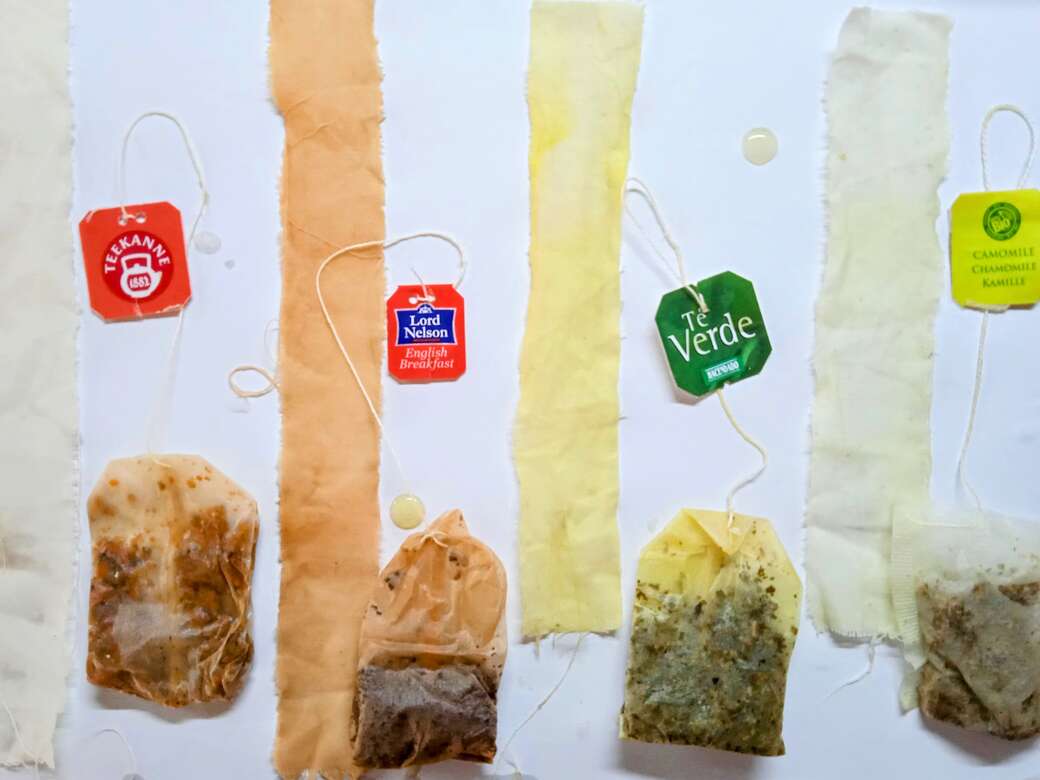
It’s quite a lot of fun spending a morning playing around making different cups of tea and dipping fabric samples into them. It’s interesting to see what effects you can achieve with just a few inexpensive everyday items.
i) Firstly get some small bowls or cups and make some strong teas with just the tea bags and a small amount of boiling water.
ii) Tear some narrow strips of plain white fabric e.g an old cotton sheet (cotton works better than mixed fibres) and immerse them into the prepared teas. Be careful not to scold yourself with the hot water, use a teaspoon to immerse the fabric and give it a stir. [c]
I leave the tea bag in to make the tea stronger and the colour more intense.
iii) Vary the amount of time you leave the fabric immersed in the tea to change the intensity of colour. Check every 10 – 15 minutes to see how the colour is developing.
iv) When you are happy with the colour, (you are trying to achieve an aged, well-used appearance) remove the fabric and hang up to dry. I don’t rinse the fabrics, you can if you wish to reduce the colour intensity but be aware the effect will be more subtle when dry.
v) Experiment with a range of fabric samples, a variety of different teas and immerse the fabrics for longer and shorter periods of time to achieve different results.
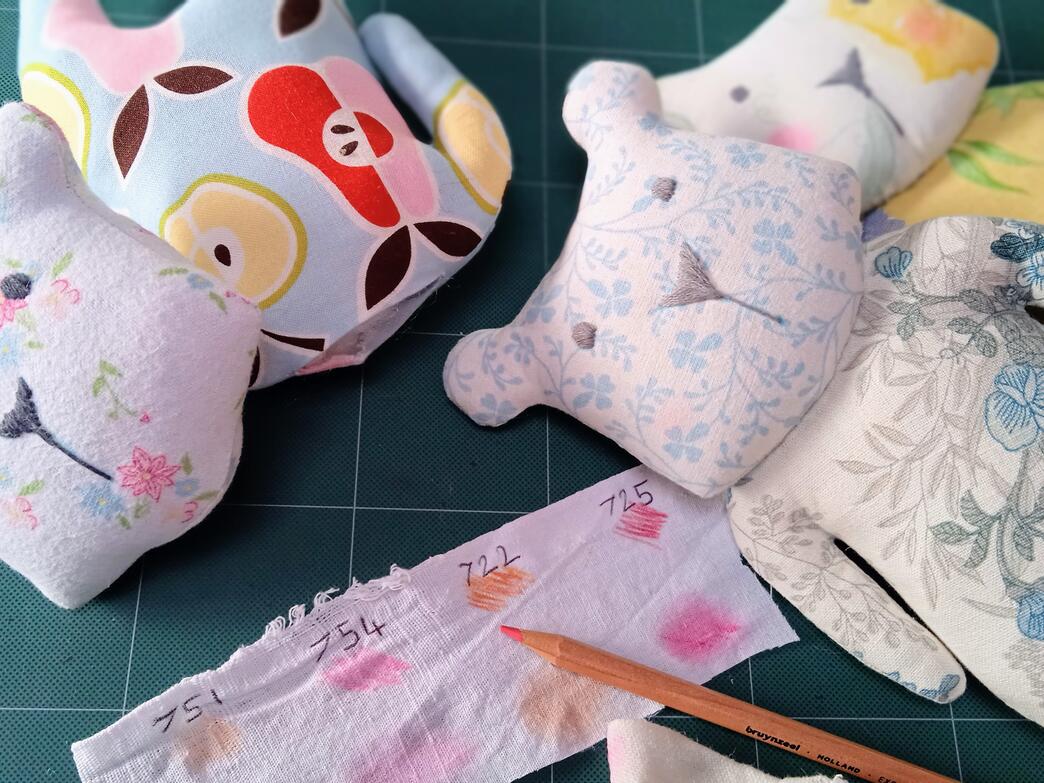
vi) It’s a good idea to record your results in case you want to recreate the same effect again. [d]
Step 2. Prepare your fabrics.
Fabric Preparation: Method 1 - Join the fabrics first then dye them as a whole piece.
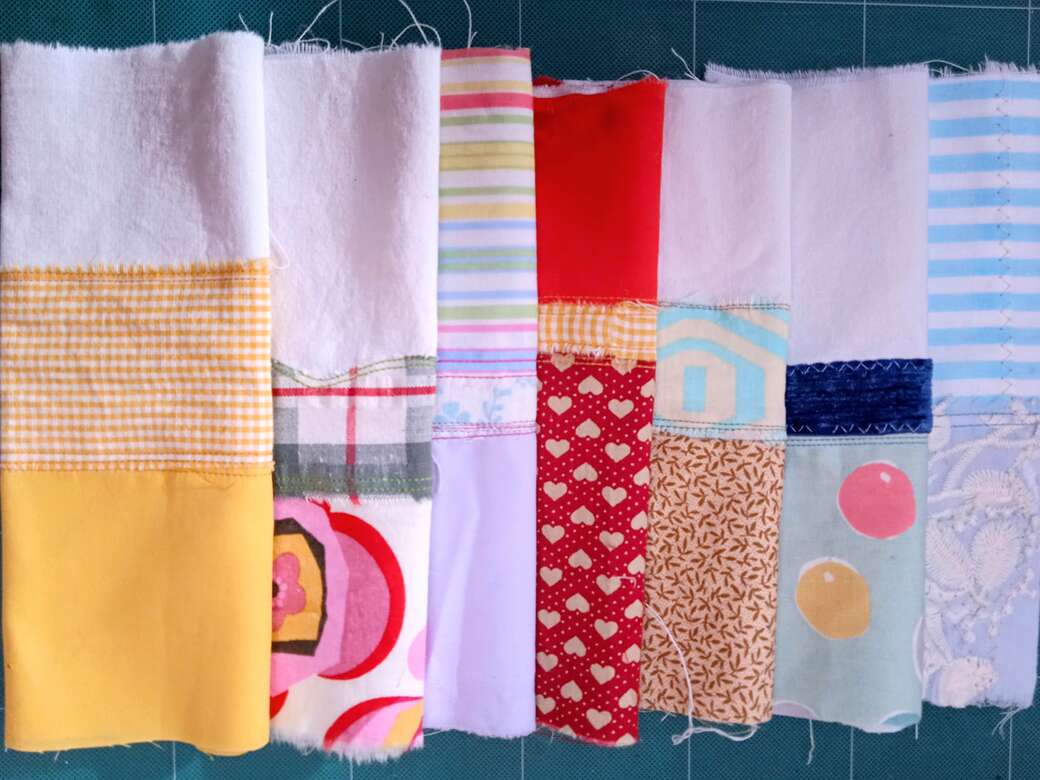
You will need one A4 size piece of fabric (landscape), to make one Creepy Cute Monster Doll. [e]
I lay out fabric strips horizontally to create 2 or 3 sections. A top section to represent the head, and 1 or 2 other sections to represent the body. [f]
The fabrics can be laid out any way you like, so long as the finished piece is similar in size to an A4 piece of paper.
*Fabric Preparation: Method 2 - Fabric strips to be dyed first then joined together after dyeing.
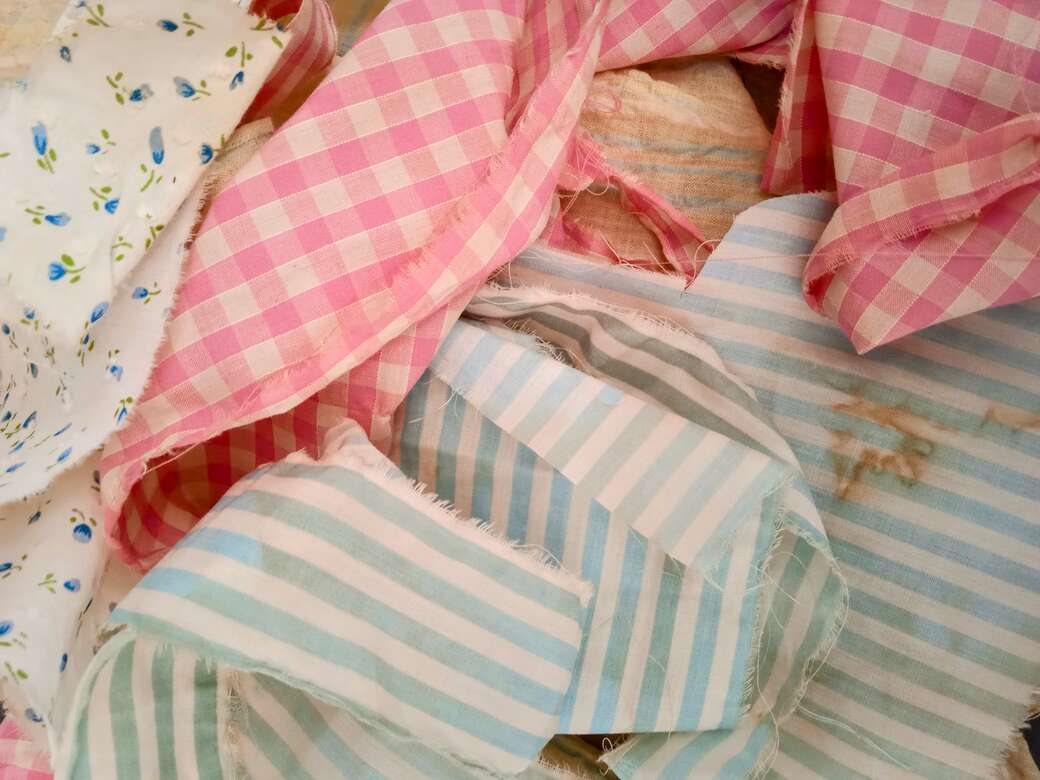
Tearing the fabrics rather than cutting them adds to the more aged and worn look. [g]
Tear strips of different widths, some printed fabrics and some plain to give you a variety of options. After dyeing, (Steps 4 & 5) you will sew these strips together to form the head and the body sections for the Doll. [h]
Step 3. Layout your design and stitch the fabrics together.
*NOTE: If you are using fabric preparation method 2 (dyeing the fabric strips first and then stitching them together after dyeing) Step 3. should be followed after completing Steps 4 & 5.
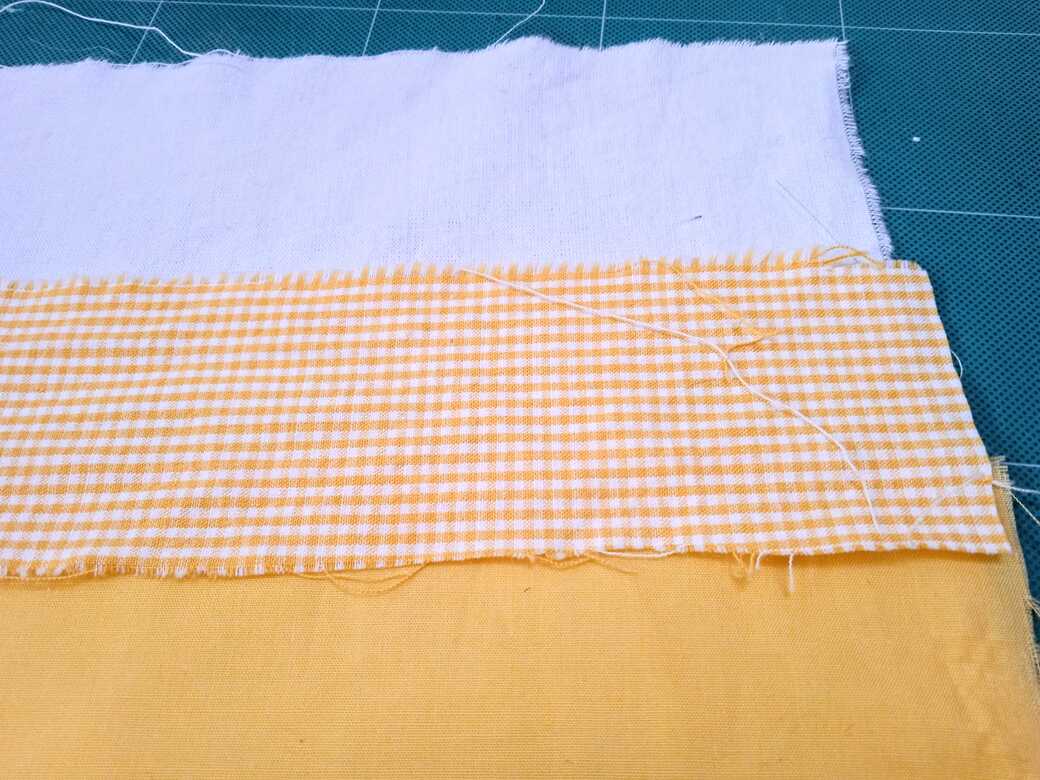
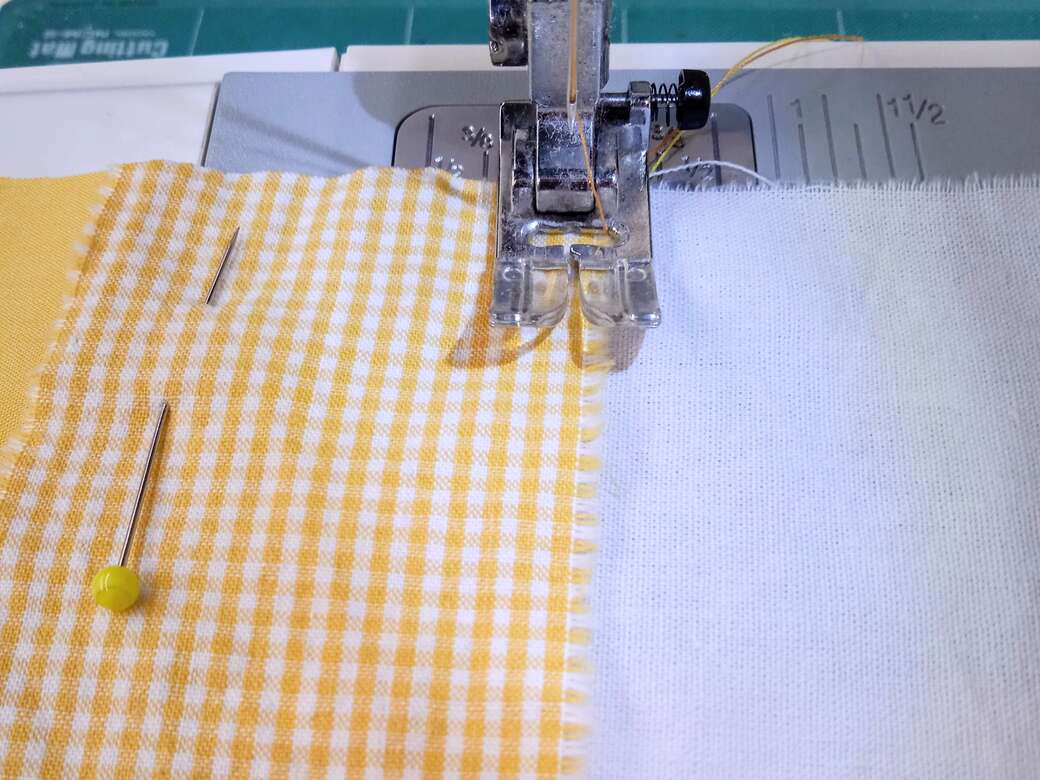
i) Lay the fabrics on a flat surface. Use an A4 sheet of paper as a guide or what I prefer to do is cut an A4 piece of plain fabric to use as a base and then stitch the fabric strips to this base fabric. Create the layout you want with horizontal sections to represent the head and the body. (See images [e,f,h] for ideas.) Lay the strips/scraps of fabric side by side with a small amount of overlap (about 5-10 mm) and pin together.
ii) Topstitch the pieces together. I used a sewing machine but you can also stitch by hand if you do not have a sewing machine or prefer to stitch by hand. The term topstitch is a row of stitching that is visible and used as part of the design. I sometimes use two rows of stitching or set the sewing machine to zig-zag.
Experiment with different stitches on some scraps of fabric before stitching your doll fabric.
Step 4. Tea-dye your fabric.
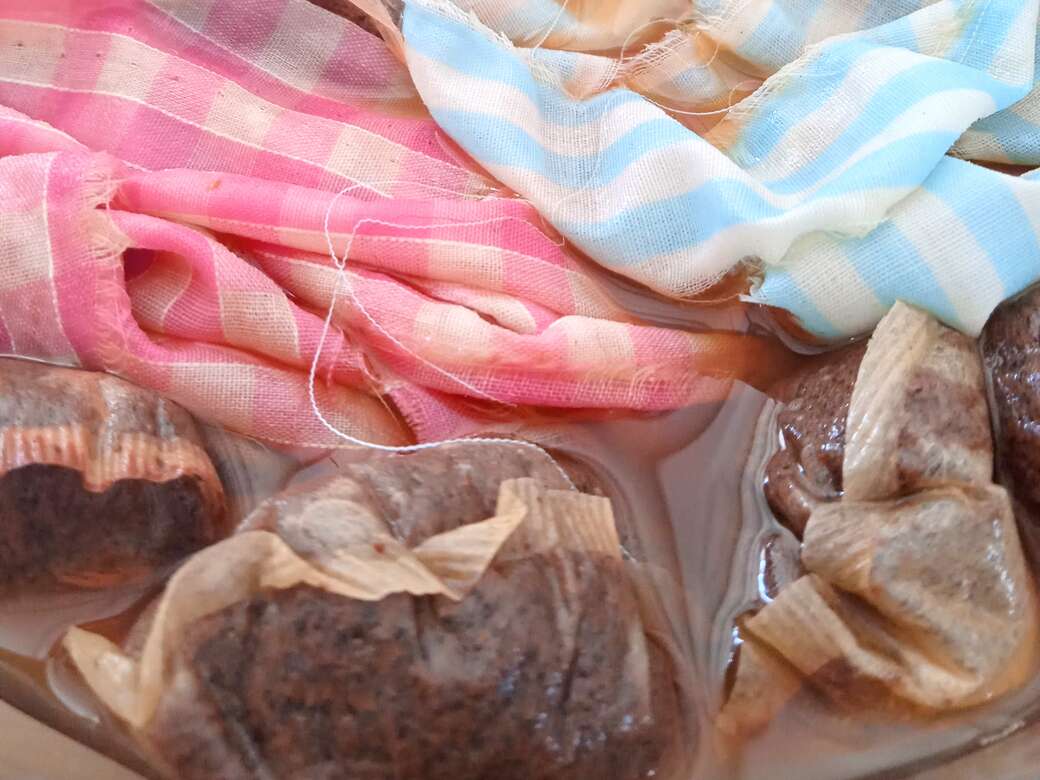
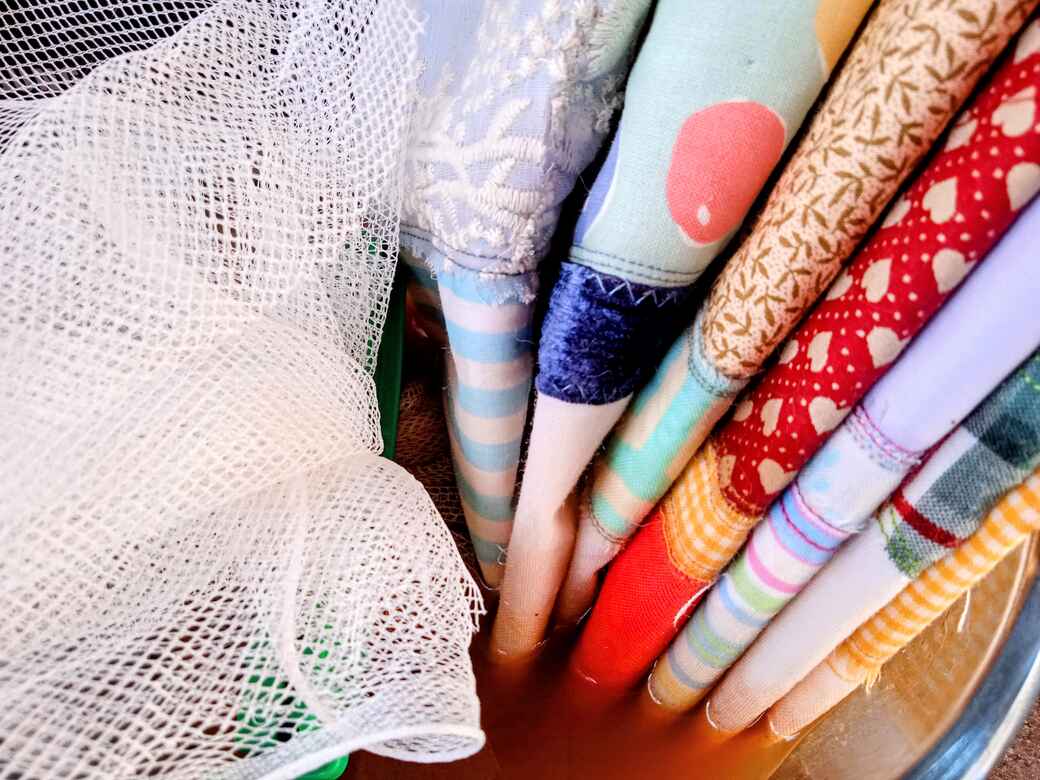
i) Make up a strong tea bath in a large bowl, I use glass, you can also use metal. Be careful with some materials eg. plastic bowls, because the strong tea could stain them.
ii) Immerse your prepared fabrics* into the tea. (*fabric preparation methods 1 & 2)
You can immerse them fully [k] or roll up your fabric and immerse just one end so that the tea gradually bleeds upwards as the dry fabric absorbs the liquid [l]. The colour will be stronger at the immersed end and get gradually lighter towards the other end.
iii) Leave your fabric in the tea bath for the colour to develop. Anything from 10 minutes to 1 hour depending on the depth of colour required. 15-20 minutes is a good choice for a subtle result but this depends on the strength of your tea bath and the type of fabric you are using. (If you completed the experiment in step 1, use the results to help gauge this.)
Step 5. Dry and Iron your fabric.
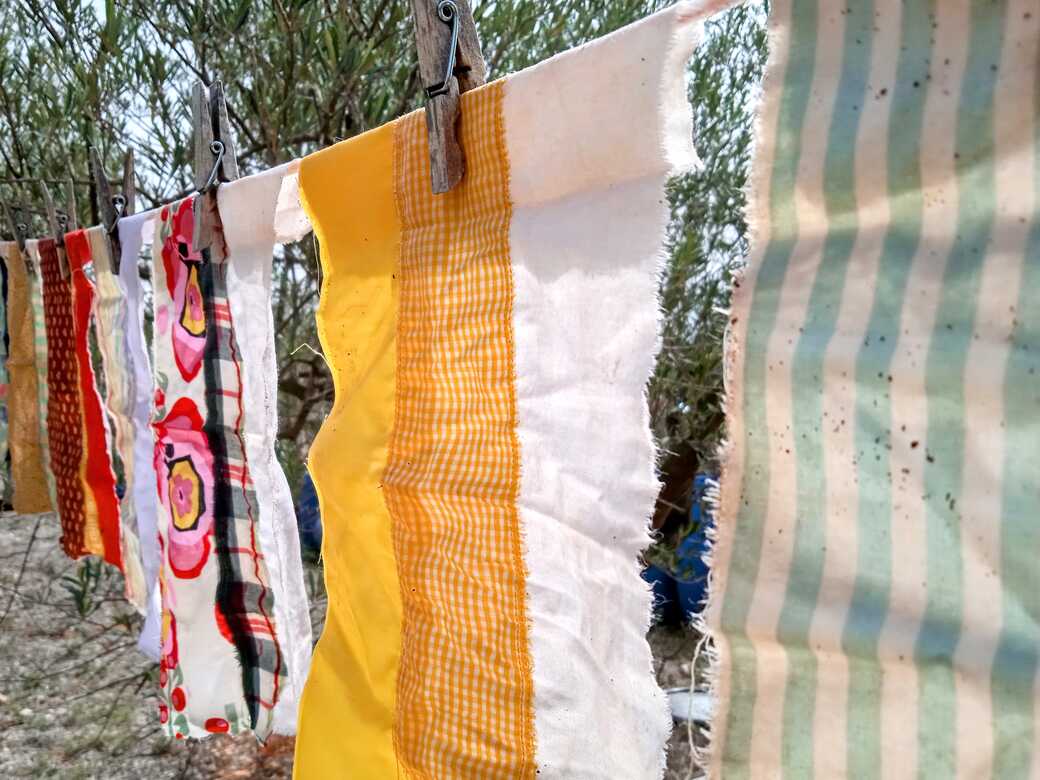
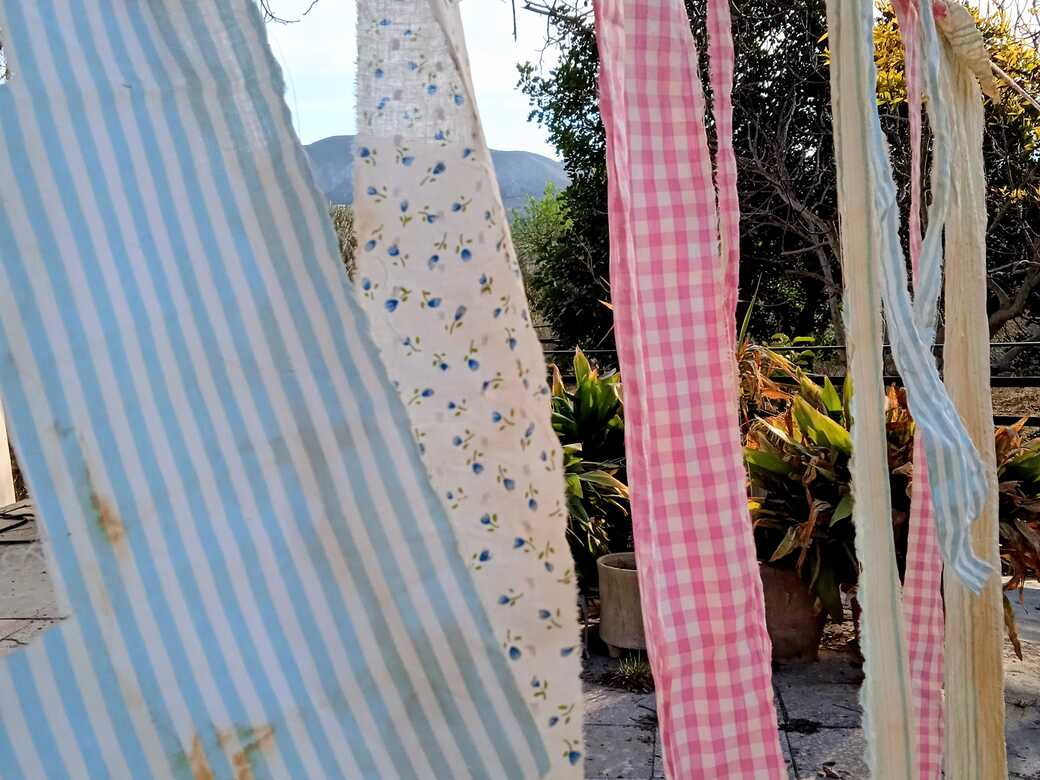
i) Remove the fabric from the tea bath, wring out as much excess liquid as possible and hang out to dry.
NOTE: I prefer to dry my fabrics naturally by hanging them out on the washing line. Of course if it’s raining try to find somewhere under cover to hang them but be aware that some of the strong tea may drip and stain, so protect the surface below.
ii) When dry, remove from the washing line.
iii) Iron on the wrong side.
Fabric preparation method 1. [m] - The fabric is now ready to make your Creepy Cute Monster Doll, move onto Step 6.
Fabric preparation method 2. [n] - Now complete Step 3, layout your design and stitch the fabrics together, before moving onto Step 6.
Step 6. Make the creepy cute features.
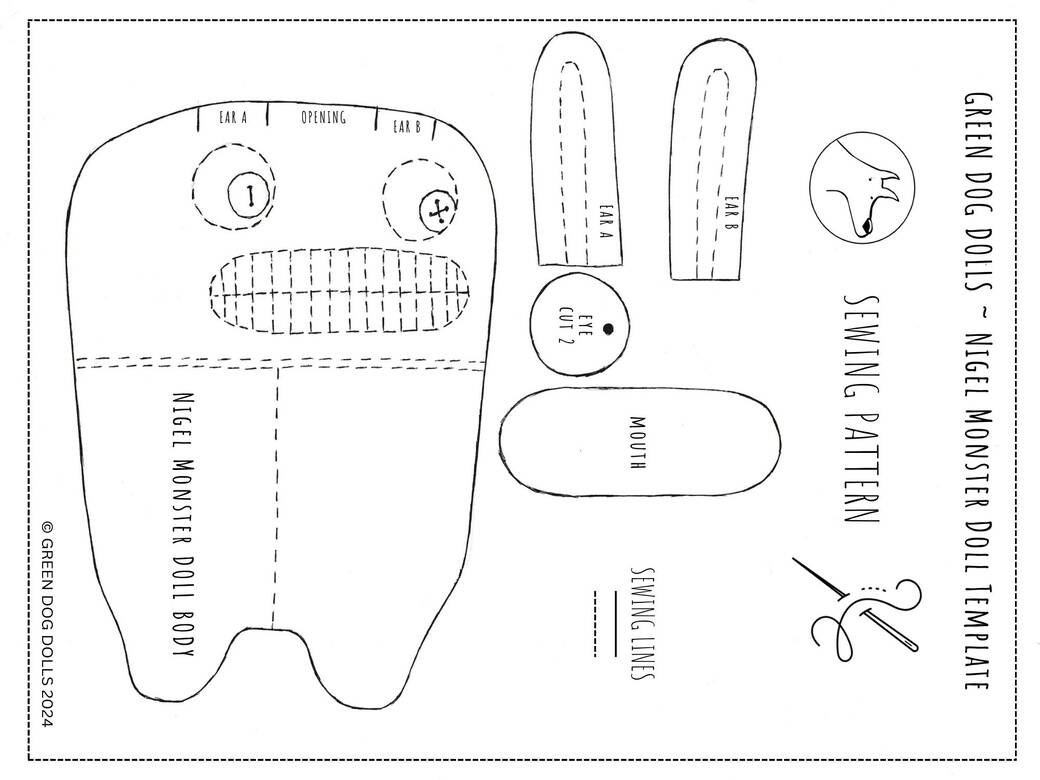
i) Print out the A4 Creepy Cute Monster Doll pattern. [o]
DOWNLOAD-CREEPY-CUTE-MONSTER-DOLL-TEMPLATE-HERE
ii) Cut-out all the pieces – (head/body, ears, mouth, eye) and choose fabric scraps for the mouth, eyes and ears. [p]
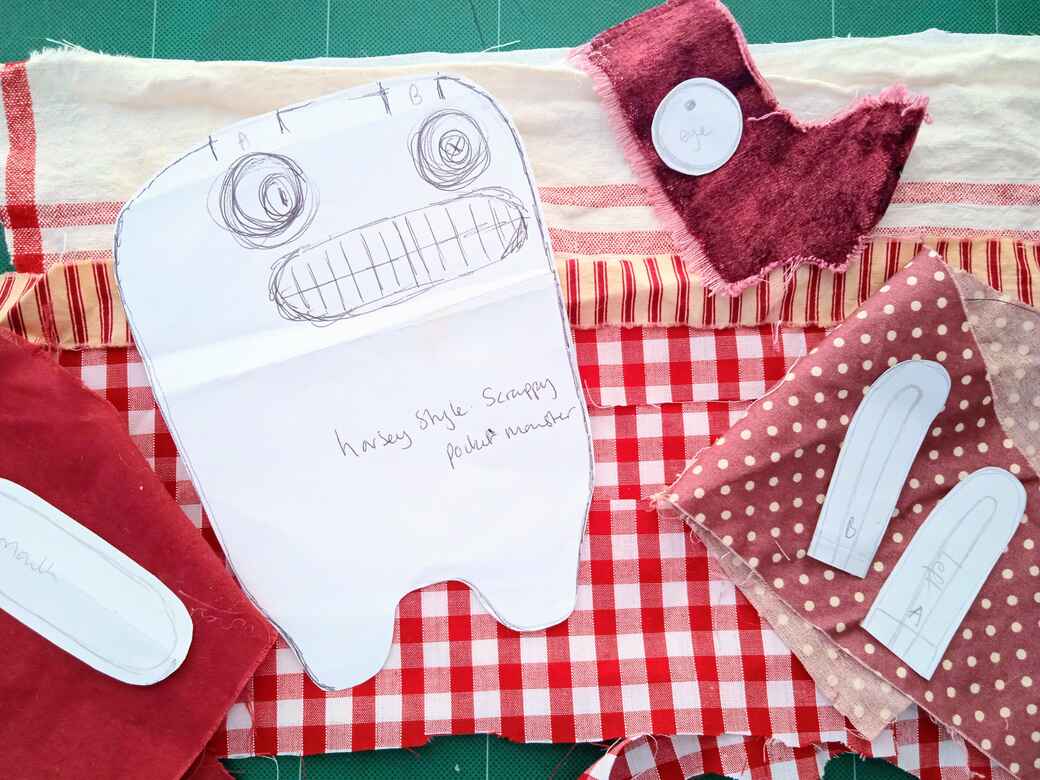
iii) Place the head/body template over the right side of the main fabric, taking special attention to the positioning of the mouth and eyes.
iv) Pin the template to the fabric. In a contrasting thread mark the position of each ear with a couple of stitches. (In between the ears, will be your opening for turning and stuffing.)
v) Stitch around the outside of the head/body template with a row of running stitch (These stitches mark the body outline on the wrong side of the fabric and becomes the stitching line.)
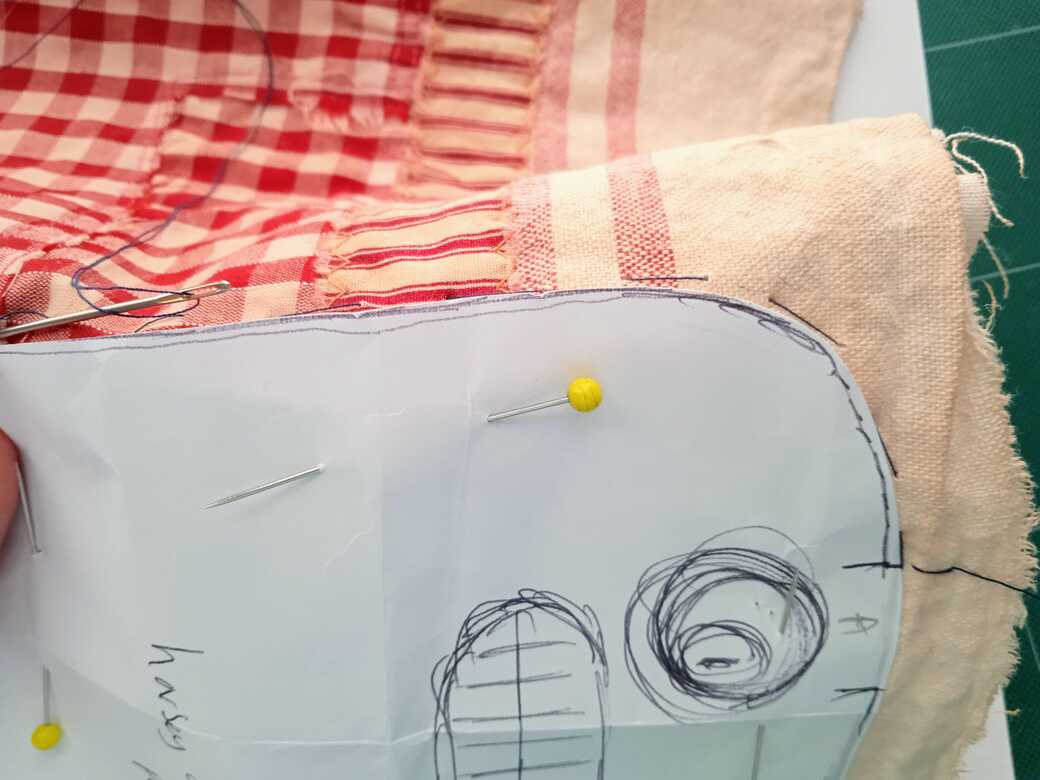
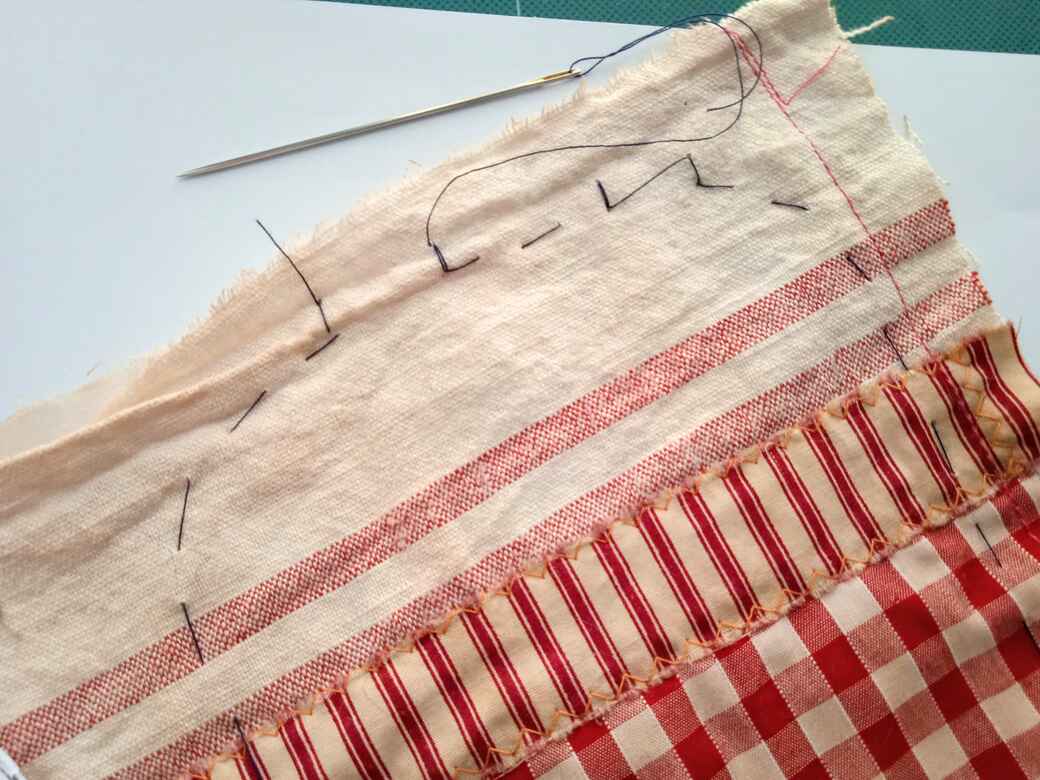
The Ears:
i) Fold the ear fabric in half, right sides together (RST) inside the fold.
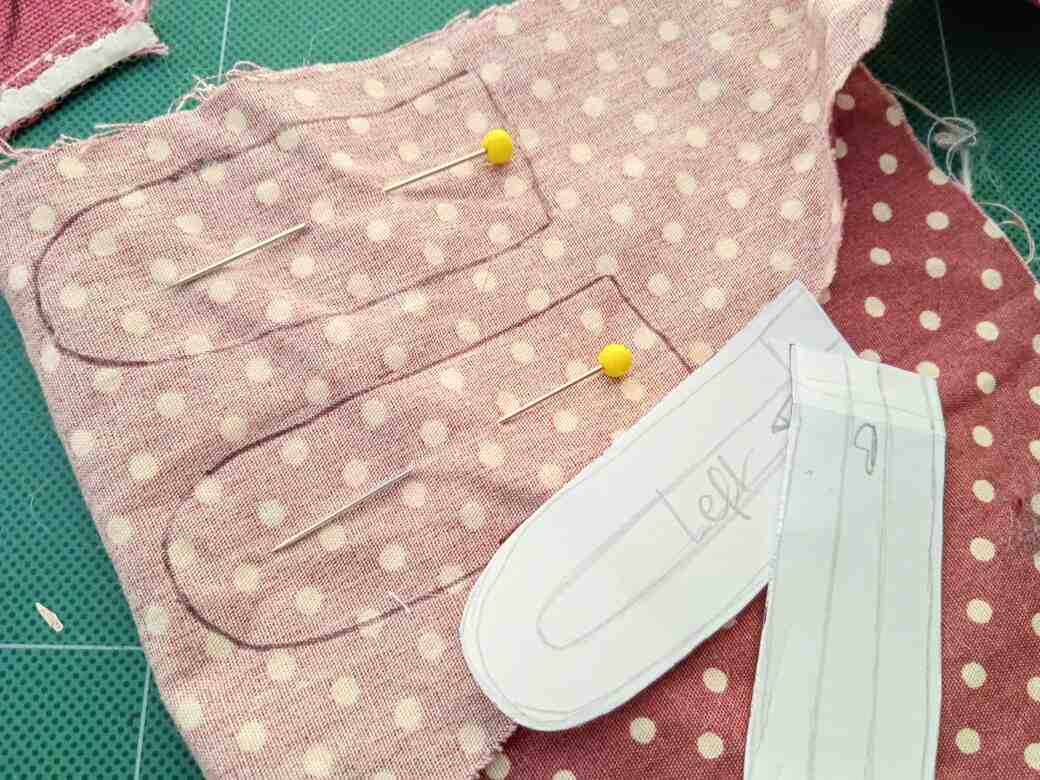
ii) Place the two ear templates onto the wrong side of the fabric and carefully draw around them.
iii) Secure the two layers of fabric together with a few pins. [s]
iv) Stitch around both ears following the drawn line, securing the thread with a few reverse stitches at the beginning and end of each ear, leave the opening unstitched for turning and stuffing.
v) Cut around each ear leaving a 5mm seam allowance. (cutting line 5 mm outside of sewing line) [t]
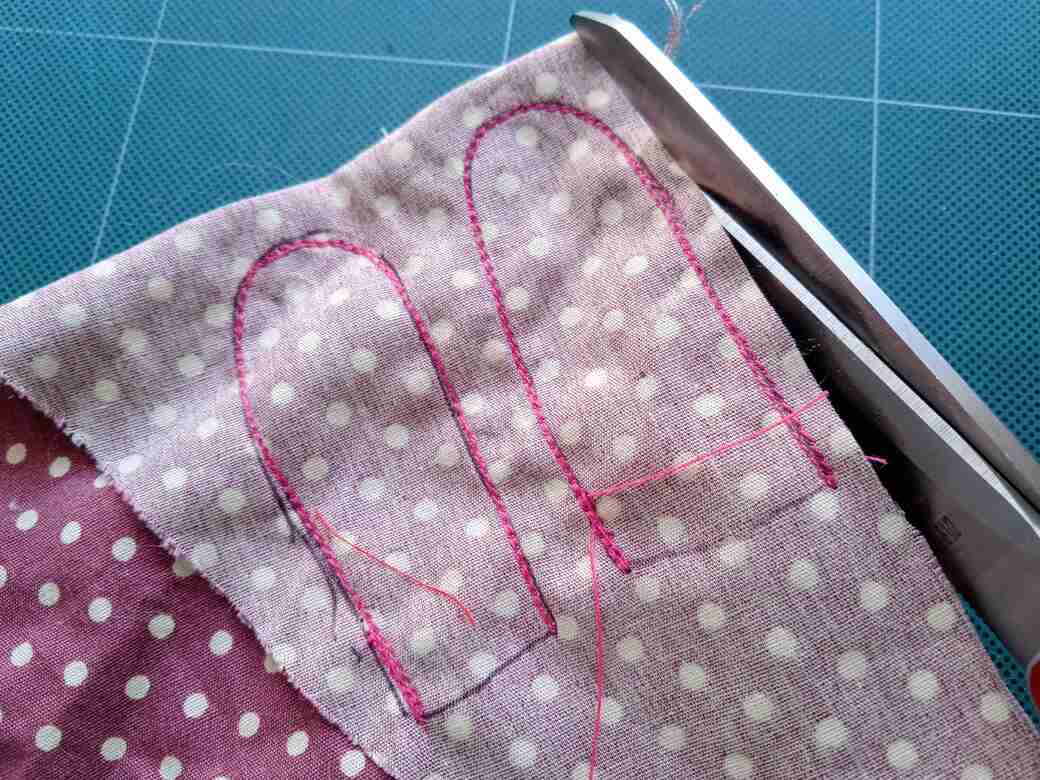
vi) Turn both ears right side out using forceps (or tweezers) and a chopstick. See doll making pro-tips: turning.
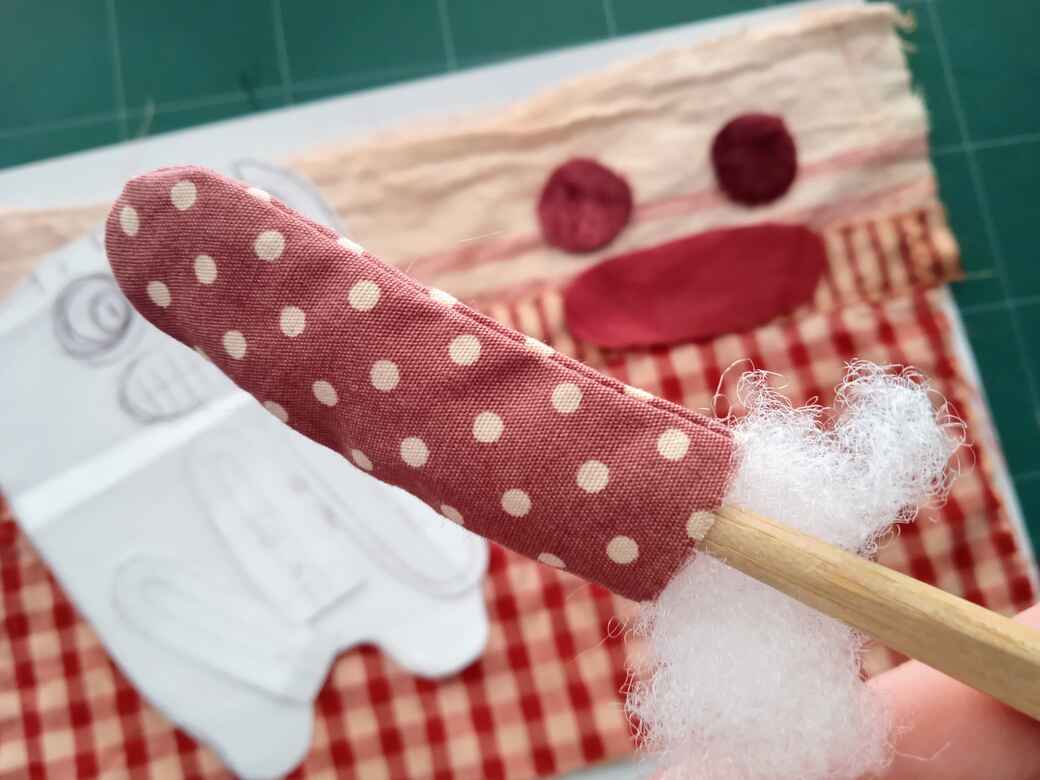
vii) Insert a small amount of polyester fibre filling (just a very thin layer) into each ear and press flat. [u] Secure with a couple of pins.
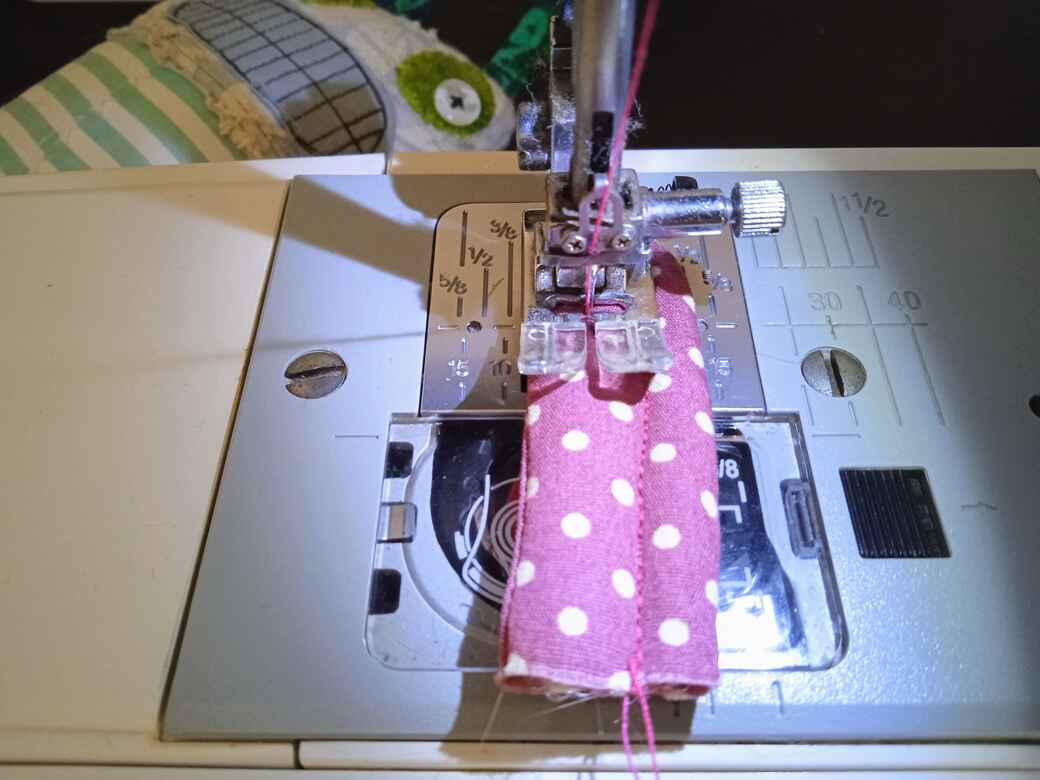
NOTE: Stitching two layers of fabric together with a layer of filling between them is called quilting and for this design we are using it as a decorative feature.
viii) Quilt the ears. Using the image as a guide, stitch around each ear about 5 mm inside of the sewn edge. [v] This creates a slightly 3D shape and adds structure so the ears stand up.
The Mouth:
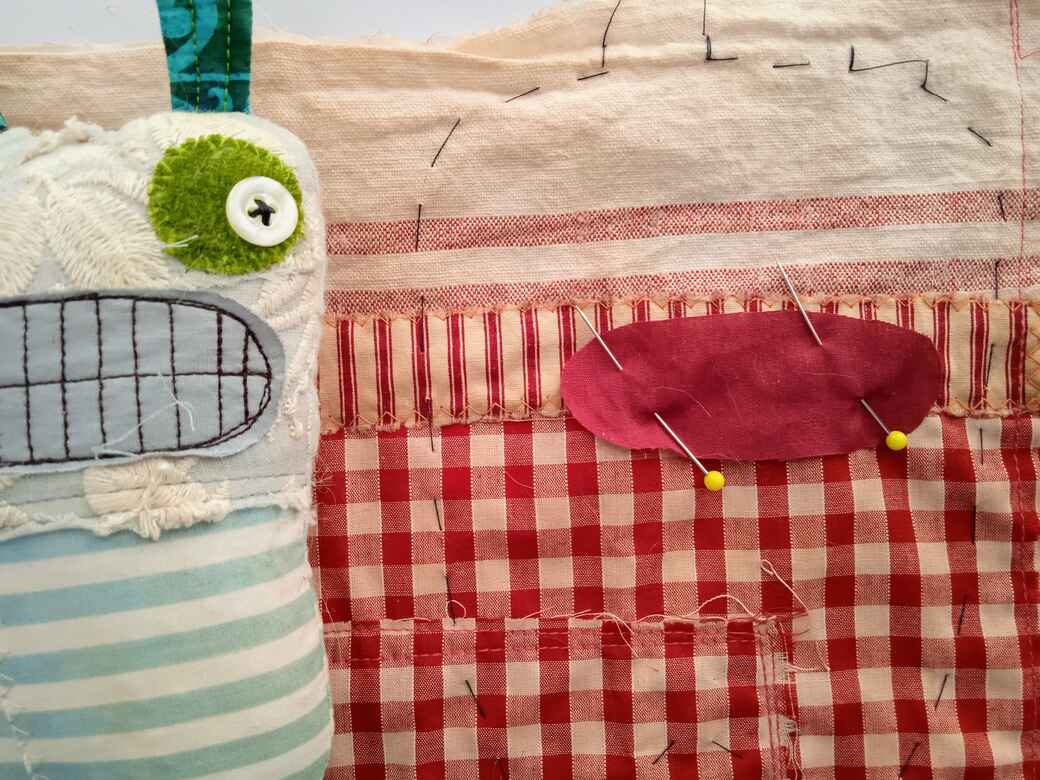
i) Place the mouth paper template on the wrong side of the fabric and carefully draw around the pattern and cut out. (1 piece of single layer fabric)
ii) Position the mouth on the main body/head fabric (the A4 fabric created in Step 3.) with the drawn line (wrong side) facing down and secure with a few pins. [w]
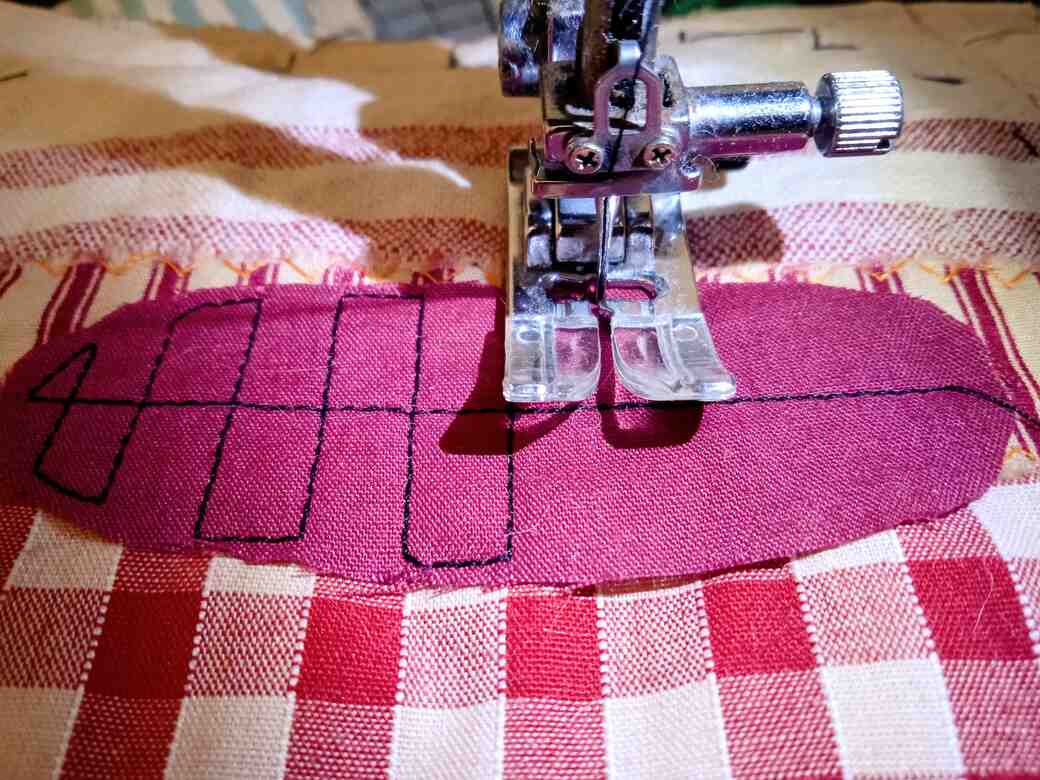
NOTE: Stitching one layer of fabric onto the surface of another (to apply it) is called applique. For this design we are using applique for the mouth and the eyes.
iii) Using a contrasting thread, (I chose black which gives a really good creepy cute look) topstitch the mouth in place using the image as a guide. [x] a) Start with a horizontal line down the centre of the mouth, to create the divide between the top and bottom rows of teeth. b) Sew a series of vertical lines to represent the teeth. c) Sew a couple of rows around the edge of the mouth to represent lips.
The Eyes:
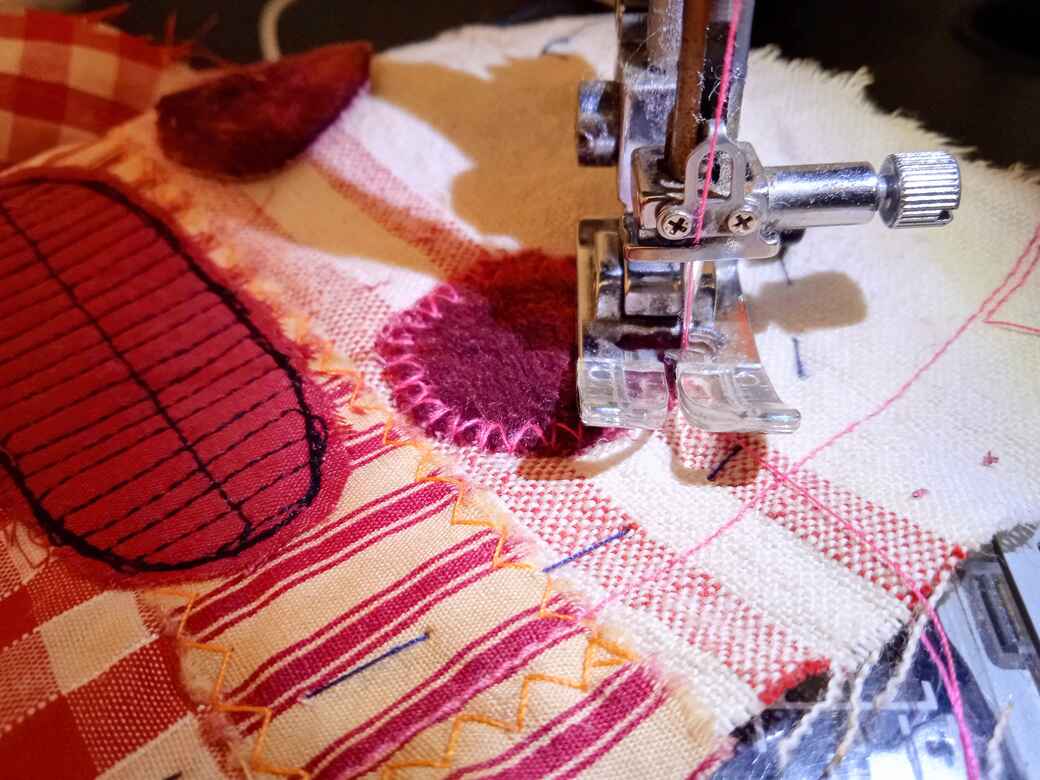
i) Place the eye template on the wrong side of the eye fabric and carefully draw around it and cut out. Repeat so you have two eyes. (2 pieces of single layer fabric)
ii) Position the eyes on the main body/head and secure with a couple of pins.
iii) Using either matching or contrasting thread (as you prefer) stitch the eyes in place. [y] (I used machine zig-zag stitch)
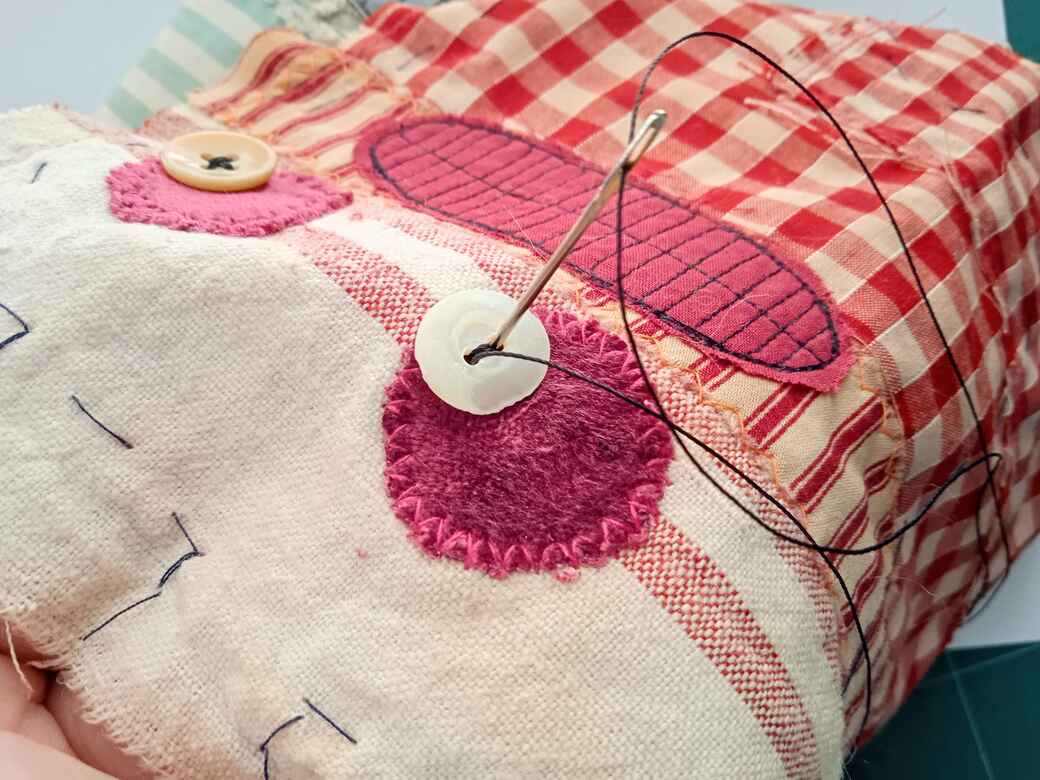
iv) Choose two buttons (non-matching works best for the creepy cute look) Play around with the placement for slightly different looks and then stitch in place. [z] (Here I have opted for an off-centre sideways glance.)
Step 7. Making up the doll.
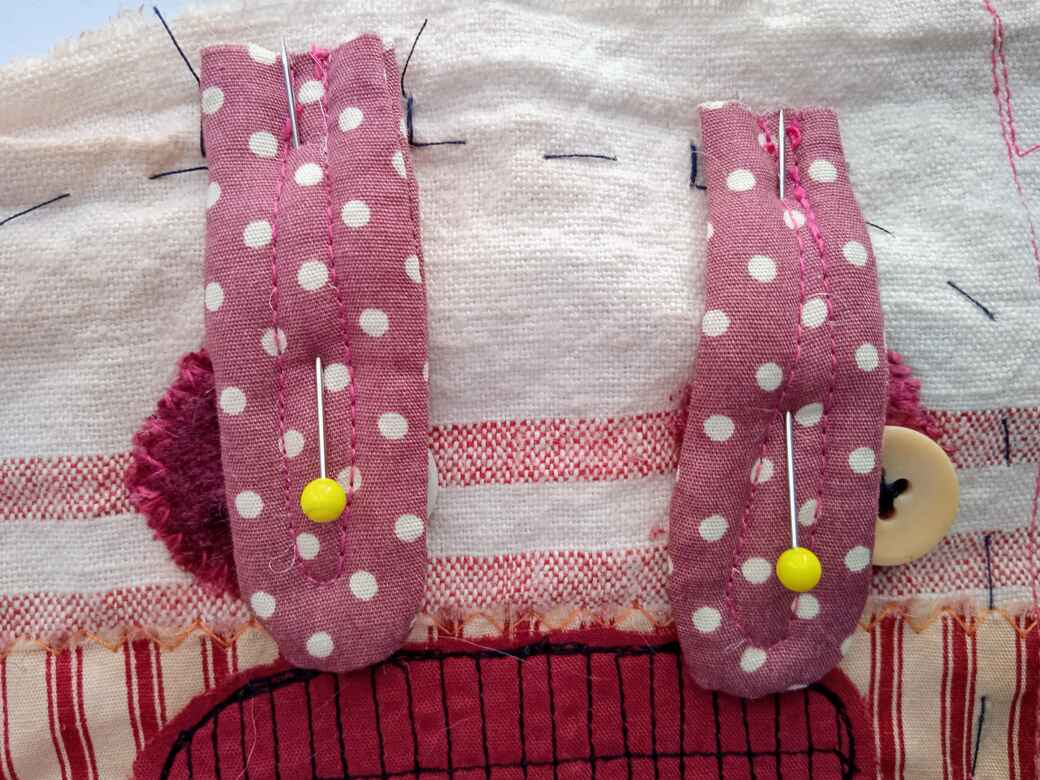
i) Place both ears in position between the stitch marks (RST) [A] and pin to secure. (The ears are placed over the eyes with the bottoms of the ears being stitched into the head-top seam.)
ii) Secure the ears in place with a couple of stitches, remove the pins.
iv) Fold the A4 fabric in half (A5), right sides together inside the fold, wrong side facing out [B] and secure with a few pins.
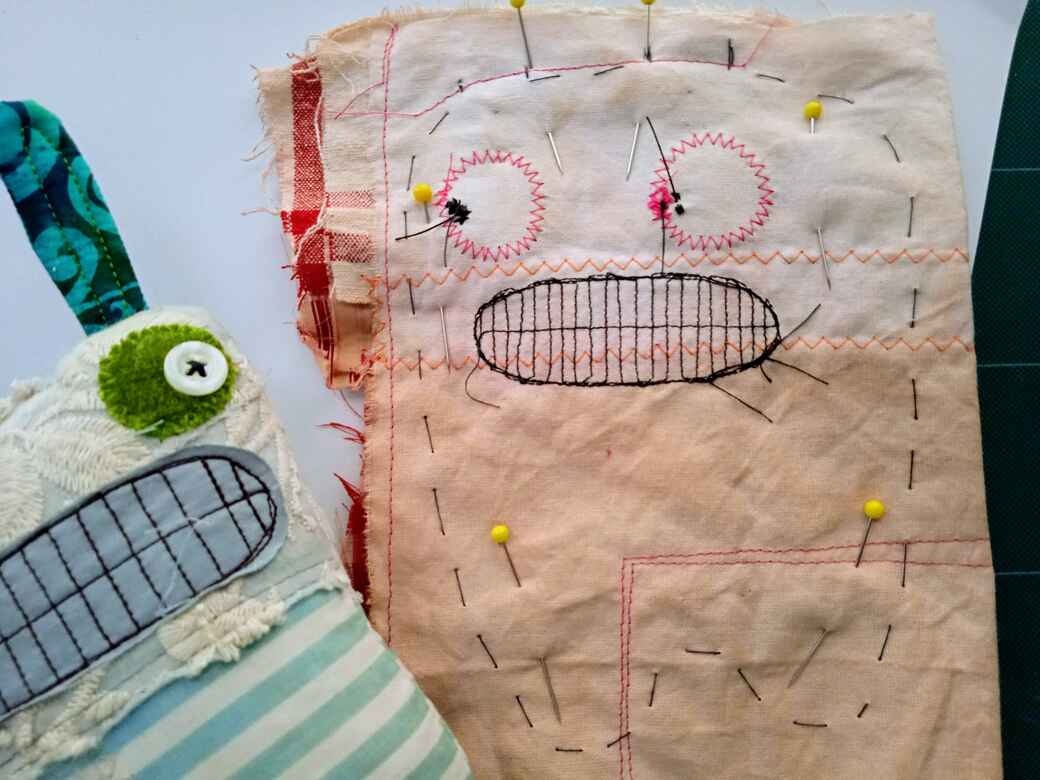
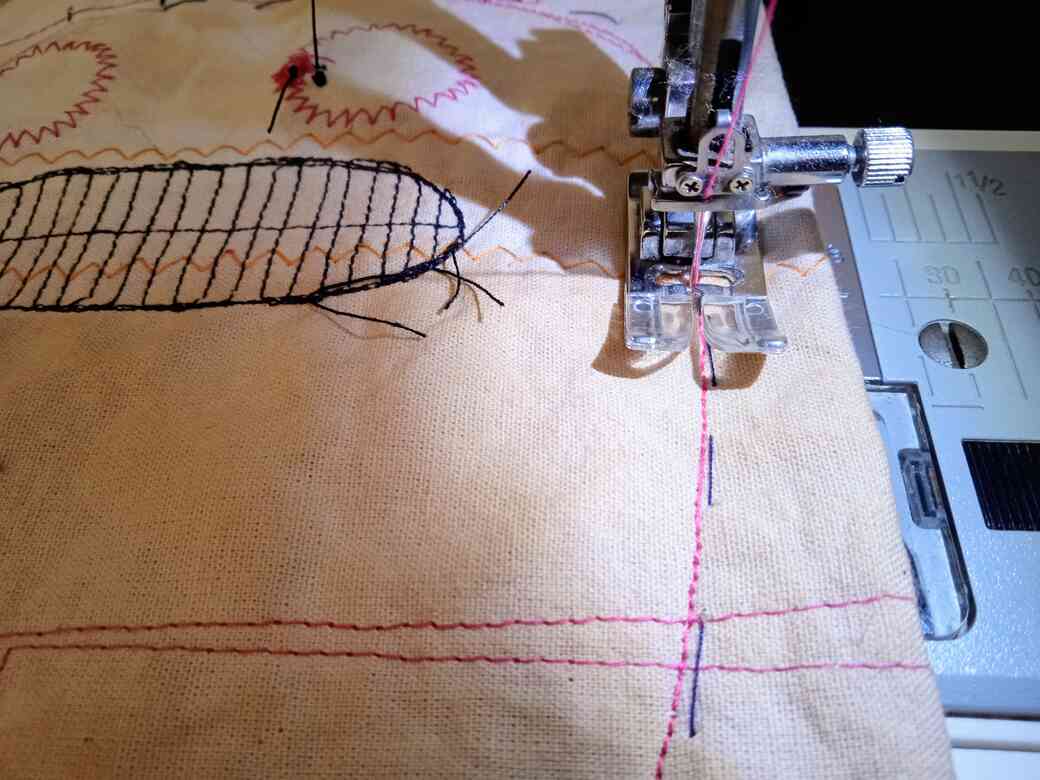
v) Stitch around the head/body using straight stitch. Start and finish sewing at the ear position stitches. (You made 4 position stitches, to mark the inside and outside edge of each ear.) Use the two inside marks to start and finish stitching. Leave the opening between the ears unstitched. (3 cm Approx.) Secure the stitching with a few reverse stitches at the beginning and end of sewing. REPEAT, stitch a second row of stitching over the first. [C]
NOTE: Two rows of stitching are more secure with the tiny 5 mm seam allowances used in doll making.
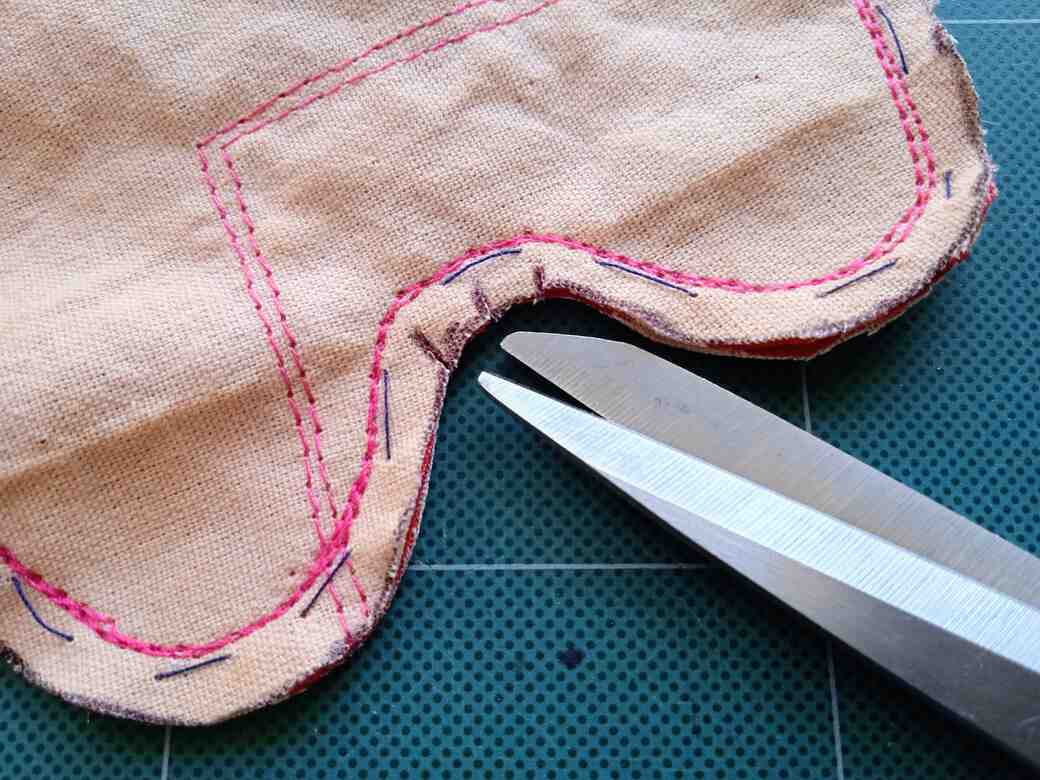
vi) Mark the cutting line. [D] (5 mm away from the outside of the sewing line all around the head and body.)
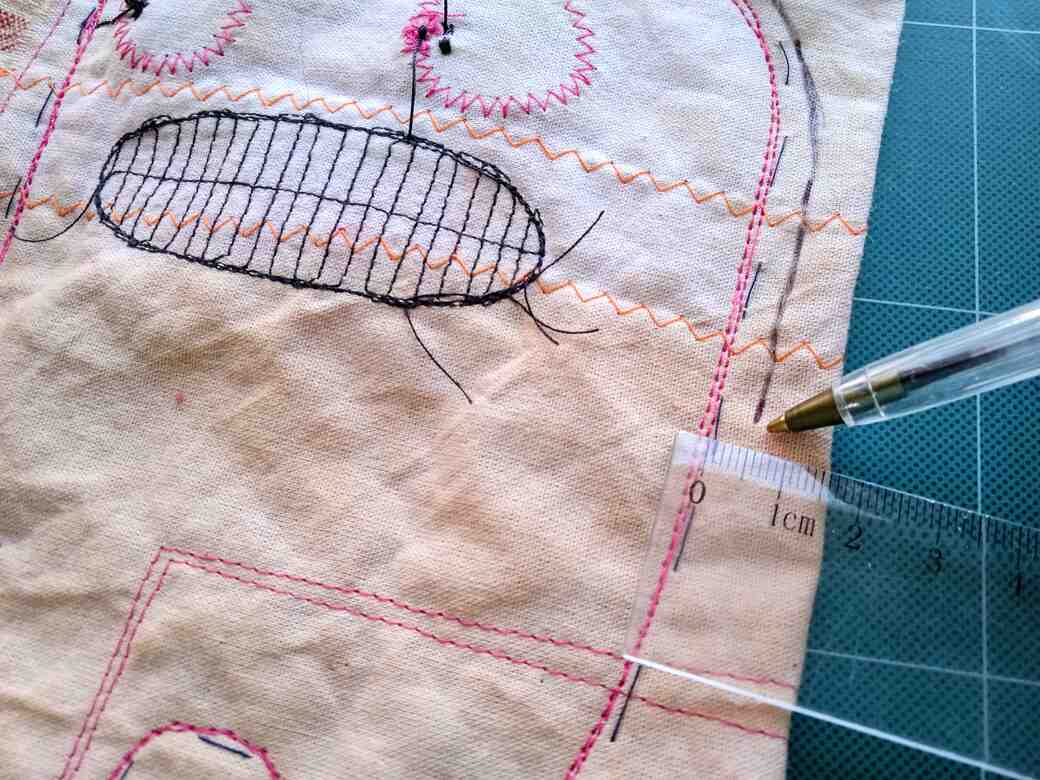
vii) Carefully cut along the cutting line to remove the excess fabric.
viii) Carefully clip the curved seam between the legs (Small snips in the edge of the fabric to help ease the curve and prevent pulling when turned right sides out.)

Step 8. Stuff your Doll.
i) Turn your doll right side out using forceps (or tweezers) and a chopstick to carefully tease out the shape without damaging the stitches.
ii) Smooth out the seams by rolling the edges between your thumb and forefinger.
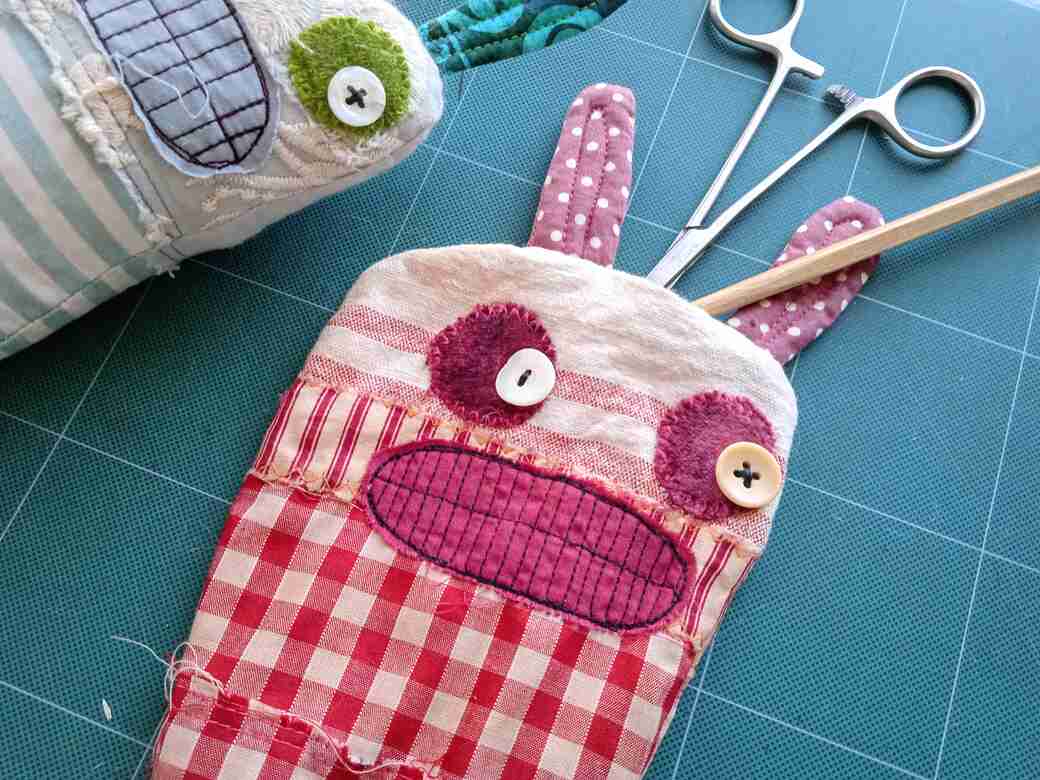
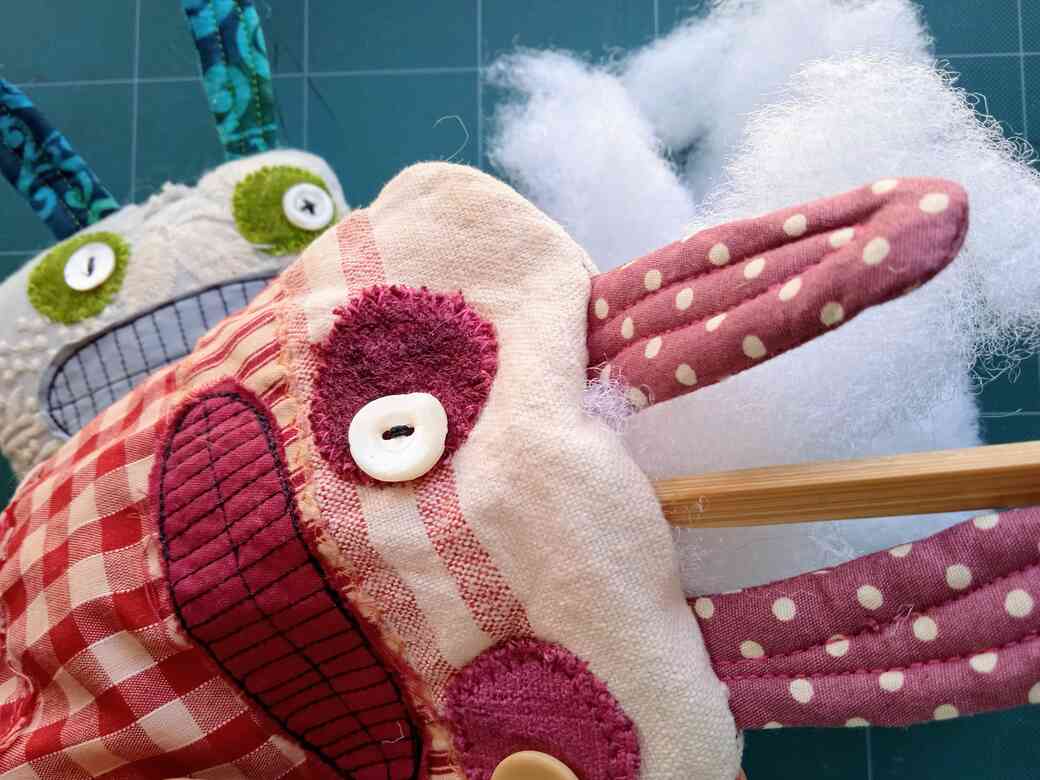
iii) Stuff the legs of the doll firmly with polyester fibre toy filling (or an old fibre filled pillow – washed and dried) using a chopstick to push the fibre filling into place.
iv) Gradually build up the form using just a small amount of filling at a time.
NOTE: Adding small amounts of polyester filling at a time helps to prevent bumps and voids giving a smoother, more defined shape.
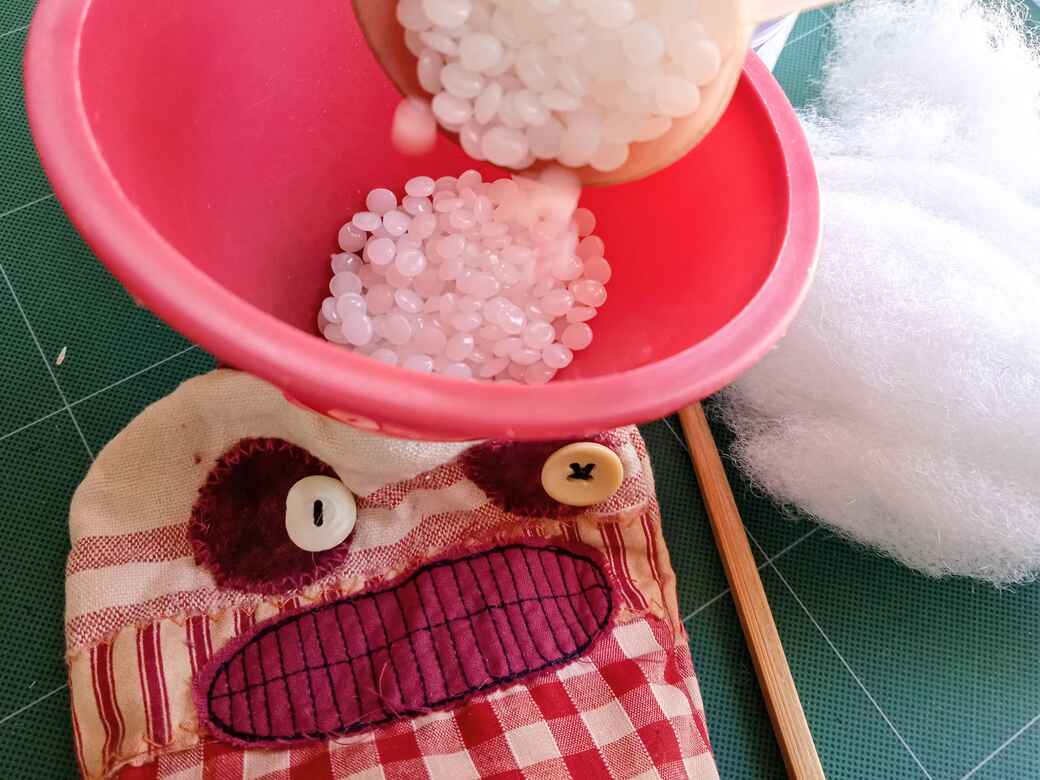
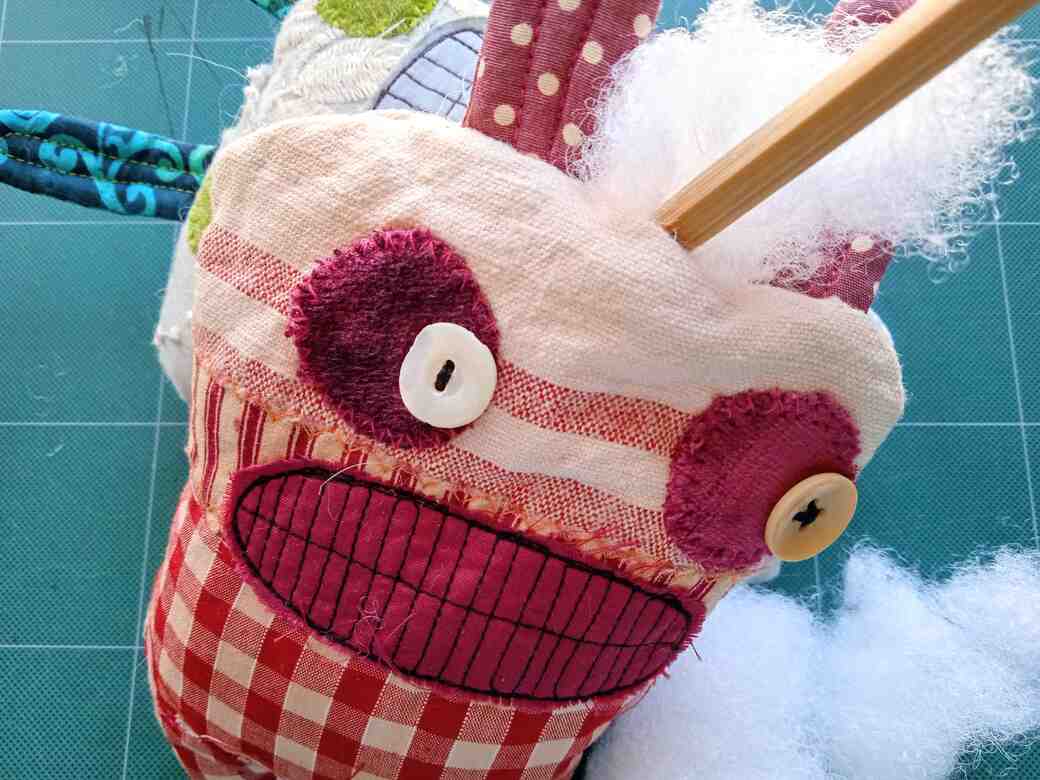
v) OPTIONAL: If you like you can add some weight to the body of your creepy cute monster doll using plastic toy filling pellets. For my monster head/body I have used a double layer of fabric. (A plain base fabric with strips of patterned fabric stitched onto it before tea-dyeing.) If your head/body fabric is single layer (strips of fabric stitched together without a base fabric) it’s a good idea to make a simple stitched bag, using scrap fabric, to contain the pellets. I find using a funnel to add the pellets makes life a lot easier and helps to prevent spills.
vi) Firmly stuff the head of your doll gradually building up the form using the ‘just a small amount of filling at a time’ method as before.
Step 9. Stitch the opening, in the top of the head, closed.
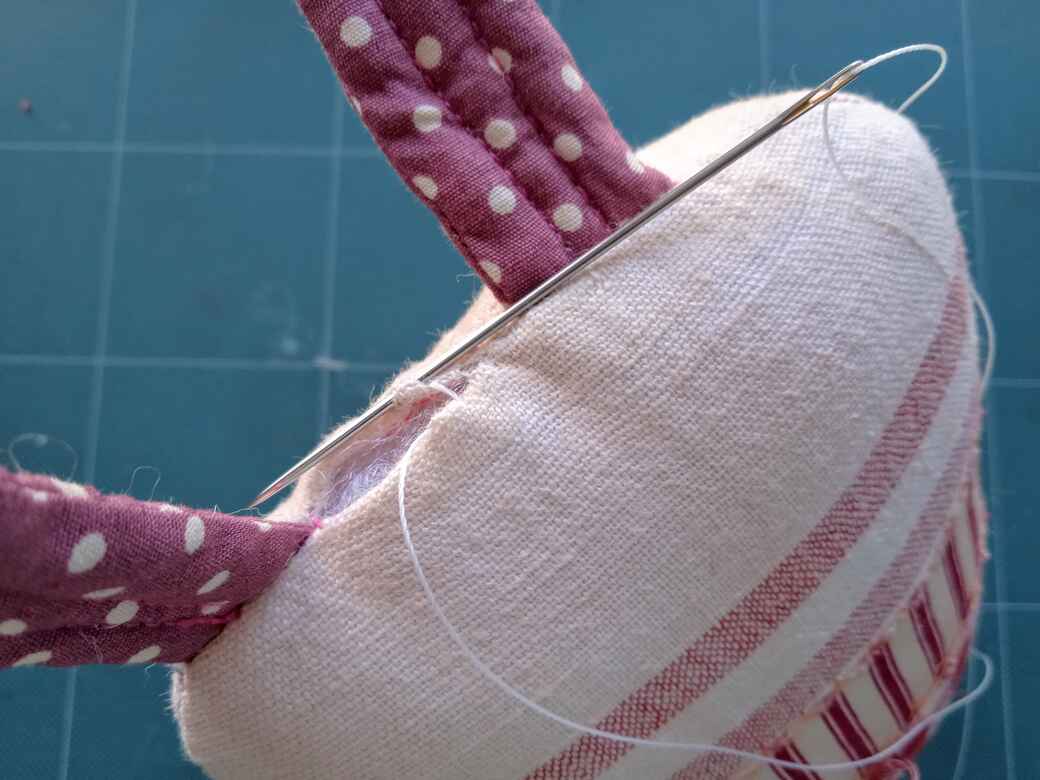
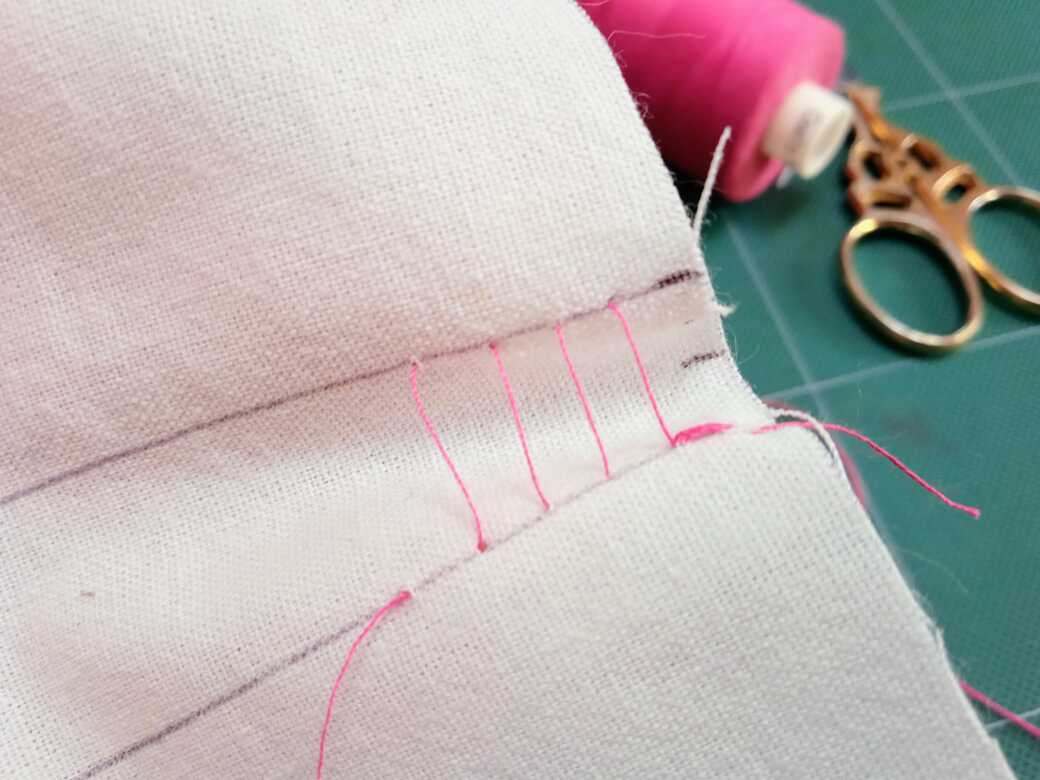
i) Stitch the opening in the top of the head closed using ladder stitch and a matching coloured thread. [G]
ii) If you are unfamiliar with ladder stitch you can practise it first in Sewing Guide No 3. Sewing techniques [H] Ladder stitch gives a professional finish to your doll because the stitches almost disappear.
Alternatively if you are adding hair you can use whip stitch
NOTE: Adding hair covers up the stitches at the top of the head.
iii) Secure the end of your thread with a few anchor stitches and lose the thread in the doll. Cut the thread close to the doll body taking care not to cut the fabric.
Step 10. OPTIONAL: Make and add crazy faux fur hair.
i) Use a scrap of faux fur to make a crazy monster hairstyle for your creepy cute doll. (I always have lots of scraps left over from making Yeti Bob dolls). [I]
NOTE: Working with faux fur is a specialist skill in its own right and deserving of a separate tutorial of its own.
I will get onto it soon!
But in the meantime I have written some notes to help you if you have not worked with faux fur before.
ADDITIONAL NOTE: If you don’t have any scraps of faux fur fabric, I have seen scrap bags available to buy on eBay and sometimes you can purchase small swatches from suppliers. An alternative is clothing or homeware with faux fur trim that could be recycled, wash, dry and brush before use.
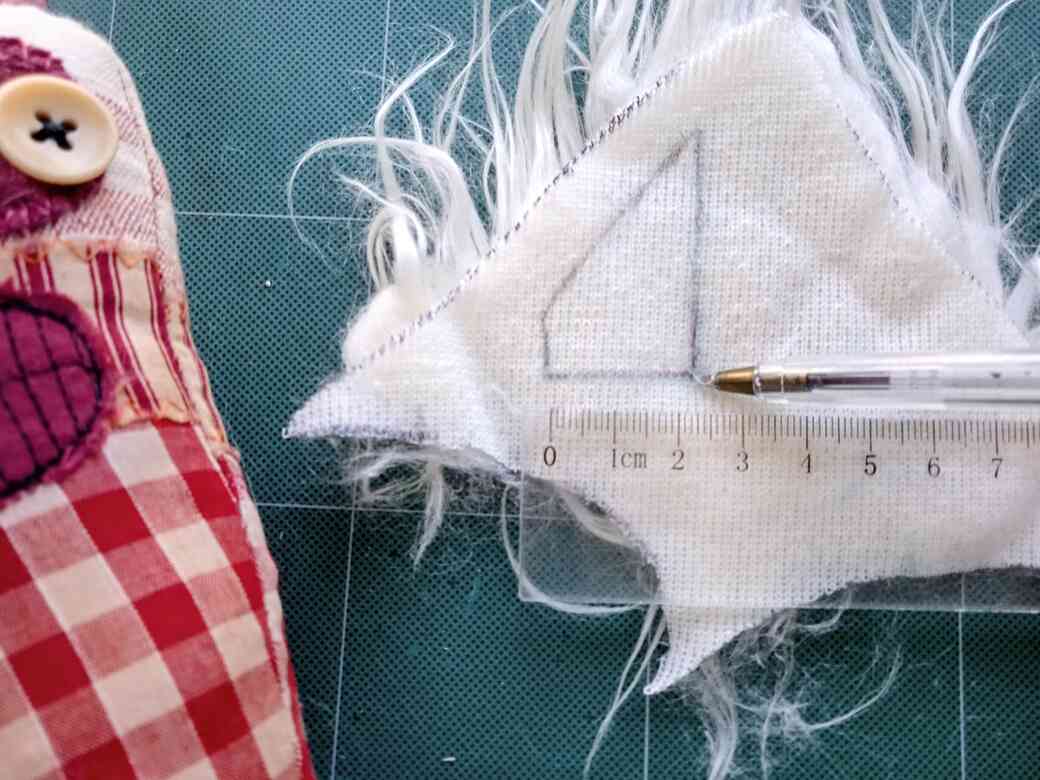
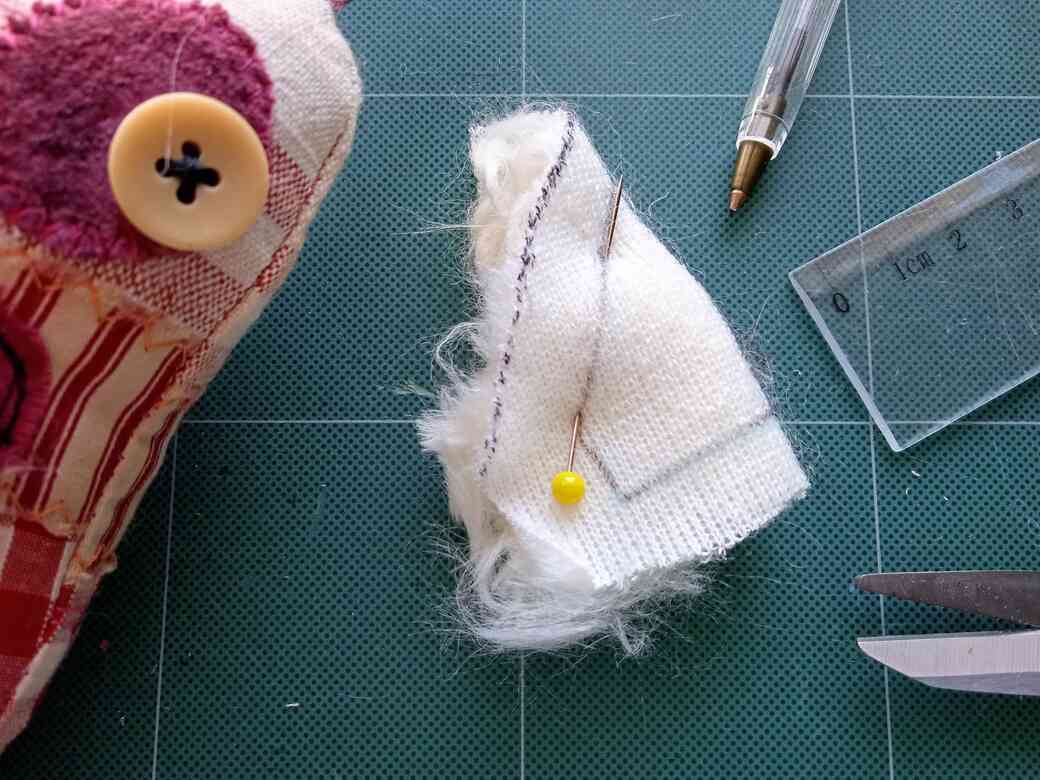
ii) Measure the gap between your dolls ears and draw a simple shape on the wrong side of the fabric to represent a hairstyle to fit the measurement. (I have opted for a triangular shape to represent a quiff.) [I]
iii) Fold the faux fur in half, right sides together (RST) and pin to secure. Trim away the excess fabric. [J]
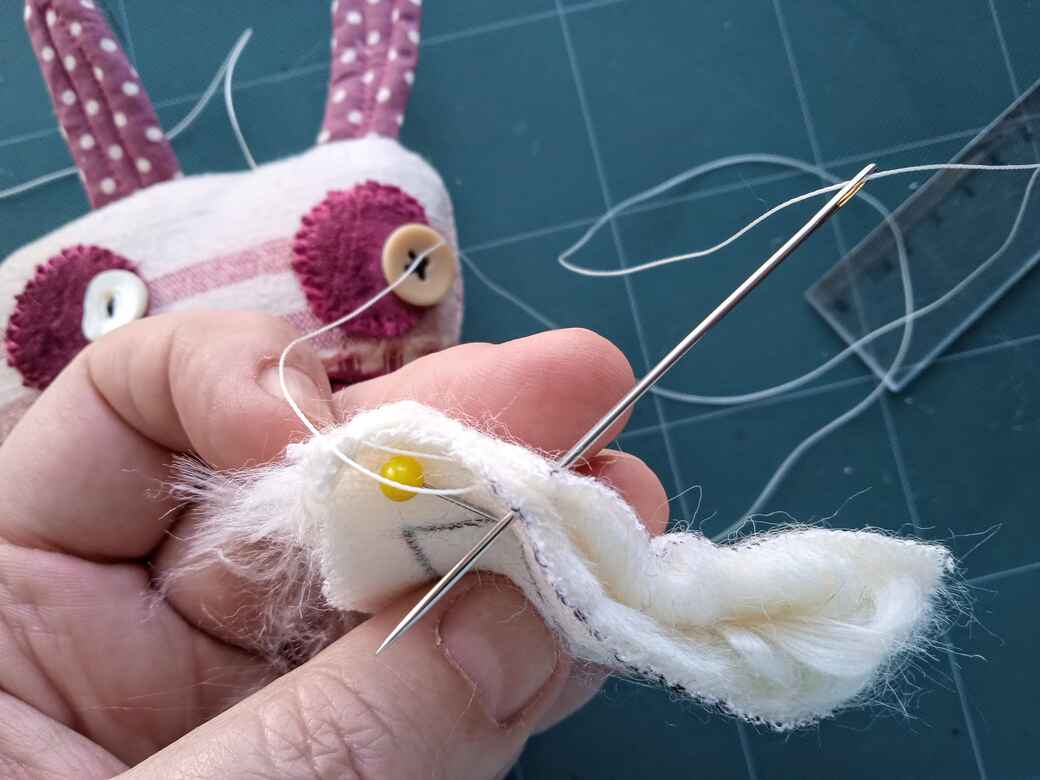
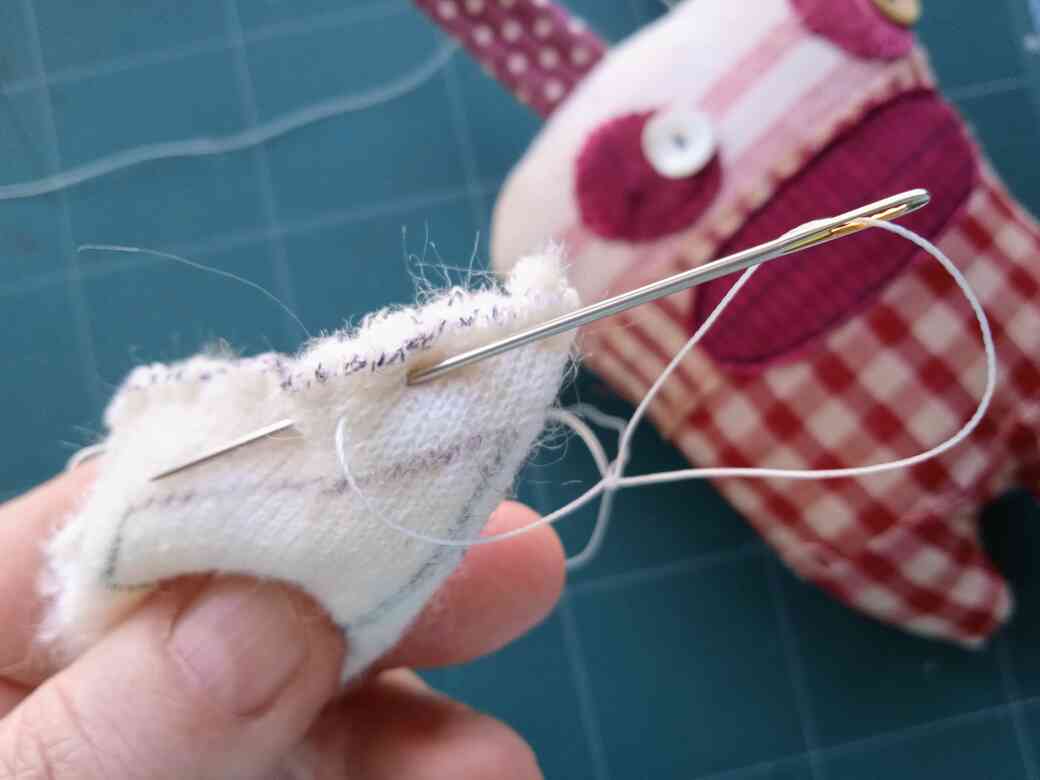
iv) Whip stitch the edges of the shape together leaving the bottom edge open for turning. Remember to anchor the thread with a few small stitches at the beginning and end of stitching. Push the fur pile (strands of hair) into the shape as you stitch so that you have a clean edge and all the strands of hair are enclosed inside the stitched edge. [K]
v) Back stitch the seam 5 mm in from the stitched edge, anchor the thread at the beginning and end of the row of stitching. Leave the opening unstitched for turning. [L]
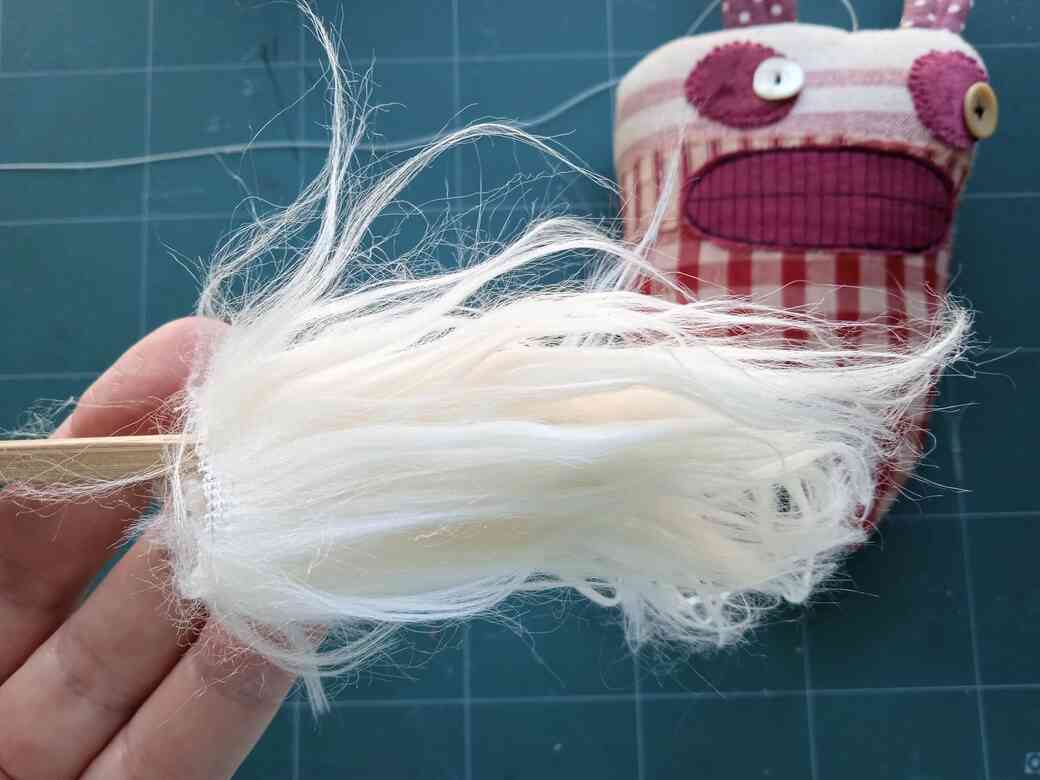
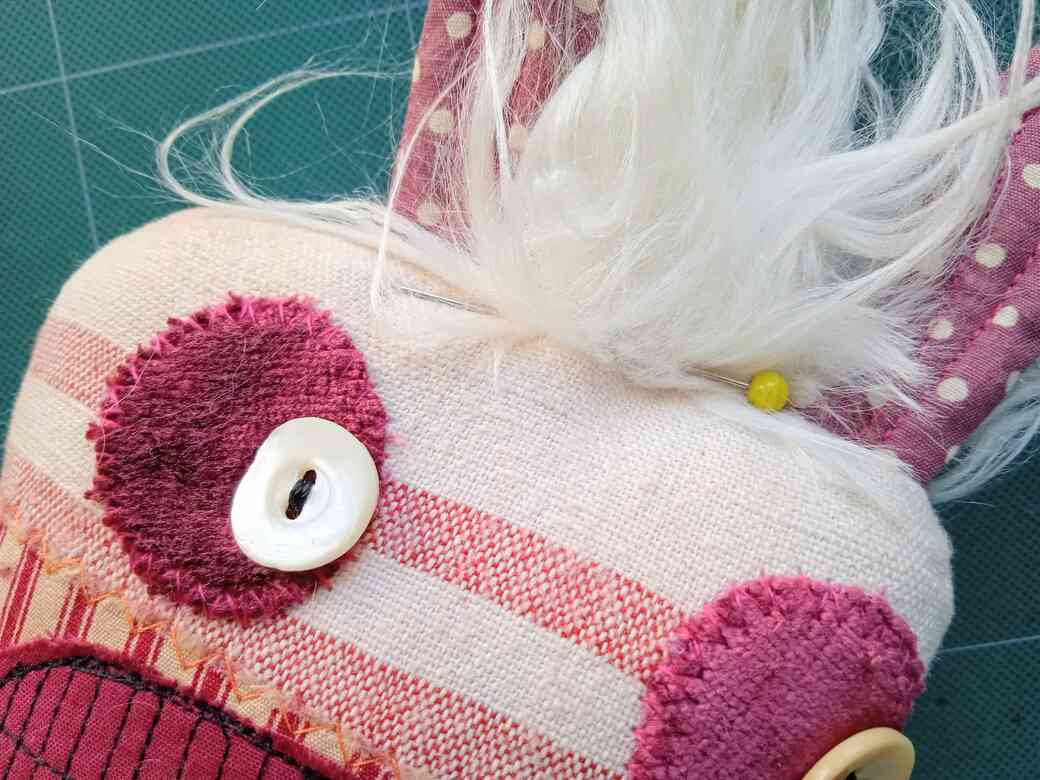
vi) Turn your crazy hair shape, right side out with a chopstick, push the seams gently with the chopstick to define the shape but take care not to make a hole in the fabric or damage the stitches. Gently brush the faux fur to tease out any hairs caught in the seam. [M]
vii) Around the unstitched edge, fold a 10 mm turning to the inside of the shape and position the hair in place on the doll’s head. (I like between the ears but you can experiment with different placements to change the character of your doll.) Pin in place, use one pin at the front and one at the back. Make sure the pins go through the faux fur and the head fabric so the hair is firmly secured for stitching. [N]
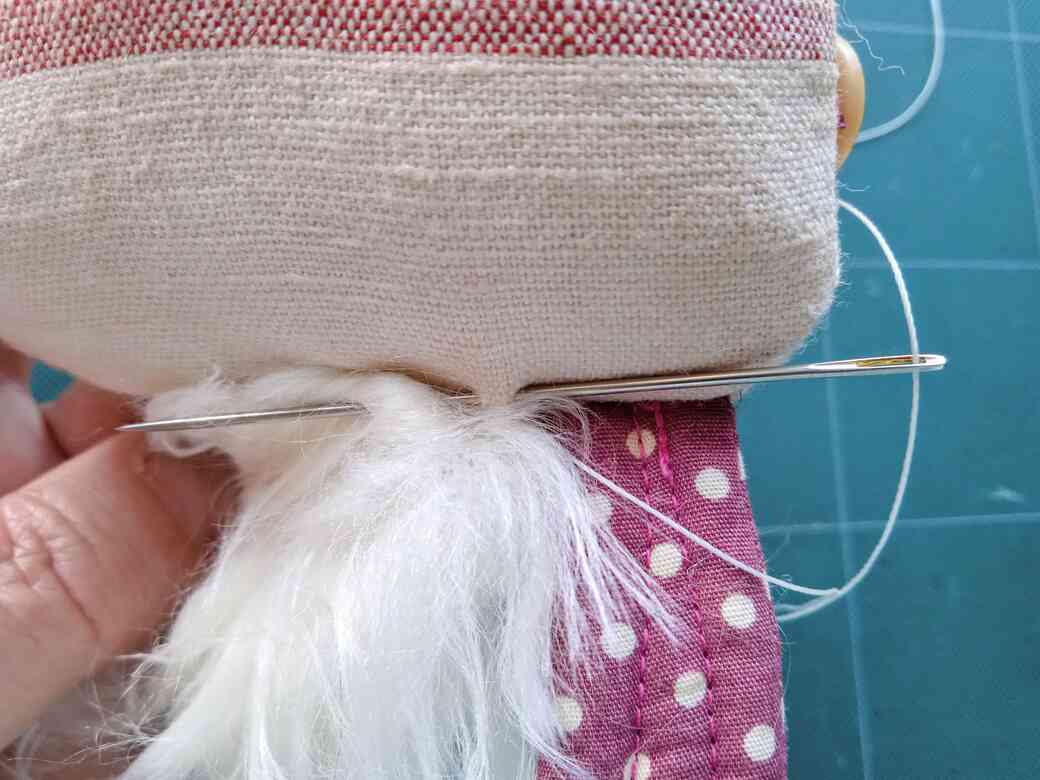
viii) Stitch the hair in place using strong thread in a matching colour and whip stitch. Secure the thread with a few small stitches where it won’t be visible (e.g. just under the folded edge of the faux fur) and work around the folded edge base of the hair piece. Take the threaded needle through a few mm’s of the head fabric and both layers of the folded faux fur edge with each stitch and pull tight. (Hence the need for a strong thread.) [O]
ix) Continue to work around the base of the hair piece until it is firmly stitched in place and sew a few small stitches to secure the thread. Lose the thread in the doll and cut the thread close to the doll’s body, taking care not to cut the fabric. Remove the pins
MEET RED-REG!!! Nigel's Creepy Cute brother [P]
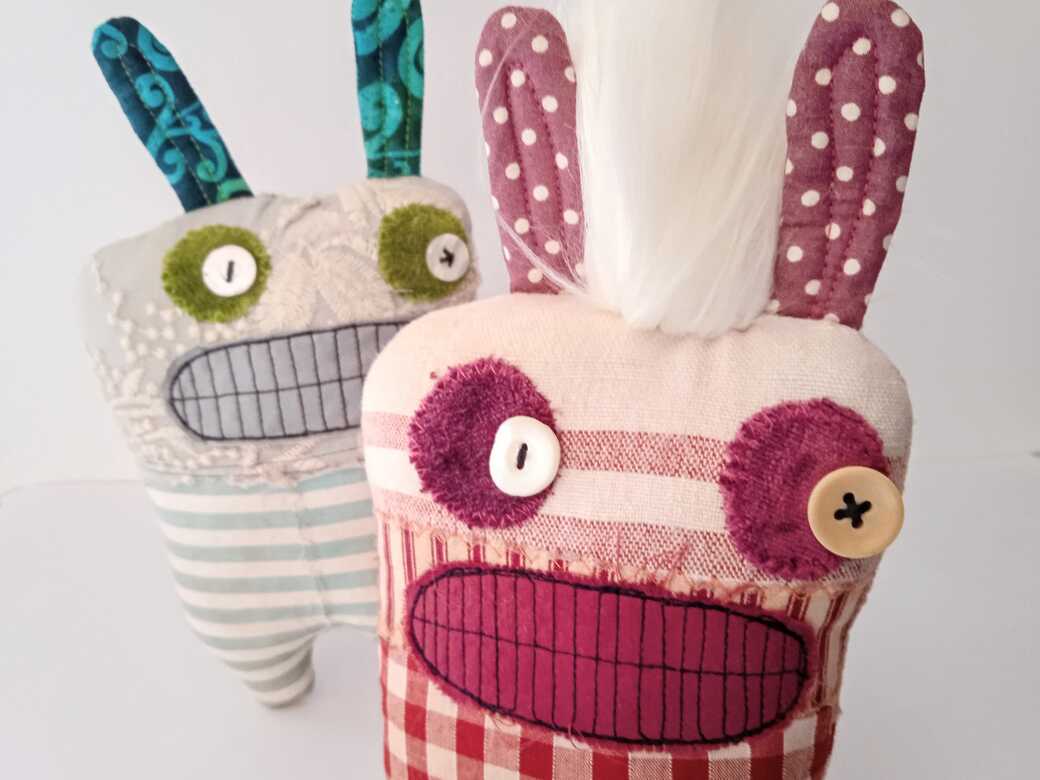
SAFETY NOTE: Not suitable for children under 3 years of age.
This design includes small parts. Small parts can present a choking hazard for young children.
Please take extra care if giving ‘Creepy Cute Monster Dolls’ to a child.
Make sure they are age appropriate. See website Terms and Conditions for full details.
© GREEN DOG DOLLS 2024
‘Creepy Cute Monster Dolls’ design, pattern, text and images remain the property of Green Dog Dolls and may be withdrawn at any time without notice.
Did you enjoy this FREE Tutorial and Pattern?
Would you like to see more?
YES!
Then please consider making a small donation using one of the buttons below.
There is no obligation whatsoever but your support is very much appreciated and helps to keep this site free from those pesky adverts.
Thank you x

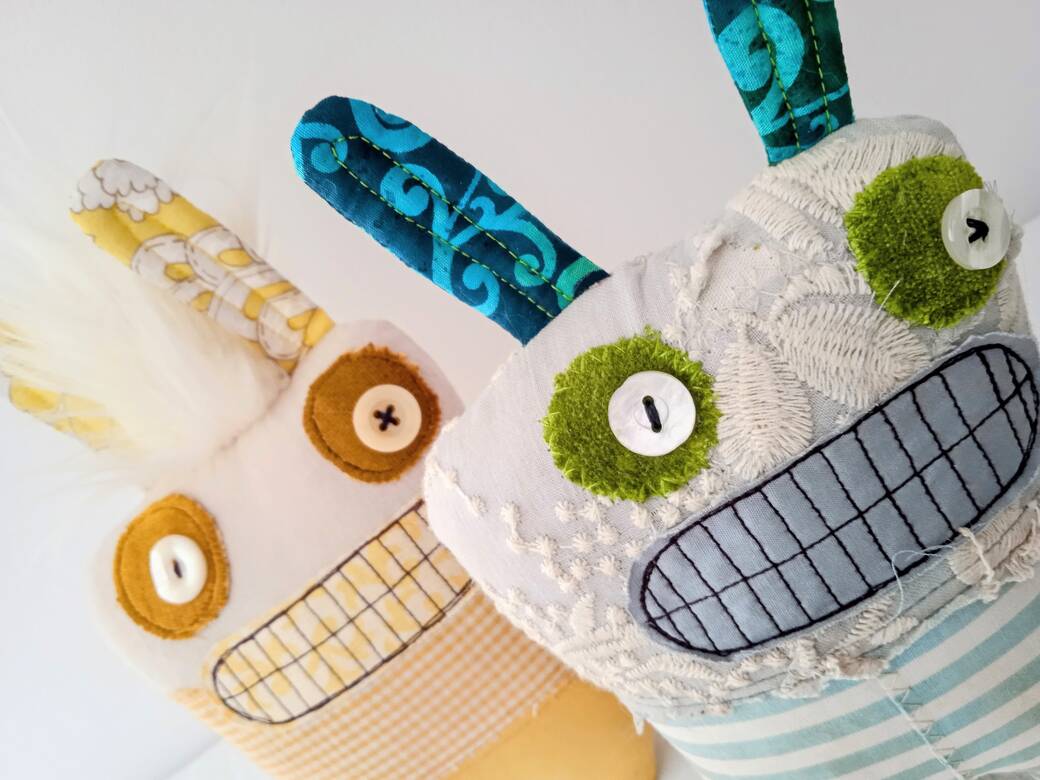
I love your scrappy dolls. Most scrappy dolls I loathe but yours are adorable. I could actually feel comfortable about having these in my house and I have the perfect fabric to make them. I am thinking about using them to make a quilt for my latest grandson born November 22nd. I needed an idea for a boy quilt and this just might be it. I’ll make a few samples first and then decide. Thank you so much for the tutorial and pattern. They are the cutest ever.