Cuddly Knitted Slugs? ~ Free Knitting Pattern
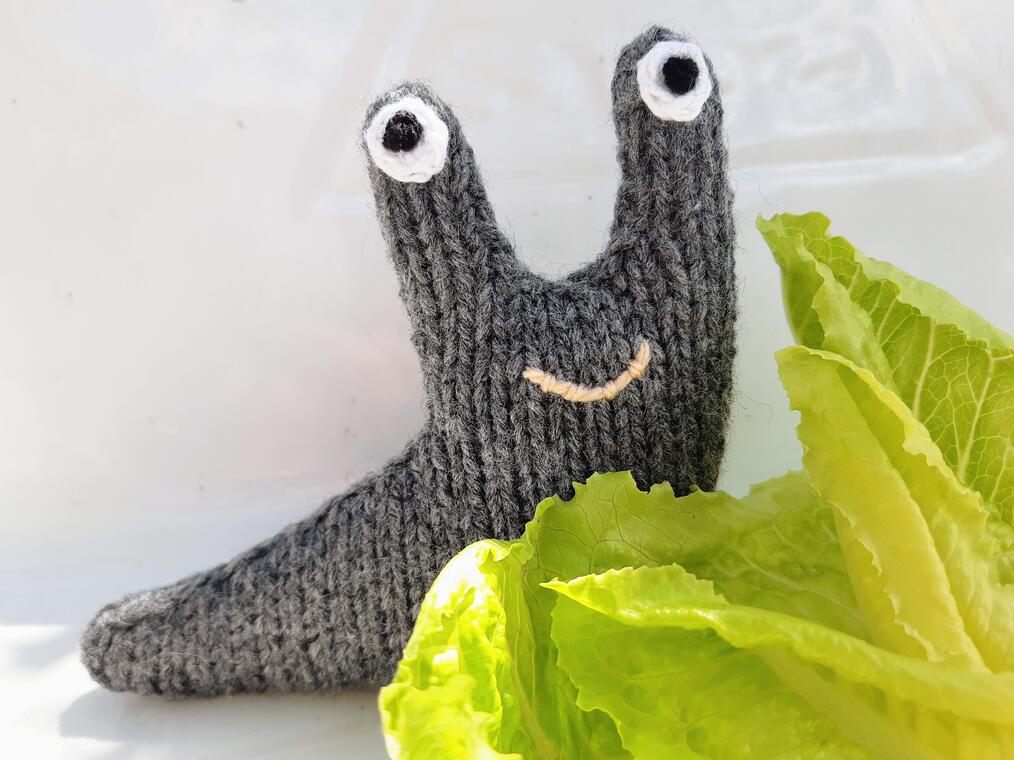
Ian the Slug is such a cute little guy and fits right in your pocket so you can take him wherever you go.
Ian lives under the flower pot at the end of Cabbage Patch Lane and likes to spend his evenings exploring the gardens nearby.
He says the locals are very accommodating in providing an endless supply of tasty, leafy green snacks so he often invites his girlfriend Beryl to dine with him.
Website Exclusive
Beryl variation is a greendogdolls.com exclusive and only available here on the blog.
This pattern uses less than 25g of double knitting yarn.
Why not make a whole bunch of Ians and Beryls, in different colours?
It’s a great stash busting, quick knit for all those leftover oddments of yarn.
~
Ian the Slug knitting pattern is also available as a PDF download on Ravelry and Patreon*.
*Patreon
Subscription based access to exclusive, content and patterns.
Just £5 per month.
INTRODUCTORY OFFER – FREE*
A way of showing your support and appreciation for my work.
New and exclusive content added monthly.
Patreon’s exclusive version of ‘Ian the Slug Knitting Pattern’, includes step-by-step, detailed photographs.
~
*Green Dog Dolls is new to Patreon so for a limited time, membership and access are FREE.
This gives me an opportunity to add exclusive content, build a community and test out the platform before introducing a membership fee.
Why not head over to Patreon now and be among the first to join my community and beta test the service.
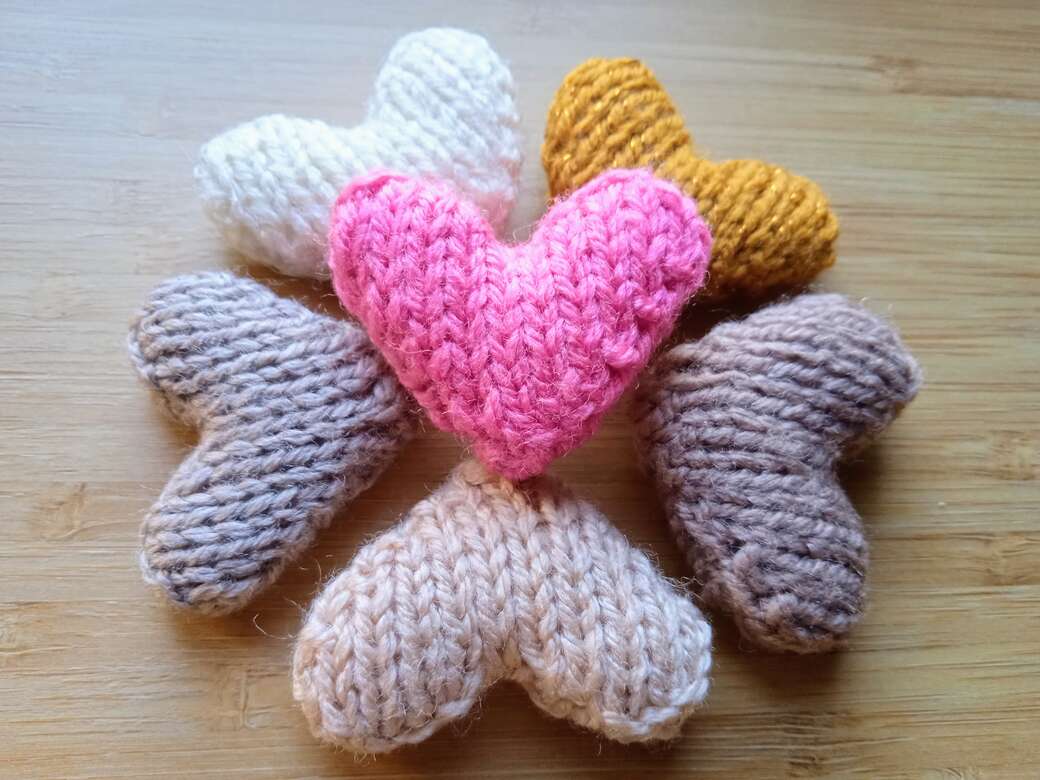
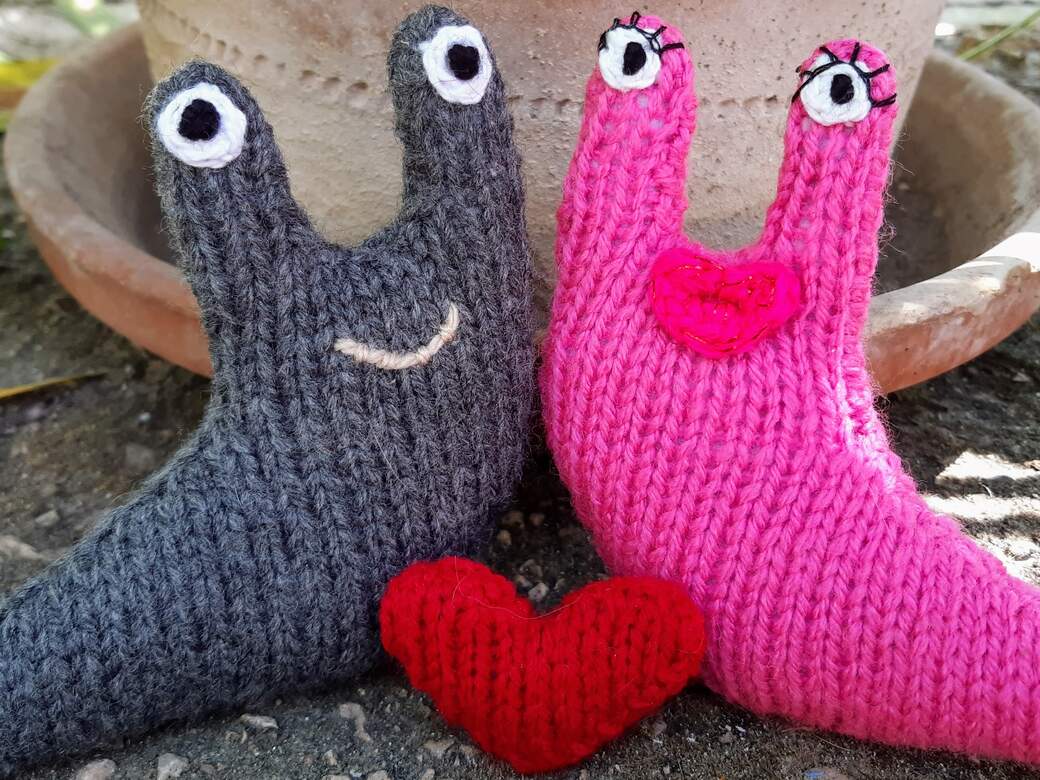
The cute couple are pictured with a sweet knitted heart.
You can make your own heart with the free knitting pattern.
~
Heart knitting pattern is also available as a PDF download on Ravelry and Patreon*.
Ian the Slug ~ Free Knitting Pattern
© GREEN DOG DOLLS 2024
UK English version
Level – Easy
Size: Approximately 10cm x 12cm
You will need:
Needles: 3.25mm knitting needles, 2.75mm crochet hook, knitters sewing needle (Tapestry needle)
Yarn: Double Knit, small amount less than 25g. I used James C Brett Top value DK in grey.
For Eyes: Small amount of white crochet cotton and black embroidery thread or small amount of white felt and black yarn.
Gauge: Not important for this pattern.
Small amount of polyester stuffing and a few pins.
Abbreviations: Increase (Increase 1 stitch by knitting into front and back of stitch), sts (Stitches)
Front: Make one
Using 3.25mm knitting needles and Double Knitting yarn cast on 20 stitches
Row 1. Right Side. Increase into first stitch, Knit to end (21sts)
Row 2. Purl
Row 3. Increase, Knit to last 2 stitches, Knit 2 together (21sts)
Row 4. Purl 2 together, Purl to end (20sts)
Row 5. Increase, Knit to last 2 stitches, Knit 2 together (20sts)
Row 6. Purl 2 together, Purl to end (19sts)
Rows 7-14. Repeat rows 3 and 4 ( x 4)
(Total stitch count reduces by 1 stitch ever purl row. Row 8. (18sts), Row 10. (17sts), Row 12. (16sts), Row 14. (15sts)
Row 15. Knit to last 2 stitches, Knit 2 together (14sts)
Row 16. Purl 2 together, Purl to end (13sts)
Row 17. Knit to last 2 stitches, Knit 2 together (12sts)
Row 18. Purl
Row 19. Knit
(Rows 18 and 19 form Stocking stitch)
Rows 20-24. Stocking stitch
Form first eye stalk: (Rows 25-36)
Row 25. Knit 5 stitches, turn your work so Wrong Side is facing and work only on these 5 stitches. (You can use a stitch holder or large safety pin to hold the remaining 7 stitches if you find it easier.)
Row 26. Purl 2 together, Purl to end (4sts)
Rows 27-34. Stocking stitch
Row 35. Knit 2 together, Knit 2 together (2sts)
Row 36. Purl 2 together (1sts) bind off.
Form 2nd eye stalk: (Rows 25-36)
Re-join yarn to remaining 7 stitches Right Side facing
Row 25. Cast off first 2 stitches, Knit to end (5sts)
Row 26. Purl 3, Purl 2 together (4sts)
Rows 27-34. Stocking stitch
Row 35. Knit 2 together, K 2 together (2sts)
Row 36. Purl 2 together (1sts) bind off.
Back: Make one (Same as front with reverse shaping) Using 3.25mm knitting needles and Double knitting yarn cast on 20 stitches
Row 1. Right Side. Knit 19, increase into last stitch (21sts)
Row 2. Purl
Row 3. Knit 2 together, Knit to last stitch, increase (21sts)
Row 4. Purl to last 2 stitches, Purl 2 together (20sts)
Row 5. Knit 2 together, Knit 17, increase (20sts)
Row 6. Purl 18, Purl 2 together (19sts)
Rows 7-14. Repeat rows 3 and 4 ( x 4)
(Total stitch count reduces by 1 stitch ever purl row – Row 8. (18sts), Row 10. (17sts), Row 12. (16sts), Row 14. (15sts)
Row 15. Knit 2 together, Knit to end (14sts)
Row 16. Purl to last 2 stitches, Purl 2 together (13sts)
Row 17. Knit 2 together, Knit to end (12sts)
Row 18. Purl
Row 19. Knit
(Rows 18 and 19 form Stocking stitch)
Rows 20-24. Stocking stitch
Form first eye stalk: (Rows 25-36)
Row 25. Knit 5 stitches, turn your work so Wrong Side is facing and work only on these 5 stitches. (You can use a stitch holder or large safety pin to hold the remaining 7 stitches if you find it easier)
Row 26. Purl 2 together, Purl to end (4sts)
Rows 27-34. Stocking stitch
Row 35. Knit 2 together, Knit 2 together (2sts)
Row 36. Purl 2 together (1sts) bind off.
Form 2nd eye stalk: (Rows 25-36)
Re-join yarn to remaining 7 stitches Right Side facing
Row 25. Cast off first 2 stitches, Knit to end (5sts)
Row 26. Purl 3, Purl 2 together (4sts)
Rows 27-34. Stocking stitch
Row 35. Knit 2 together, Knit 2 together (2sts)
Row 36. Purl 2 together, bind off.
Making up:
Place Right Sides together and pin. Stitch the front and back together around the edge starting at the base near to the tail end. For a small piece like this I use matching yarn and whip stitch. Pay special attention to the eye stalks as they can be a little bit fiddly to turn right side out. Leave a 3cm opening at the base (for turning right side out and stuffing).
Remove pins and turn Right Side out. Using a small amount of polyester toy stuffing and something like a chop stick carefully push small amounts of stuffing into each eye stalk, then the tail, then the head and finally the body. (Careful not to overfill or you will see the stuffing through the stitches.) Once you are happy with the size and shape of your slug, close the opening in the base with ladder stitch using matching yarn. Secure the end with a couple of stitches and lose the end inside the body. See – DOLL-MAKING-PRO-TIPS
Eyes: Make two
Using white crochet cotton and 2.75mm crochet hook, make a magic ring, work 6 double crochet into ring, join into a round (slip stitch first stitch to last stitch), pull magic ring tight and fasten off.
Stitch in place (one on each eye stalk) using picture as guide. Using black embroidery thread and a tapestry needle make a large French knot (wrapping thread around needle 3 times) in the centre of each white circle, fasten off. Or stitch circles of white felt and embroider with black yarn.
Mouth: Using contrasting yarn and tapestry needle embroider a little smile, I used couching but back stitch also works well.
Beryl Variation greendogdolls.com Exclusive
Follow Ian the slug pattern, make one of each front and back in pink and make two eyes in white.
Follow Ian the Slug making up instructions for the body and eyes.
Embroider blanket stitch eye lashes above each eye using black embroidery thread and the picture for a guide.
Mouth:
Abbreviations: Crochet; slst (slip stitch), sc (single crochet), dc (double crochet)
3.25 crochet hook and bright pink knitting yarn – Crochet 6 chain, slst to first chain to form a ring. Into ring 1sc, 1dc, 9sc, 1dc, 1sc cot thread and pass through last stitch to finish off. Stitch in place forming a lips shape using photo as a guide.
SAFETY NOTE: Not suitable for children under 3 years of age.
This design includes small parts. Small parts can present a choking hazard for young children. Please take extra care if giving ‘Ian the Slug’ to a child. Make sure materials and construction methods used are age appropriate. Please see Terms & Conditions for full details.
© GREEN DOG DOLLS 2024
‘Ian the Slug’ design, pattern, text and images remain the property of Green Dog Dolls and may be withdrawn at anytime without notice.
Knitted Slug Games
I might be slightly biased but I absolutely love Ian and Beryl and have been working on a number of ideas, based on traditional kids games, using them. Why not make a batch of Ians, Beryls and Hearts and try out some of the suggestions below.
Find Ian – Hide and seek
Hide some Ians around the house or garden, a bit like an Easter egg hunt. You could use different colours and then allocate a different score to each colour, or alternatively it could just be a number of points for every Ian found. You could also add bonus points for finding Beryl and the heart. The winner of the game being the player with the most points when all the Ians have been found.
The 3 Ians – Tic-tac-toe or Noughts & crosses
Using chalk on a pavement or pencil on paper draw out the 3×3 grid. Two players, each has 5 Ians of the same colour e.g. Player 1 blue and Player 2 green. The two players take turns to place one Ian in each square of the grid. The object of the game is to get a row of 3 Ians of the same colour while trying to stop your opponent doing the same. The first player to get 3 in a row wins. 3 in a row Ians can be vertical, horizontal or diagonal.
Ian’s flower pots – Bucket ball
Get some flowerpots of different sizes, why not reuse old ones but make sure you brush out any leftover soil and give them a quick rinse. Allocate points to each pot, the smaller the pot the more points, and write this on the pot, permanent marker works well with plastic pots and chalk is good on terracotta pots. Each player has their own colour of Ians and takes turns to throw their Ians and try to get them into the flower pots. Arrange the pots in a group a distance away from the players. The distance will depend on the age of the players, 50cm perhaps for young children but a few metres for older children and adults. Mark the distance with a stick or similar to create a line from behind which the players will throw their Ians. Once all the Ians have been played, each Ian inside a pot wins the number of points written on the pot. The player with the most points wins. If you have quite a few players you could play this game as teams.
Can you think of any other kids games to play with Ian?
Drop your suggestions in the comments.
Don’t miss out on new free patterns, subscribe to receive the bi-monthly newsletter below. I never fill your inbox with spam or share your information. See Privacy Policy.
Thank you & Happy Knitting x

