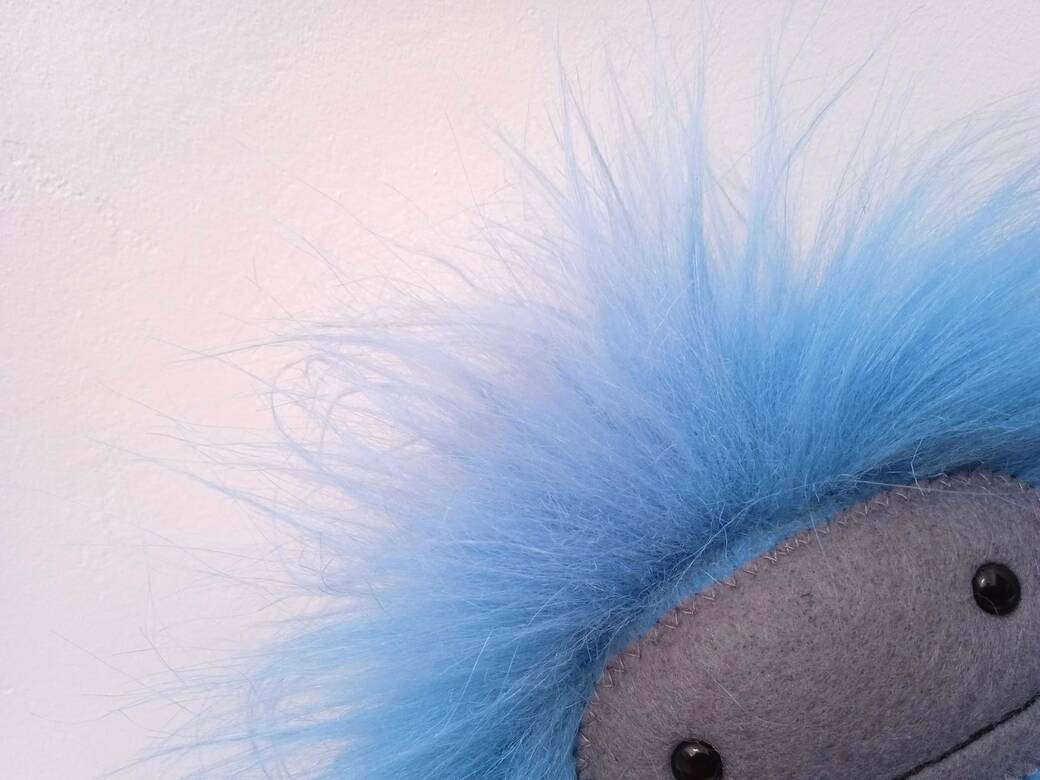
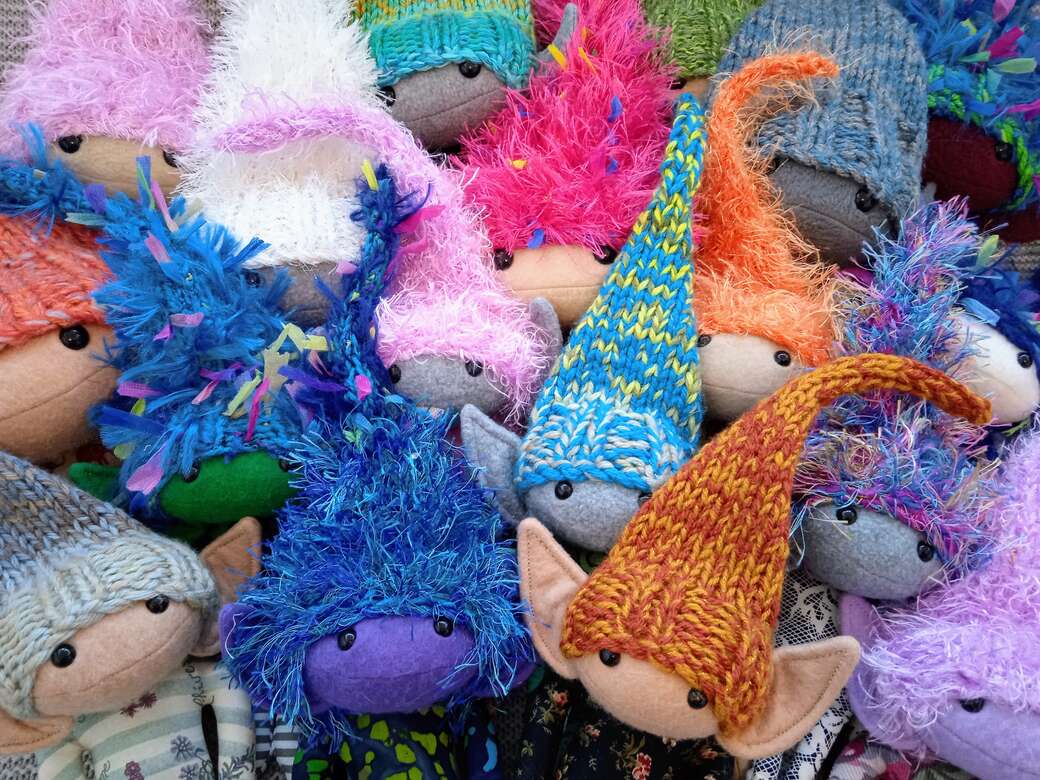
Make your very own Dress-Me-Up Teddy Doll with this FREE sewing tutorial and pattern.
The sewing tutorial includes easy to follow step-by-step instructions with over 80 detailed photos and a printer friendly PDF pattern.
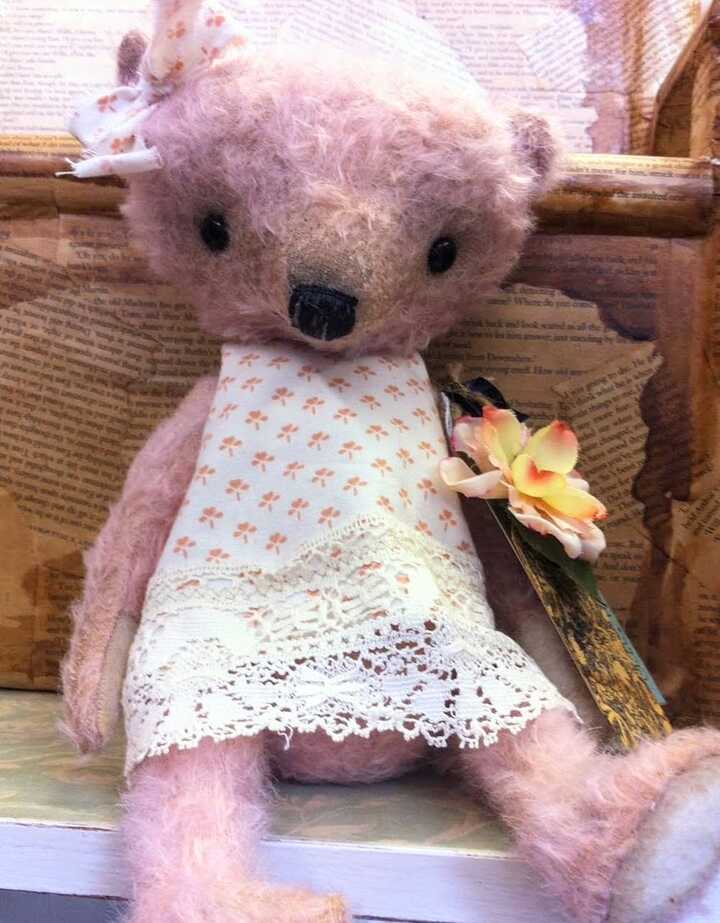
Teddy Dolls are cute and cuddly, soft body, fabric dolls with teddy bear heads and sweet embroidered faces.
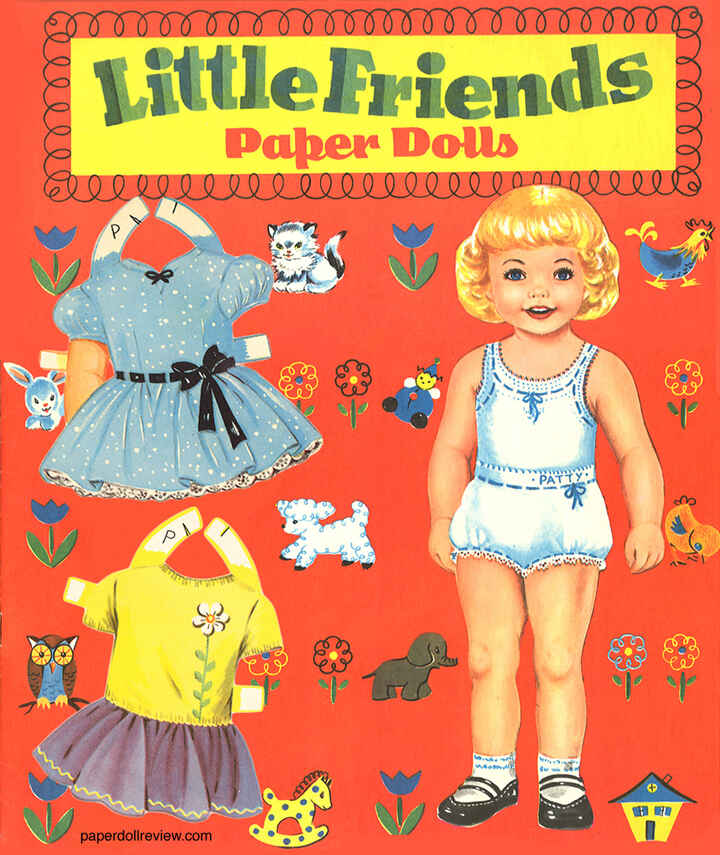
As a child I loved playing with vintage style paper dolls that came complete with a full cut-out wardrobe and set of accessories, based around a theme like ‘Winter Wonderland’ or ‘A day out at the Farm’.
These Teddy Dolls along with the, soon-to-be-released Dress-Me-Up Wardrobe including accessories and play-sets, have been designed with a similar sense of fun and nostalgia in mind.
The tutorial is suitable for beginners although some experience of sewing would be an advantage because there are a few fiddly bits.
I learned to sew at a very young age by making my own toys and designing clothes and accessories for them. In many ways this is the perfect project to improve your sewing skills like I did. There are numerous helpful links to free resources included as well as practical notes and pro-tips to assist you at every stage.
Having said that, there’s lots to keep even the more advanced interested. I really had a lot of fun with this project and I love that you can add to the wardrobe and accessories.


Teddy Doll’s Dress-Me-Up Wardrobe will be an add-to-set of patterns and tutorials to make clothing, knitwear and accessories for your Teddy Doll. All patterns available on the website will be completely FREE, some designs will be available exclusively for PATREON MEMBERS with additional patterns, for designer play-sets, available for purchase ONLY in my ETSY SHOP.
At the time of writing this, I am drafting the pattern and tutorial for the first FREE wardrobe design, The Classic Floppy Bow due to be released soon.
Subscribe to the free-to-join Green Puppy Club to be the first to receive notification when new wardrobe designs are released.
This free sewing tutorial and pattern includes:
- Printer friendly pattern template download.
- Easy to follow step-by-step instructions.
- Over 80 detailed photos.
- Useful sewing notes for beginners.
- Pro-tips for professional results.
These instructions are for making a fabric bear using machine and hand sewing but the machine sewn steps can be hand sewn, if you prefer or do not have access to a sewing machine.
Skills you will develop with this tutorial:
- Design and make your own dress-up teddy bear doll using recycled fabrics.
- Transferring pattern markings from paper pattern to fabric.
- Doll making Pro-Tips for a more professional finish.
- Hand embroidery – Satin stitch for embellishment.


You will need:
- Printed Teddy Doll Template. DOWNLOAD-TEDDY-DOLLS-TEMPLATE-HERE
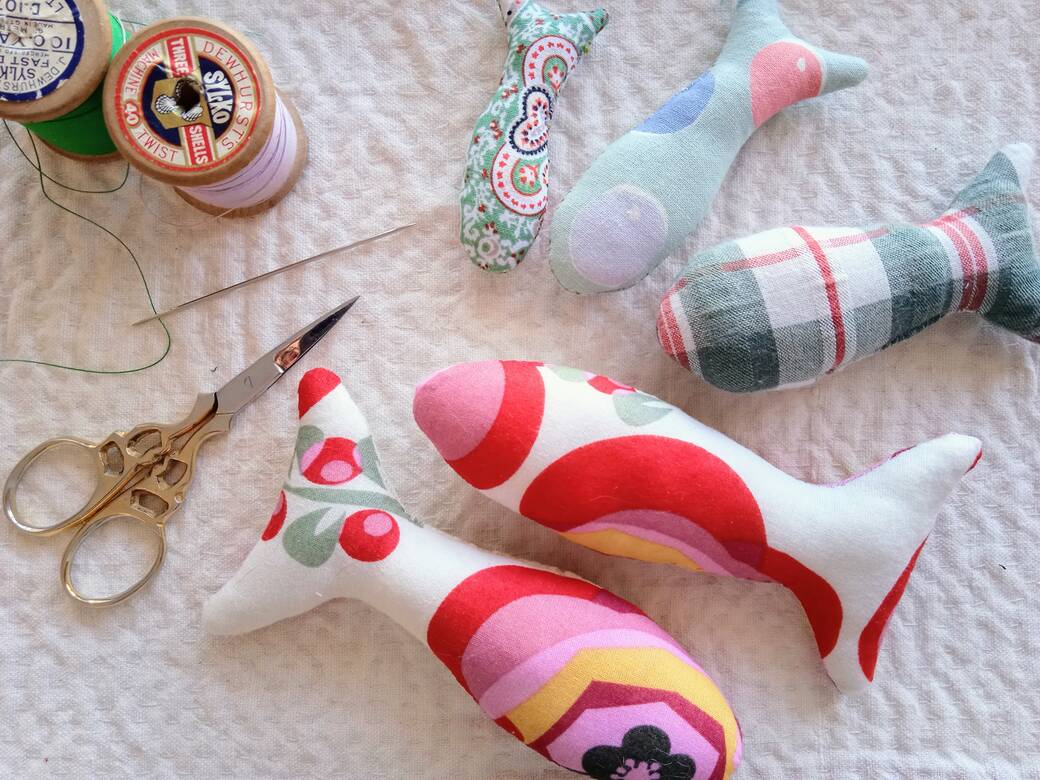
- Basic sewing kit. SEE HERE FOR BASIC SEWING KIT Fig. [a]
- Sewing machine (Or you can sew by hand if you prefer)
- Stuffing (I use carded polyester or recycled from old pillows , make sure you wash it before using it)
- A pair of tweezers or forceps for turning.
- Chopstick for stuffing.
- Recycled fabrics: Light-medium weight woven fabrics. (e.g. printed cotton shirts or dresses)
- Embroidery threads. Fig. [b]
- Tealight wax candle.
- Iron.
- Disappearing fabric marker pen (OPTIONAL)
PLEASE NOTE: Three teddy dolls were made during the writing of these instructions. The images used are the best fit for the description, therefore the same teddy doll is not featured in all images.
STEP ONE: Collect together your resources and choose your fabrics.
Collecting together the resources and in particular choosing the fabrics, is one of my favourite parts of making a new design. I get to sort through my much loved collection of recycled fabrics, some of which I’d forgotten I had. Fig. [c]
It’s like discovering a pound coin down the side of the sofa just as the ice cream van’s jingle rings out in the street outside. In other words pure joy.
I love to mix and match the fabrics until I find a combination that I really like. Fig. [d]


STEP TWO: Prepare the paper pattern (4 Pieces) and iron your fabrics.
i) Download and print out the Teddy Doll template on one A4 sheet of paper. Fig. [e]
DOWNLOAD-TEDDY-DOLLS-TEMPLATE-HERE
ii) Cut out the pattern pieces – Head (3 pieces), body (1 piece) using paper or general purpose scissors. (Don’t use fabric scissors because it will blunt the blades.)
iii) Iron your fabrics to remove any creases. Fig. [f]


STEP THREE: Head - Transfer paper pattern markings onto fabric.
i) Pin the head front pattern piece, face down, onto the wrong side of a single layer of fabric. Cut around the pattern, leaving at least 2-3cms all the way around. Fig. [g]
ii) With the pattern piece still pinned to the fabric, place this cut piece up against a brightly lit window. Pattern side against the window and right side of fabric facing you. The window acts as a lightbox, you should be able to see the face markings through the fabric. Fig. [h] IMPORTANT: DO NOT REMOVE PINS


iii) Using a vanishing fabric marker pen (ink disappears with water) carefully trace the face onto the fabric. Fig. [i]
NOTE: If you don’t have one of these fabric markers you can lightly use a coloured pencil in a similar colour to your fabric or embroidery thread. You want the markings to be visible enough to embroider the face but almost invisible once the face is stitched.
iv) Pin the two head back pattern pieces to the wrong side of a single layer of fabric. Transfer the seam markings from the pattern onto the fabric Fig. [j] These markings are important for matching up sections of the head before sewing together.


v) Carefully remove the lower pin on the ears section of the pattern keeping the pattern in place but allowing access to fold the pattern along the dashed sewing line. Mark the sewing line and the opening onto the fabric. Fig. [k]
vi) Remove the pattern pieces and trim excess fabric away from the cutting line for both sections. Fig [l]


STEP FOUR: Make the Head - Sew together the three head sections.
i) Head back seam – Place right sides of fabric together for head back and head back top sections. Match up marks and cutting line edge and pin together. Fig. [m]
ii) Use a machine or hand stitch (running stitch or back stitch) to sew along the sewing lines joining the two head back pieces together. Leave the opening between the two marks. Sew two rows of stitching and anchor the thread at beginning and end of sewing. Fig. [n]
HAND SEWING TECHNIQUES: RUNNING STITCH & BACK STITCH HERE
NOTE: Anchoring the thread when machine sewing is often referred to as reinforcing.


iii) Iron the head back seam, with the opening flat. Fig. [o]
iv) Mark head back seam opening onto head front pattern piece – Do not remove the pins, keep the front pattern pinned to the fabric. Fold head back pattern along sewing line and place over head front pattern piece matching the outlines. Transfer the sewing line and opening marks onto the front pattern. Fig [p]
NOTE: This is important to make sure the face is in the right position in relation to the back seam and opening.


v) Place head front pattern and fabric on top of head back fabric, placing right sides together (RST). Fold front pattern and fabric under along the sewing line transferred from the back pattern. Fig. [q]
vi) Reposition the top fabric to match up the opening markings Fig. [r] and seam markings Fig. [s]


vii) Carefully pin all three layers together. (Front and back fabrics with the head front pattern still in place.) Fig. [t]


viii) Draw around the head front pattern piece to mark the sewing line. Fig. [u]
ix) Carefully remove the head pattern piece and replace the pins. Fig. [v]
NOTE: Do not move the positioning of the two fabrics or you will need to repeat lining up the marks and seams. You can add extra pins to secure the two layers of fabric together, before removing the pins holding the pattern in place.


x) Sew around the head sewing line twice, anchoring the thread at the beginning and end of sewing. Measure 5mm outside of the sewing line all around the head (seam allowance) and cut away the excess fabric Fig. [w]
NOTE: Sew with a machine or hand sewing as before for head back seam.
Measure and mark the 5mm seam allowance cutting line before cutting. (Not shown in picture)
xi) Turn the head right sides out. Use forceps or tweezers going in through the head back opening and gently pull the fabric through the opening to the outside. Fig. [x]
DOLL-MAKING-PRO-TIPS: TURNING


STEP FIVE: Make the body
i) Fold the body fabric in half, right sides together (RST), position the body pattern so there is at least 2cm all around the paper pattern and take special attention to any pattern on the fabric. Example: I have fruit and I wanted them to appear upright on the finished doll. Fig. [y]
ii) Pin the pattern in place through both layers of fabric and draw around the pattern to mark the sewing line. Mark the opening that will be left unstitched for turning. I have used a biro but you can also use a pencil or a disappearing fabric marker pen. Fig. [y]
iii) Carefully remove the paper pattern and replace the pins to secure the two layers of fabric together. Cut away excess fabric leaving at least 2 cm all around the drawn line. Fig. [z]
NOTE: Cutting away excess fabric makes the work easier to manage when stitching around the sewing line.


iv) Choosing a matching sewing thread sew around the body sewing line, start at one side of the opening, anchor the thread and finish at the other side of the opening again anchor the thread. Leave the opening at the neck between the two marks unstitched for turning. Fig. [A]
v) Sew a second row of stitches over the first, remembering to anchor the thread at the start and end of sewing and leaving the neck opening unstitched between the marks.
NOTE: Two rows of stitches are recommended for toy making with lots of curved seams. It means you can allow much smaller seam allowances without seams easily pulling apart. Fig. [B]

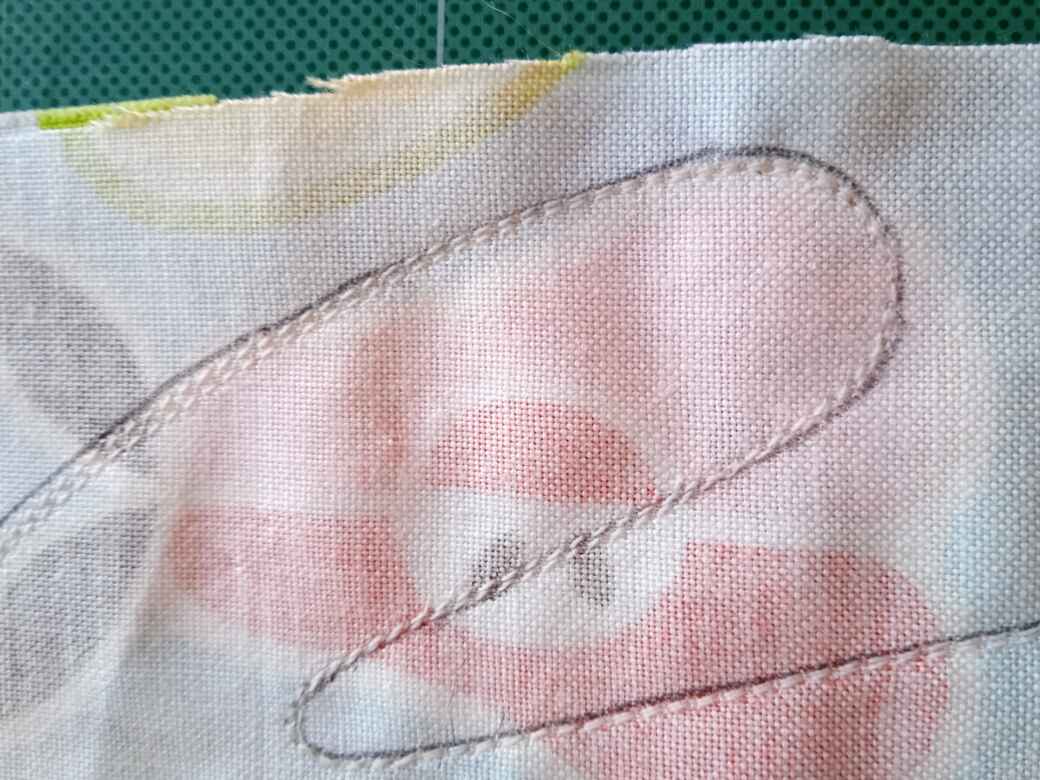
vi) Measure and mark the cutting line, 5mm outside of the sewing line, all around the body. Carefully cut away the excess fabric. Fig. [C]
vii) Mark clip points on tight curves. Mark two clip points between the legs 3mm in from the cut edge but no closer than 2mm to the sewing line stitches. Fig. [D]
viii) Using only the very tips of sharp fabric scissors or sharp embroidery scissors make a 3mm cut at each clip point. Be very careful not to cut too close to the stitches. Fig. [E]
NOTE: Clipping the seam allowance on curved seams allows some flexibility when the body is turned the right way out. There is less pulling and puckering and seams appear smoother and more defined.


ix) Measure and make clip marks on the seam allowance under both arms. As before, keep at least 2mm away from the stitches. Fig. [F]


x) As before, using only the very tips of sharp scissors make a small cut at each clip point no closer than 2mm to the stitches. Be very careful not to cut the stitches. Fig. [G]
xi) Using forceps or tweezers turn the body right side out through the opening at the neck. Fig. [H]


xii) Use a chopstick to gently push out seams from the inside. Insert the chopstick into the body through the neck opening and gently push out the body shape paying special attention to the hands, feet and clipped curves. Be careful not to push too hard and split your stitches. Fig.[I]
NOTE: Using the chopstick to push out the seams gives a more defined body shape.
PRO-TIP: For smoother seams, use the blunt end of the chopstick, again from the inside of the body, pull the blunt end along the seams with a small amount of pressure.
xiii) Iron the body and head on both sides to smooth out any creases and define the shapes. Fig. [J]


STEP SIX: Stuff the head and stitch the opening
i) Firmly stuff the head with polyester fibre filling. Holding the head in one hand and a chopstick in the other. Use the chop stick to work the polyester filling into all parts of the head, push the filling into any voids you can feel. Fig. [K]
NOTE: I am right handed so I am holding the head in the palm of my left hand and working the polyester filling using the chopstick in my right hand.
DOLL-MAKING-PRO-TIPS: STUFFING
BEGINNER PRACTICE: If you are unfamiliar with ladder stitch you can practise it first in Sewing Guide No 3. Sewing techniques Fig. [L]
NOTE: Ladder stitch gives a professional finish to your doll because the stitches almost disappear.
SEWING GUIDE NO 3. SEWING TECHNIQUES
Alternatively if you are familiar with ladder stitch skip ahead to ii)


ii) Once you are happy with the firmness and shape of the head, stitch the opening closed using ladder stitch. Thread the needle using a matching coloured thread and insert the needle into the head three cm away from the opening and coming out at the point you need to anchor the thread, very close to one end of the opening. Fig. [M]
NOTE: The exact place you begin with your anchor stitch may vary based on whether you work from right to left or if you are right or left handed. It’s not important so long as you start at one end and work along the opening to the other end.
iii) Do not pull the thread all the way through. Here you can see the tale in Fig. [N] You will cut the tail off later. Sew a few stitches to secure the thread at the opening and work along the opening in ladder stitch making small stitches at alternate sides of the opening to form the ladder structure. Fig. [N]


iv) Once you have stitched all the way along the opening, secure the end of your thread with a few anchor stitches and lose the thread in the doll. Fig. [O]
DOLL-MAKING-PRO-TIPS: LOSE THE THREAD IN THE DOLL.
v) Cut the two thread tails, remember we left one at the start, close to the doll head taking care not to cut the fabric. Fig. [P]


STEP SEVEN: Embroider Teddy’s face
Next you are going to embroider the face using six strand embroidery thread and satin stitch.
NOTE: It is easier to embroider the face before attaching the head to the body.
i) I am using 6 strand embroidery threads, sometimes called embroidery silks. Fig. [E1]
ii) Cut a length of embroidery thread in your chosen colour 60-70cm approx. Split the thread in two lengthwise into two pieces of 60-70cm but with only 3 threads in each length. Fig. [E2]
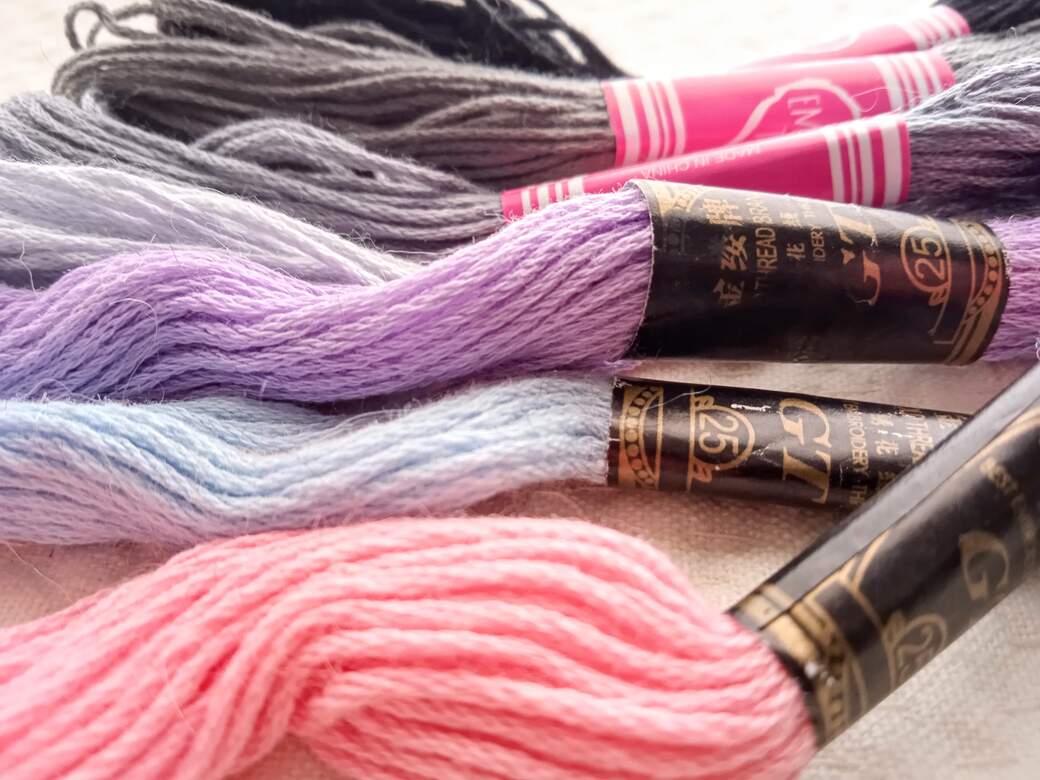

iii) Take a small amount of wax and pull the thread along the surface. You need to apply a small amount of pressure as you pull, holding the thread against the wax with one hand whilst pulling the thread with your other hand. The thread should slightly cut into the wax leaving a drag mark. Repeat this step 2-3 times. Here I am using a tealight candle but you can also use beeswax or a regular candle so long as it is a natural colour. Fig. [E3]
NOTE: The wax will lightly coat the outside of the thread making it easier to pull through the stuffed head.
iv) Tie a knot in one end of the thread. Fig. [E4]


v) Thread a needle with the other end of the embroidery thread, you may need to use a needle with a slightly bigger eye if you have trouble threading. Remember you are using 3 threads at once. Insert the needle into the back of the head close to the seam and come out on the face at the bottom of the nose marking. Fig [E5]
vi) Pull the thread so the knot sits on the surface of the fabric at the back. Then give a short sharp tug on the thread (needle end), the knot should be pulled inside the head and get caught on the stuffing inside, securing the thread. Fig. [E6]
NOTE: You may need to repeat this step if the thread pulls all the way through and doesn’t catch on the stuffing inside.


vii) Lay the embroidery thread flat on the surface of the face straight up the centre of the nose. Insert the needle at the point where the embroidery thread crosses the nose top. Fig. [E7]
viii) Bring the needle out at the top right point of the nose and pull the thread so it sits neatly on the surface of the fabric. Fig. [E8]
NOTE: You don’t want to pull the stitches too tight that they pull the fabric but also don’t leave them too loose that they create loops. You are aiming for nice straight lines that sit firmly on the surface of the fabric.


ix) Again lay your embroidery thread in a straight line on the surface of the fabric along the drawn line of the right side of the nose. Insert the needle at the point where the thread crosses the first stitch and exit at the top left point of the nose. Fig. [E9]
x) Lay the thread along the drawn line at the left side of the nose and insert the needle where the thread crosses the first stitch. Exit at the top left of the nose next to the stitch you have just made. Fig. [E10]
NOTE: You have stitched the basic outline of the nose and will now fill in with satin stitch.


xi) Continue laying the embroidery thread in a straight line, on the surface of the fabric, each time alongside the last stitch made. Insert the needle where the thread meets the first stitch and come out next to the upper point of the stitch you have just made. Fig. [E11]
xii) Continue working stitches from left to right filling in the drawn nose shape with satin stitch. Fig. [E12]


xiii) Continue working as in steps xi and xii filling in the drawn lines of the nose. On the last stitch bring the needle out through the back seam of the head. Fig. [E13]
xiv) Secure the thread with a few stitches hidden in the seam at the back of the head and finish off by losing the thread inside the head. Fig. [E14]
DOLL-MAKING-PRO-TIPS: LOSE THE THREAD IN THE DOLL.


xv) ** To embroider the eyes use the length of embroidery thread with 3 strands left over from splitting the thread at step ii) Fig. [E2] and prepare it in the same way. iii) Wax the thread Fig. [E3] iv) Tie a knot in one end Fig. [E4] v) thread the needle and bring through the back of the head close to the seam but this time bring the needle out at one side of the eye at the upper most point. Fig. [E15] Fig. [E17] vi) Pull the knot into the head. Fig. [E6]
NOTE: Just to clarify, I found it easier to embroider the eyes holding the head upside down. In the pictures it appears that I started at the lower side points of the eyes but the head is in fact held upside down in my left hand and the needle in my right hand.
xvi) Work one eye in satin stitch, similar to the nose, lay the thread flat on the surface of the fabric and insert the needle at the point where the thread crosses the drawn outline of the eye. Bring the needle out next to the stitch you have just made, ready to make the second stitch in the same way. Fig. [E15]
xvii) Repeat step xvi) filling in the eye with satin stitch. Fig. [E16]


xviii) On the last stitch bring the needle out at the back of the head close to the seam and as in step xiv) secure the thread with a couple of stitches hidden in the seam and lose the thread in the head. Fig. [E14]
xix) Repeat from ** for the second eye. Fig. [E17]
NOTE: You may need to cut and prepare another length of embroidery thread as in steps i) and ii)
xx) Iron the stitches on a low heat setting to melt the wax. Melting the wax helps the stitches to sit nice and flat on the face and also gives a slight sheen to teddy’s features.


xxi) Use a clean damp cloth to gently dab away any visible blue marks left from the disappearing fabric marker pen. Fig. [E19]
NOTE: The water makes the marks disappear but just a little is needed so don’t get the face too wet.
Fig. [E20] Teddy’s face is now embroidered. You will add the pink cheeks later.


STEP EIGHT: Stuff the body and stitch the opening
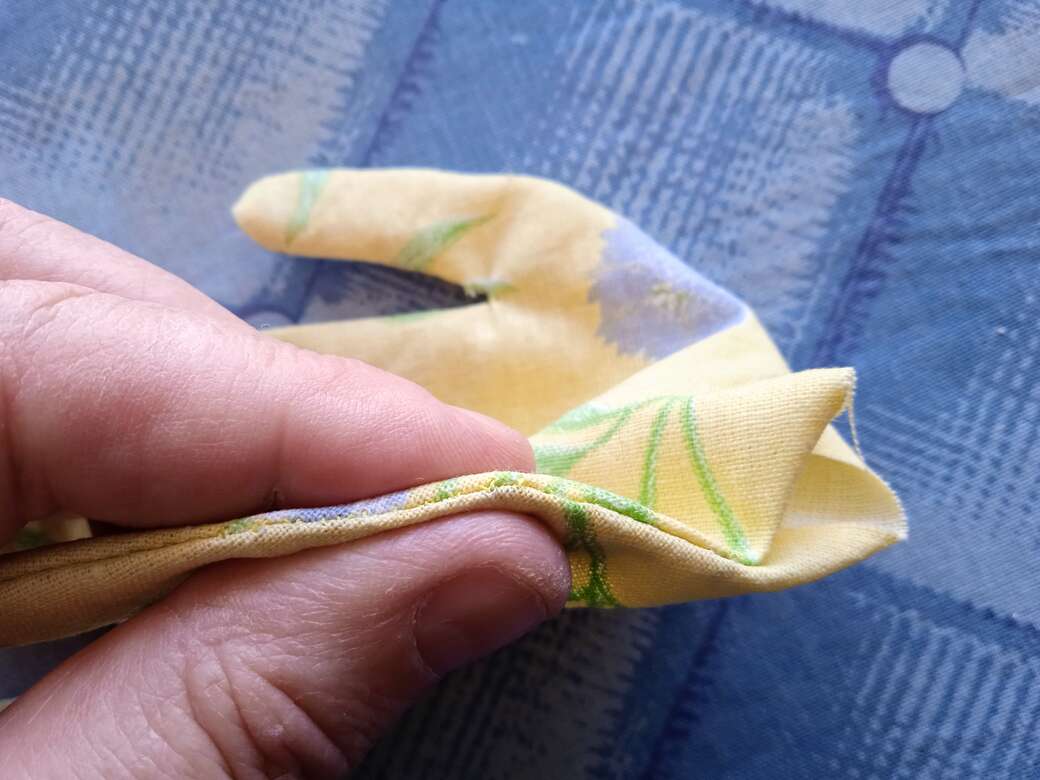
i) Prepare the body for stuffing. Roll the seams between your thumb and fore finger this helps to smooth the curves and define the body shape. Fig. [Q]
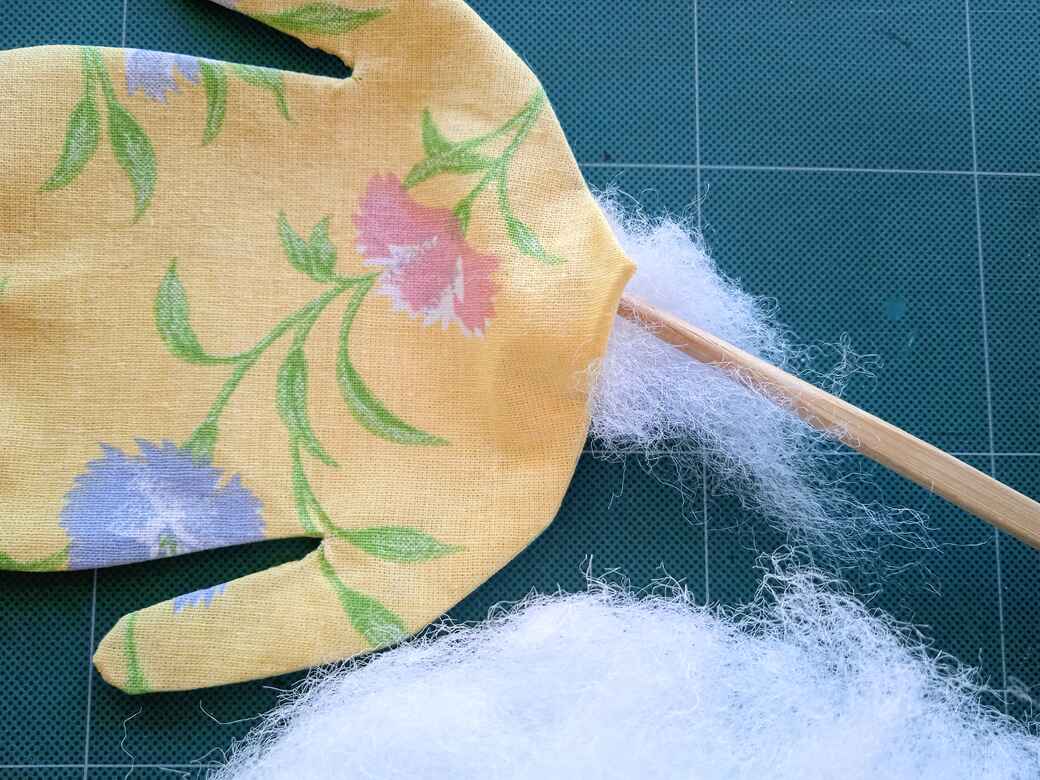
ii) Firmly stuff the body with polyester fibre filling. Holding the body in one hand and a chopstick in the other. Use the chop stick to work the polyester filling into all parts of the body paying special attention to the arms and legs. Push the filling into any voids you can feel. And smooth out any lumps by adding and removing stuffing and using your hands to massage the form to give a smooth surface and defined shape. Fig. [R]
NOTE: I am right handed so I am holding the body in my left hand and working the polyester filling using the chopstick in my right hand.
DOLL-MAKING-PRO-TIPS: STUFFING
iii) Once you are happy with the firmness and shape of the body, stitch the opening closed using ladder stitch as you did with the head. Turn in the seam allowance at the neck opening (5mm – 1cm) and secure with a couple of pins. Fig. [S]
iv) Thread the needle using a matching coloured thread and insert the needle into the body 3cm away from the opening and coming out at the point you need to anchor the thread, very close to one end of the opening. Fig. [S]
NOTE: The exact place you begin with your anchor stitch may vary based on whether you work from right to left or if you are right or left handed. It’s not important so long as you start at one end and work along the opening to the other end.
iii) Do not pull the thread all the way through. You will cut the tail off later. Sew a few stitches to secure the thread at the opening and work along the opening in ladder stitch making small stitches at alternate sides of the opening to form the ladder structure. Fig. [T]


iv) With 2cm of the opening still unstitched add small amounts of stuffing using the chopstick to fill any voids in the neck area. Fig. [U]
v) Once the neck area is firm and smooth, finish stitching the last 2cm of the opening. Secure the thread with a few stitches and lose the thread in the body. Fig. [V]
DOLL-MAKING-PRO-TIPS: LOSE THE THREAD IN THE DOLL.


vi) Cut the two thread tails, one at the start and one at the end of sewing, close to the surface of the body taking care not to cut the fabric. Fig. [W]
Fig. [X] The body is now ready for the head to be attached


STEP NINE: Attach the head to the body
i) Position the head on the body facing you Fig. [X]. I like the head to be slightly cocked to one side. I feel it looks more expressive but this is just personal preference.
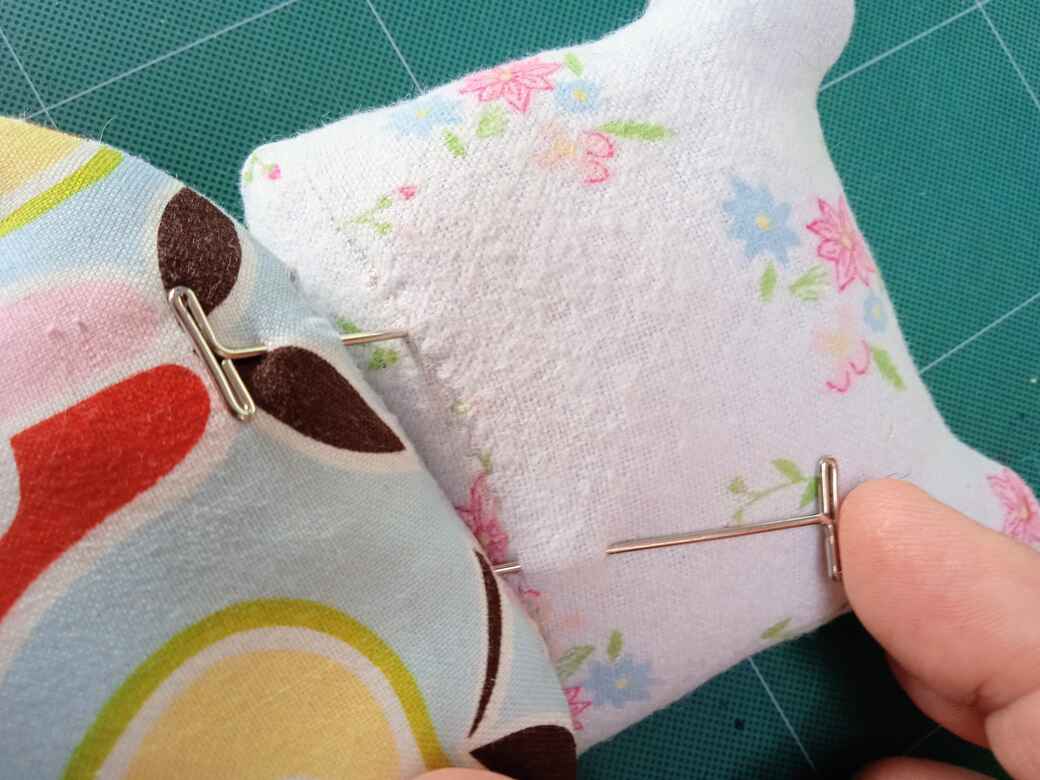
ii) Make sure the head and body overlap at the back so the neck and head openings line up and secure with pins. Fig. [Y]
NOTE: I am using T-Pins which are really strong and great for doll and bear making. If you do not have T-Pins use regular pins but you might need more of them.
iii) Using a disappearing fabric marker pen, draw around where the head meets the body. This will act as your sewing line. Fig. [Z]

iv) To attach the head I am using a doll needle which is an extra long sewing needle made especially for passing through stuffed forms like doll or teddy bodies and extra strong sewing thread often used in upholstery called Coats Nylabond. Fig [Aa]
v) Cut a length of the thread from your finger tips to your shoulder approximately 60-70cm and thread the doll needle.
NOTE: You can use a regular needle if you don’t have a doll needle but choose the longest you have and you will probably find working with a shorter needle a bit more fiddly.
Insert the needle into the shoulder and come out at the neck seam close to the base of the head. Secure the thread with a few stitches. Fig. [Bb]


vi) Use ladder stitch to attach the head to the body using the drawn neck lines to help you place the stitches. Alternate stitches between the base of the head and the body neck to form the ladder structure. Fig. [Cc]
vii) When you pull the thread tight the stitches close up bringing the head and body securely together. Fig. [Dd]
Note: This is why it is so important to use extra strong thread. If your thread snaps when you pull the stitches tight you will have to start over attaching the head from step v).


viii) Continue working in ladder stitch all around the neck and the base of the head using the drawn lines as a guide to position the stitches. Fig. [Ee]
ix) Continue stitching until you have reached the point where you started. Fig. [Ff]


x) Secure the thread with a few stitches hidden in the neck seam and lose the thread in the doll body. Fig. [Gg]
xi) Cut the thread tails close to the body, careful not to cut the fabric. Fig. [Hh]
xii) Use a damp cloth to remove any visible blue marks, from the disappearing fabric marker pen, at the neck or base of the head. (NOT SHOWN)


STEP TEN: Finishing touch - If you like you can add a cute finishing touch to your teddy doll, some rosy cheeks!
i) I have used watercolour pencils but you can also use regular coloured pencils or some blusher make-up.
ii) Use a scrap of fabric to experiment with colour and intensity before adding it to your finished teddy. Fig. [Ii]
NOTE: Whatever materials you are using, I WOULD RECOMMEND THAT YOU ALWAYS USE A SCRAP OF FABRIC TO EXPERIMENT BEFORE WORKING ON YOUR FINISHED TEDDY DOLL. The last thing you want is to be unhappy with the result at this late stage.
In Fig. [Ii] You can see I tested 4 different shades of pink watercolour pencil.
I labelled each colour so I wouldn’t forget which one was which.
I used a damp cloth to blend the pencil.
Here I have eight different variations of finish to choose from.
Even if you only have one option you can try different amounts of pressure and blending to vary the intensity of the colour.
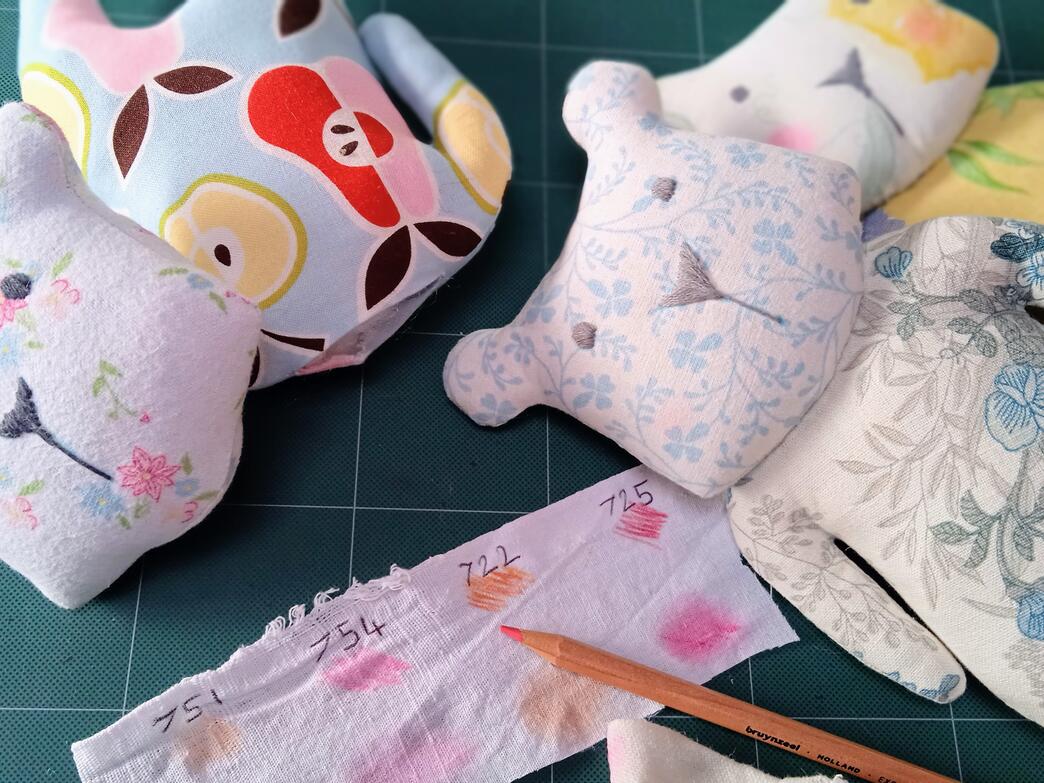

iii) Use the fabric experiments to choose the result you want to achieve and carefully replicate it on Teddy’s face either side of the nose, under each eye. Fig. [Jj]
iv) If using blendable watercolour pencils like me, use a damp cloth to blend the colour. Fig. [Kk]
CONGRATULATIONS! You have finished making your Teddy Doll.
Three finished Teddy Dolls. Fig. [Ll]


The Teddy Dolls pattern and tutorial is just the beginning, now the dress-up fun can begin!
Start your Dress-Me-Up Teddy Dolls Wardrobe with the Classic Floppy Bow Fig. [Mm] or Playtime Dungarees with Mini-Pet Rodney, coming soon in FREE PATTERNS


Want to know when new patterns are released for Teddy Doll’s Dress-Me-Up Wardrobe?
YES! Then join my FREE CLUB to be among the first to receive notification about new pattern releases.
Use this link below to be taken to the Green Puppy Club subscribe page
YES PLEASE I WOULD LIKE TO JOIN GREEN PUPPY CLUB AND RECEIVE FREE PATTERN RELEASE NOTIFICATIONS
NOTE: some designs will be available exclusively for PATREON MEMBERS and some designs will be available for purchase ONLY in my ETSY SHOP.
Some of the designs planned for future release include:
- Take-Me-Anywhere Bag (ETSY SHOP)
- Flower-Girl Tutu & Tiara. (FREE on WEBSITE)
- Day-at-the-Beach Set. (PATREON EXCLUSIVE)
SAFETY NOTE: Small parts can present a choking hazard for young children.
Please take extra care if giving ‘Teddy Dolls’ to a child.
Make sure they are age appropriate. See website Terms and Conditions for full details.
© GREEN DOG DOLLS 2025
‘Teddy Dolls’ design, pattern, text and images remain the property of Green Dog Dolls and may be withdrawn at any time without notice.
Have you tried this Tutorial?
Was it easy to follow?
What other projects or skills would you like to see a tutorial on?
Let me know in the comments below or send me a message using the contact form.
This sewing tutorial and pattern have been vigorously self-tested, however if you notice any mistakes please send me a message using the contact form thank you.
