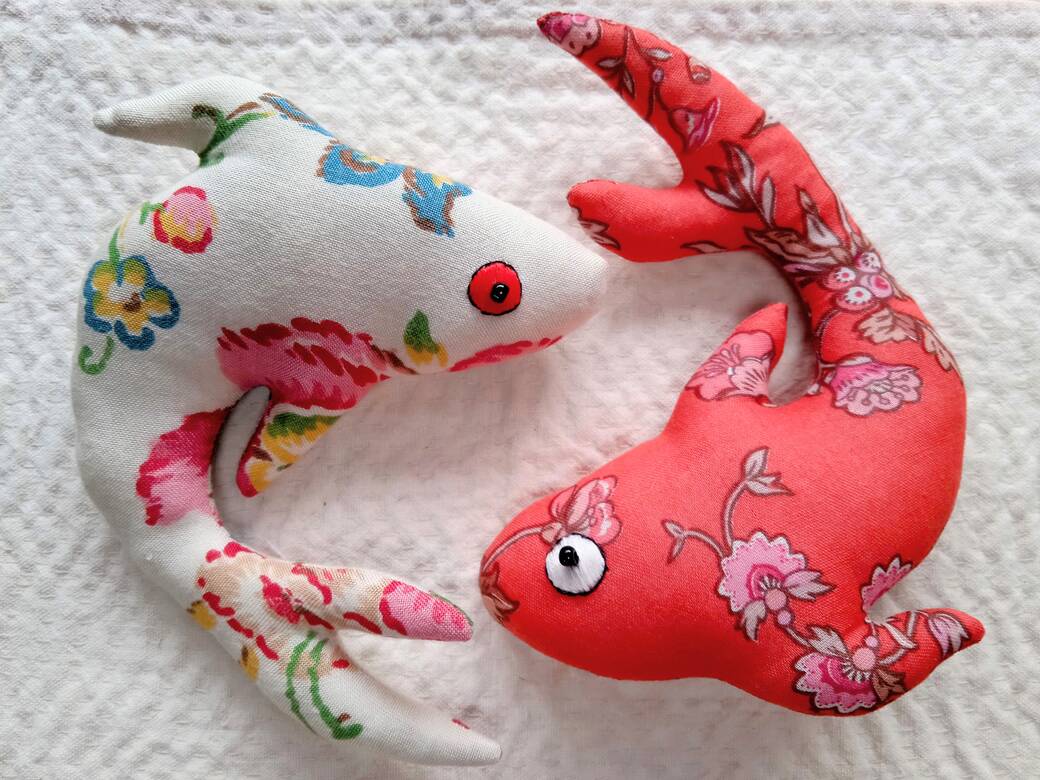
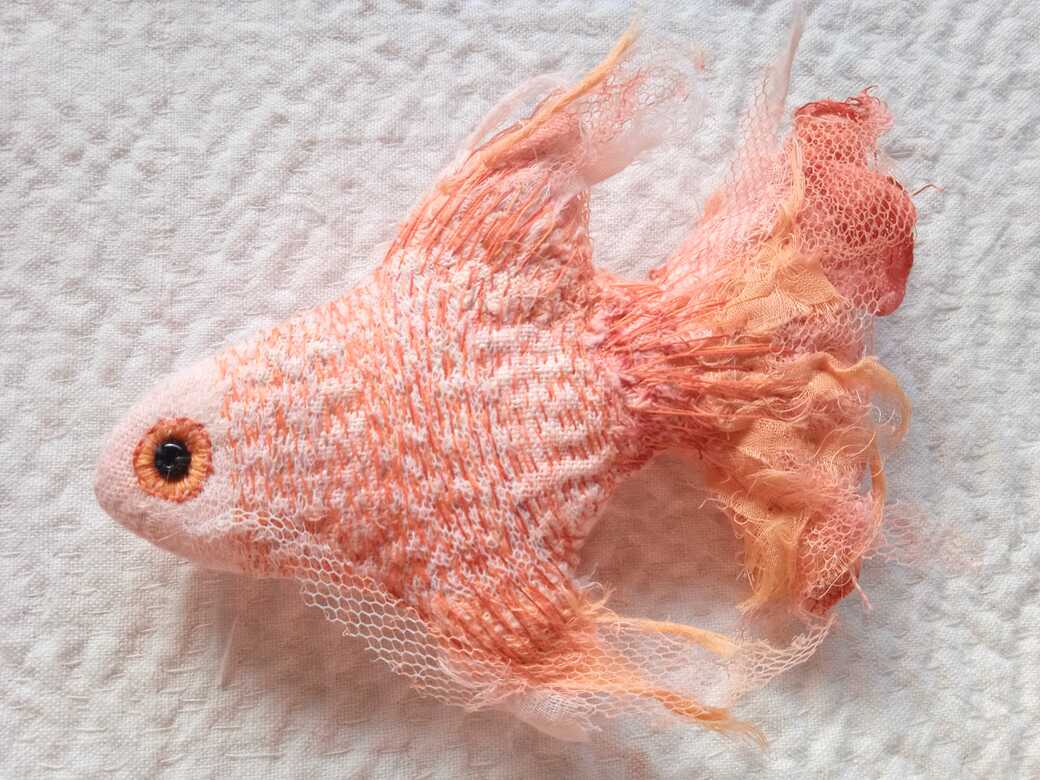
Fabric Fish - free hand sewing tutorial, is a beginners course in 3 parts.
Fishy Dolls ~ Part 1.
This hand sewing tutorial includes full step-by-step written instructions with detailed photos.
If you prefer you can download a PDF copy available on Patreon*.
Green Dog Dolls is new to Patreon* so membership and access are currently FREE.
Become a Patreon* member now and gain full access to exclusive bonus materials for FREE.
*Patreon is a platform where artists and content creators can share exclusive content with their supporters.
There is often a monthly subscription fee of about £5.
This shows support and appreciation for a creators work and helps to build a community.
There is currently NO CHARGE for membership, while I roll out and test this service.
Fish Symbolism
Having trawled (no pun intended!) the internet in search of ‘fish’ symbolism and meanings, with the intention of summarising, why so many people, including myself, are drawn to these fascinating and beautiful creatures. I have to admit I am left a little overwhelmed and confused. If we are to believe what we read, on the many and varied sources available online, it would seem like almost every culture and subculture have their own beliefs and interpretations of fish symbolism.
These variations are generally based around; different types of fish, their association with water, religious and spiritual groups, geography and culture.
I believe I am drawn to fish because I associate them with the ocean and the freedom to swim wherever they please.
This belief is apparently similar to Buddhist beliefs that fish represent freedom from the norms of society expectations.
Some cultures see them as a symbol of good luck or prosperity, others resilience or fertility.
It would seem that fish can symbolise almost anything you want it to, but whatever your beliefs or point-of-view, fish undeniably hold a fascination for many.
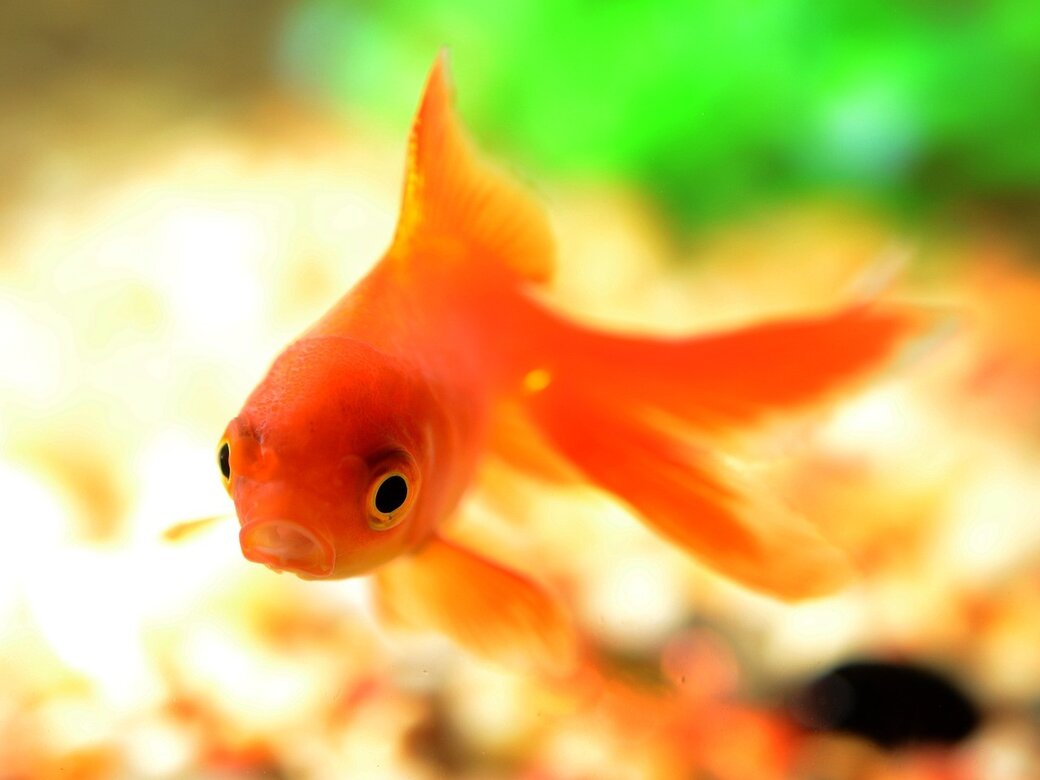
*Image by Hung Diesel from Pixabay
Friends not Food.
Whereas some give fish as gifts or offer them as food, I myself being an animal loving vegetarian, prefer my fish in the form of these cute little ‘Fishy dolls’.
This is a great hand-sewing project for beginners but also cute enough for the more experienced to make as a quick, fun project to use up small scraps of fabric.
Fishy Dolls is perfect for meditative slow-stitching and compact enough to be mobile and take with you when on the move.
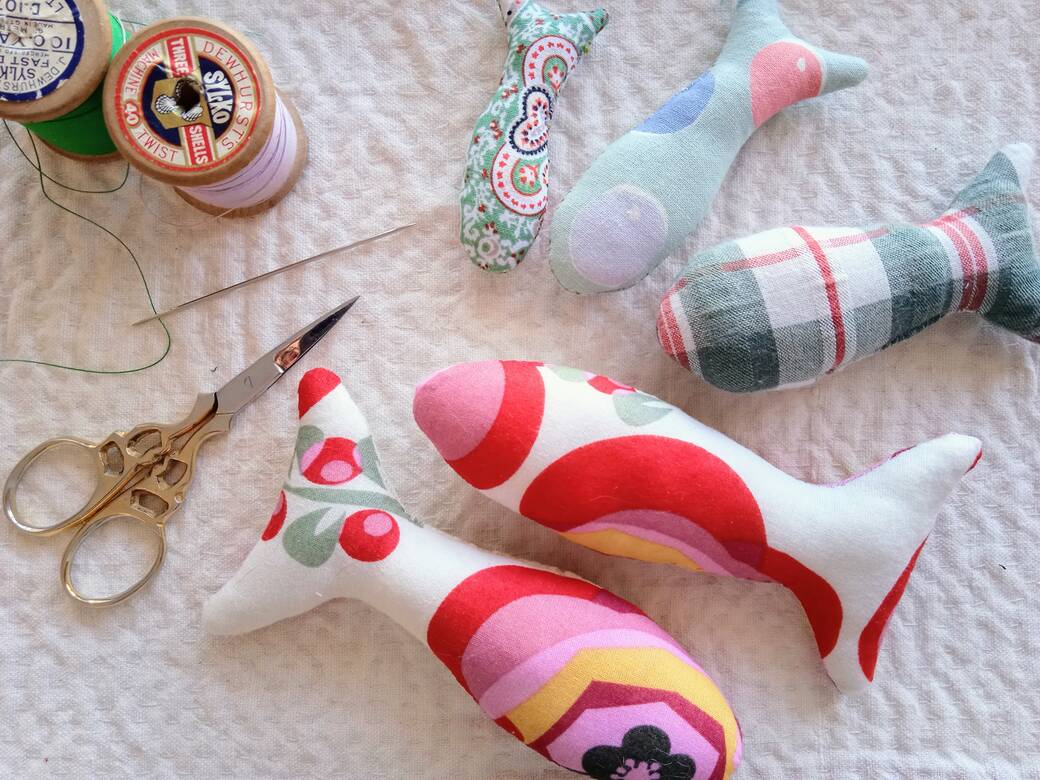
Once you start making these cute little fishy dolls it can become very addictive and you may find you have lots of little fish everywhere. Being so small there is always room for a Fishy Doll or two, around your home, your car or your office. They also make cute little token gifts for friends and family, young and old alike.
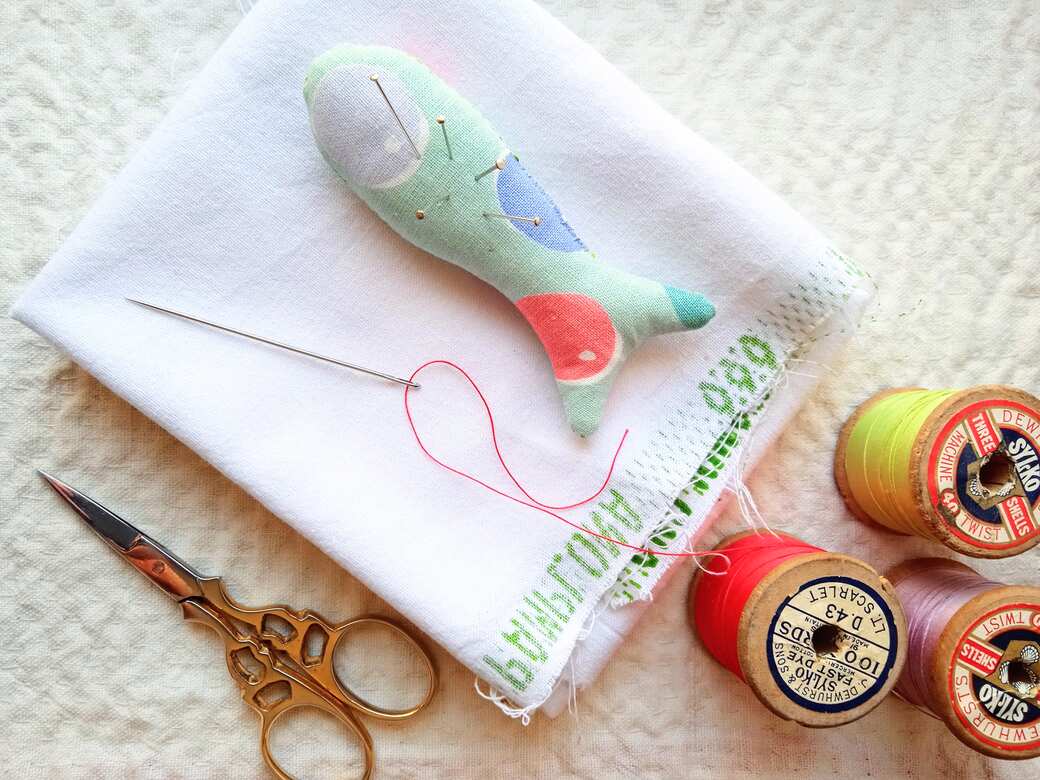
Fabric Fish - free hand sewing tutorial - Beginners course part 1: Fishy Dolls
Skills you will develop with this tutorial:
- Simple pattern cutting for beginners.
- Creating 3D shapes using fabric and stuffing.
- 5 basic hand-sewn stitches useful for doll-making.
- 3 doll-making Pro-Tips for a more professional finish.
- Sewing on buttons for embellishment.
5 basic hand-sewn stitches:
See SEWING GUIDE No 3. SEWING TECHQUNIQUES
1. Anchor stitch, 2. Running stitch, 3. Back stitch, 4. Whip stitch, 5. Ladder stitch.
You will need:
- Paper (e.g. Left over packaging)
- Pencil and pen (Biro)
- Ruler
- Scissors (one for paper and one for fabric or a general purpose pair – must be able to cut fabric cleanly)
- Sewing threads
- A needle and a few pins
- Stuffing (I use carded polyester or recycled from old pillows , make sure you wash it before using it)
- A pair of tweezers or forceps (for turning through small pieces after sewing and before stuffing)
- A chopstick (for stuffing)
- Some fabric scraps, medium or light weight woven fabric is best for creating small stuffed shapes.
Stretch fabrics, like old t-shirts, are difficult to work with and stretch out of shape when stuffed.
I like to buy children’s summer dresses at car boot sales, they are often a suitable weight and made from woven cotton or a mix of cotton and polyester. Children’s clothing comes in a wide range of colours and designs and usually you can pick them up cheaply. They are often in good condition because children grow so quickly.
You can also use: scraps left over from other projects or purchased fabrics from a craft shop. For this tutorial a fat quarter of quilting cotton would be suitable and only a couple of £s.
Step 1. Make your paper pattern.
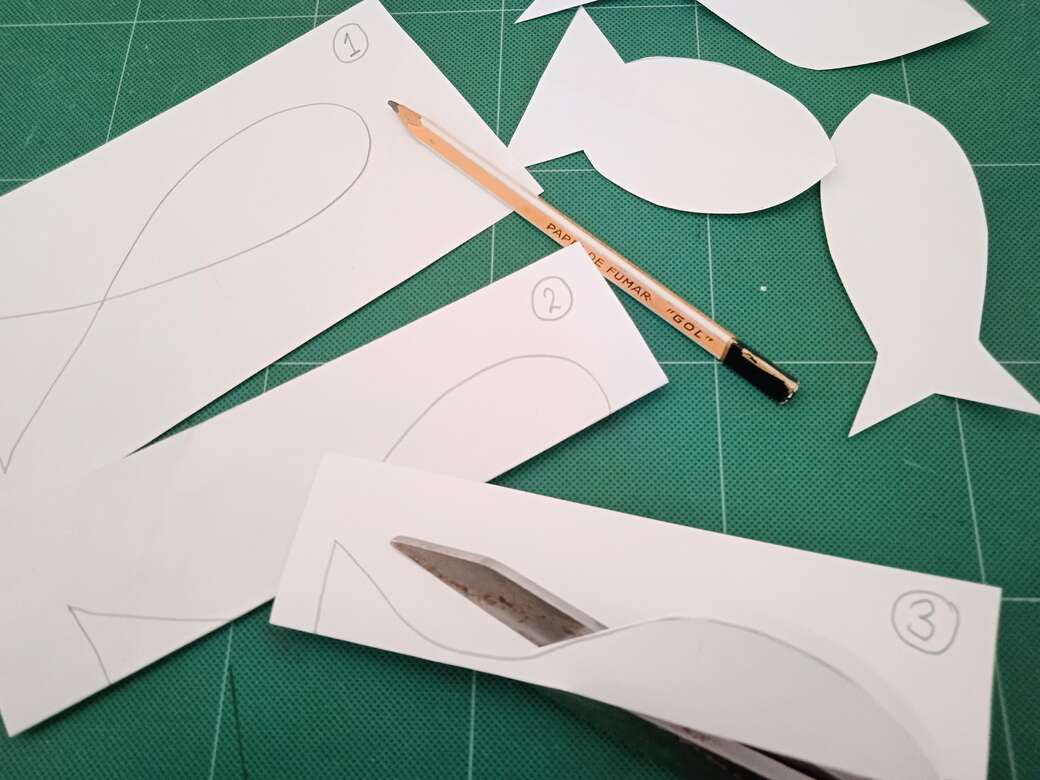
i) Fold your paper in half lengthways.
Draw the shape of half of a fish. If you’re having trouble, try drawing out some shapes on a scrap piece of paper first, use the continuous line technique, similar to how children learn to draw fish (1) and then fold the shape in half lengthways to see what half a fish looks like (2), smooth out the lines. [a]
ii) Cut out your shape keeping the paper folded so you are cutting through double paper and both sides of the fish will be the same (3). Try drawing and cutting different sizes but keep things small, remember, this is a mobile sewing project. [a]
My fish [b] use the Fishy Dolls template download in 4 different sizes and measures approximately from tip to tail, 12cm (large), 9.5cm (medium), 8.5 cm (small) and 6.5 cm (tiny).
Step 2. Choose your fabric and draw your sewing line.
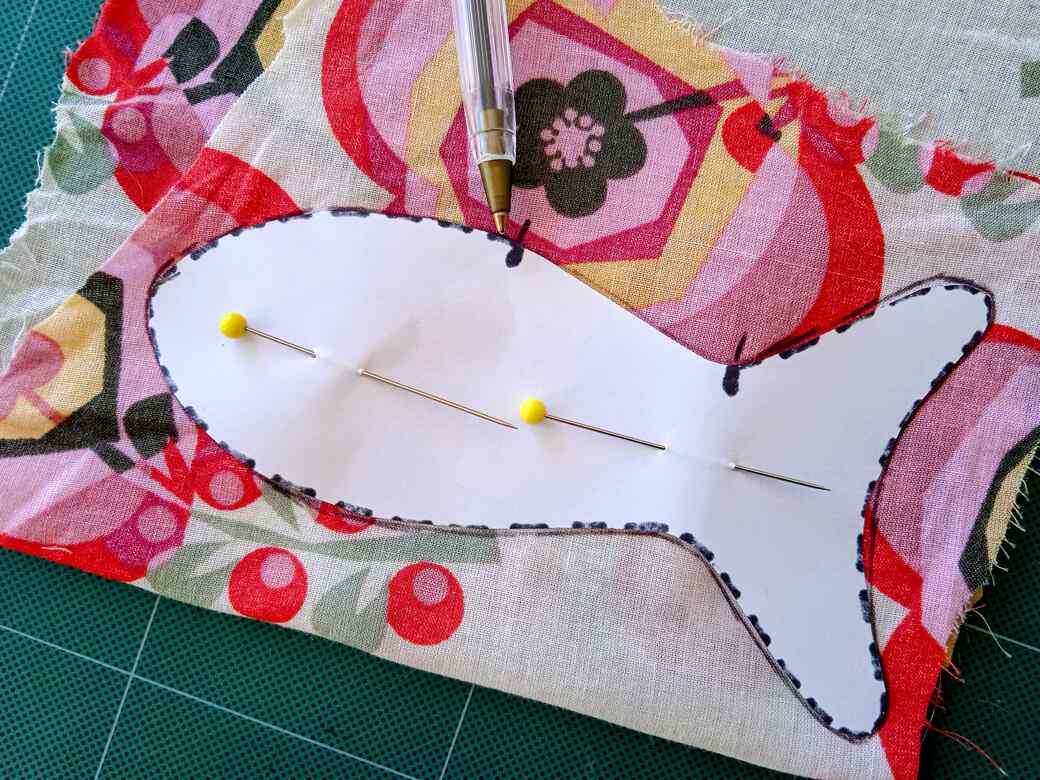
i) Cut out a paper fish template or one of your own fish shapes, select a piece of fabric that is twice the size of your fish paper pattern. (This one I have chosen was a child’s dress, bought at a car boot sale for £0.50).
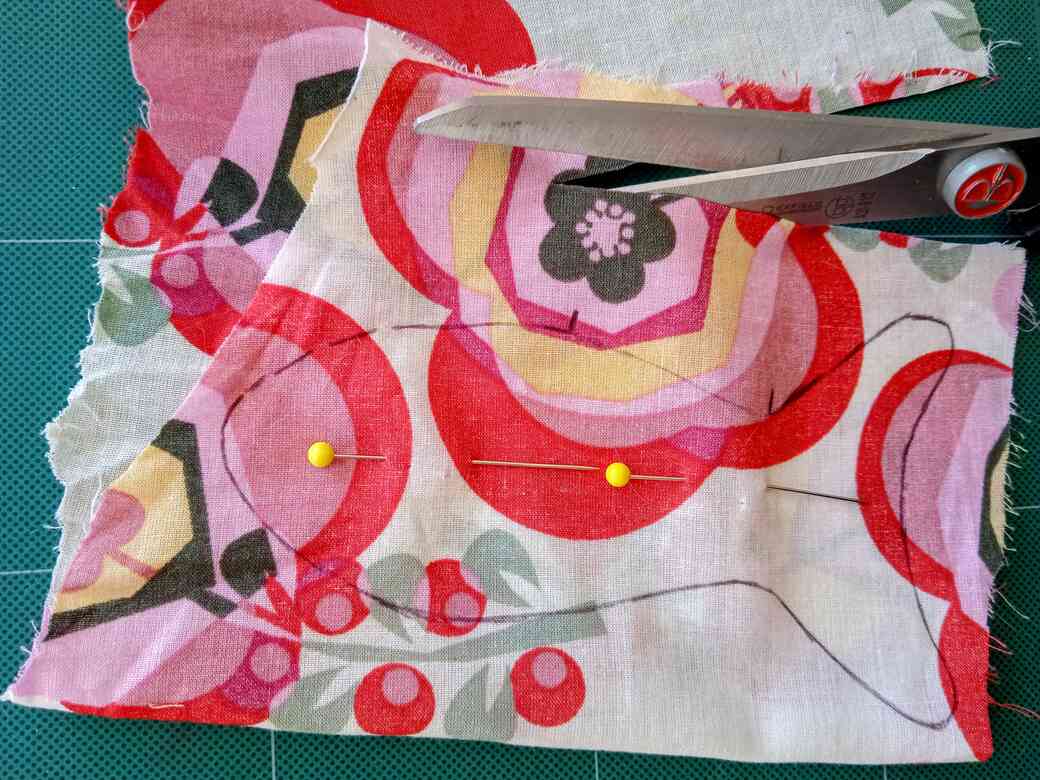
ii) Fold the fabric in half, you should be able to fit the whole fish on with at least 5 mm extra all the way around (Seam allowance). Make sure that the right side of the fabric (the side you want to show on your finished fish) is on the inside of the fold, right sides together and wrong side showing on the outside.
iii) Pin the paper fish to the fabric (make sure the pins go through the pattern and both layers of fabric to secure the 3 layers together.) Draw around your fish with a pencil or pen, make a visible line without pressing too hard, try to avoid making a thick black line. This will be your sewing line. [c]
iv) Carefully remove the pins and paper pattern, then replace the pins to hold just the two layers of fabric together.
v) Make 2 small marks on the fish outline a minimum of 2 cm apart (3 cm for the largest fish). You will not sew between these 2 marks, this is your opening for turning your fish right side out and for adding stuffing to create a 3D shape. Try to place the opening on as straight an edge as possible, it’s more difficult to sew closed a curved edge. Also not too close to the tail fins as this might result in the tail looking a bit lopsided.
vi) Trim away any excess fabric, but do not cut around the fish at this point. [d]
Step 3. Practise your stitches - Beginners Step. OPTIONAL
If you are familiar with these stitches, move onto Step 4.
1. Anchor stitch 2. Running stitch 3. Backstitch 4. Whip stitch, 5. Ladder stitch.
See Sewing Guide No 3. Sewing Techniques for tutorial on these 5 stitches before moving onto step 4.
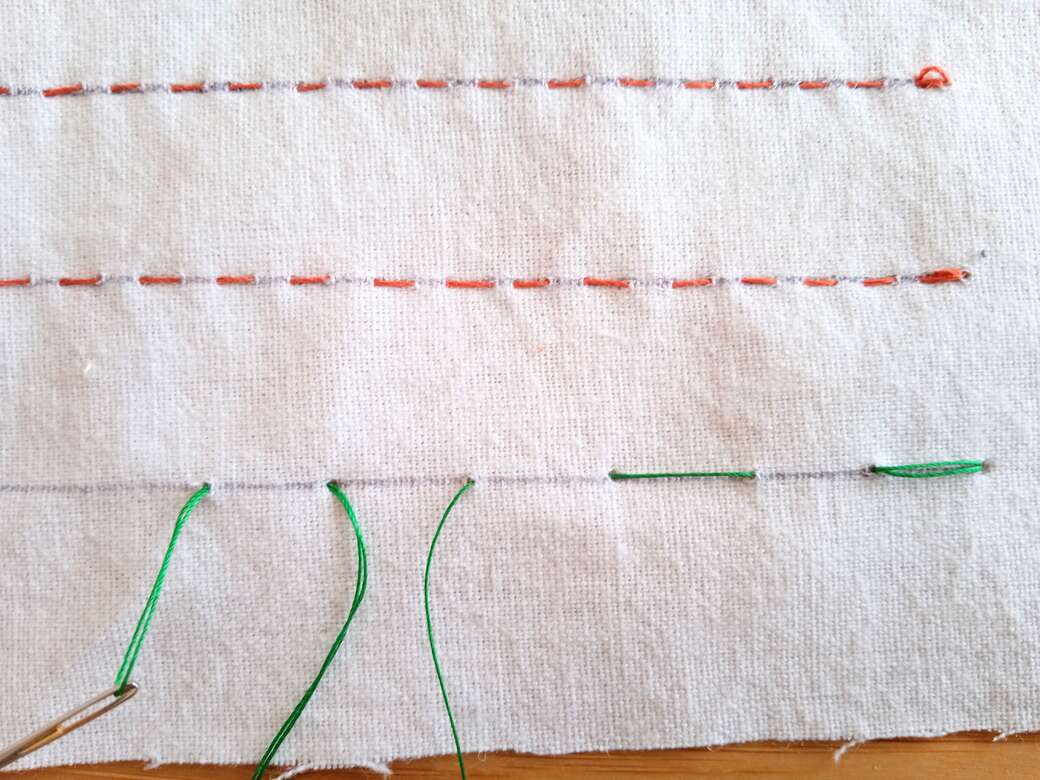
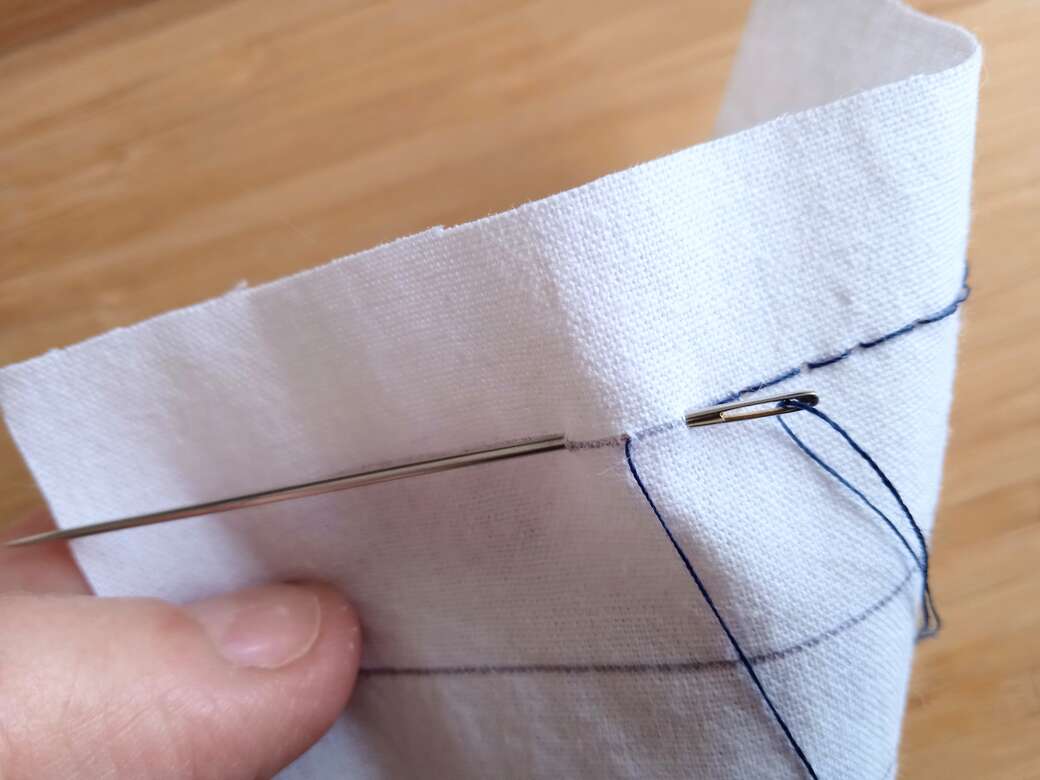
Step 4. Sew around your fish shape.
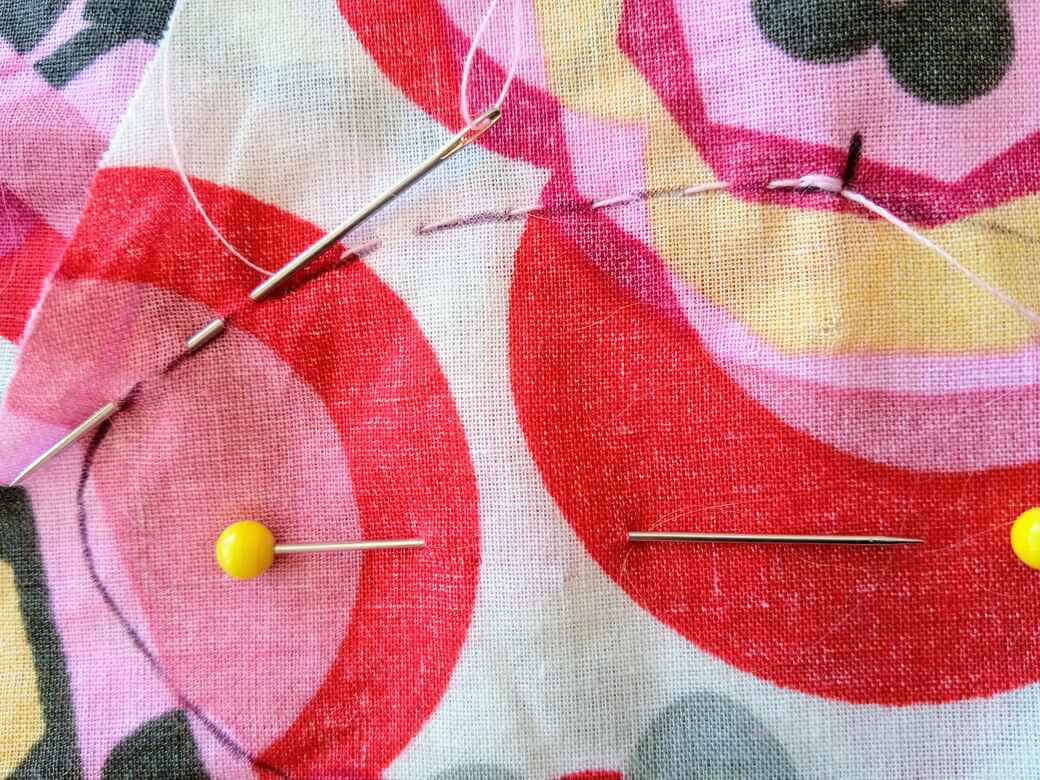
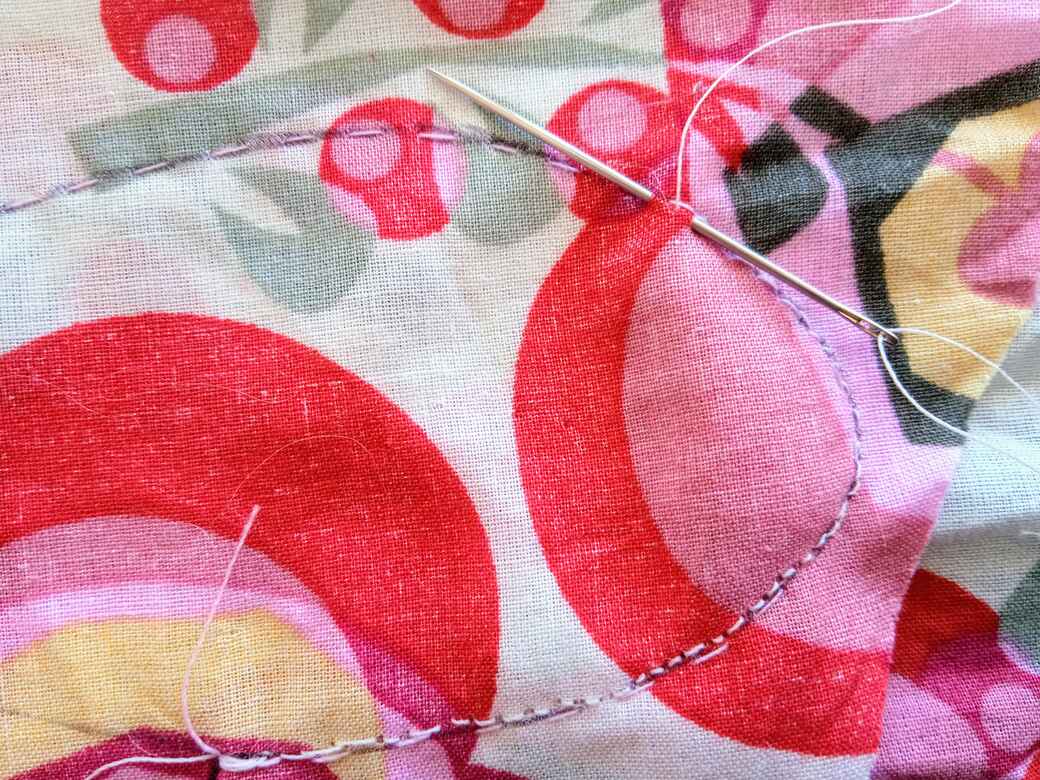
i) Choose a thread that matches your fabric as closely as possible. Alternatively use a neutral coloured thread like grey or beige, they often work well with different coloured fabrics.
Cut a length of sewing thread (stretching from your fingers to your shoulder) and thread your needle. Do not tie a knot.
ii) *Pushing your needle through both layers of fabric at your first mark, to the left of the opening, anchor stitch to secure the thread.
iii) Using running stitch carefully sew around your fishy doll shape, try to keep the stitches small and on the drawn line. [g] Stop at the second mark (2 or 3 cm’s from where you started sewing) and sew another anchor stitch here. Cut the thread leaving a 2 cm tail.
iv) Repeat from* sew a second row of stitching over the top of the first row. I used back stitch.
[h] 2 rows of stitching are more secure with the tiny seam allowances used in doll making.
Step 5. Iron your stitches, mark seam allowance and cut away excess fabric.
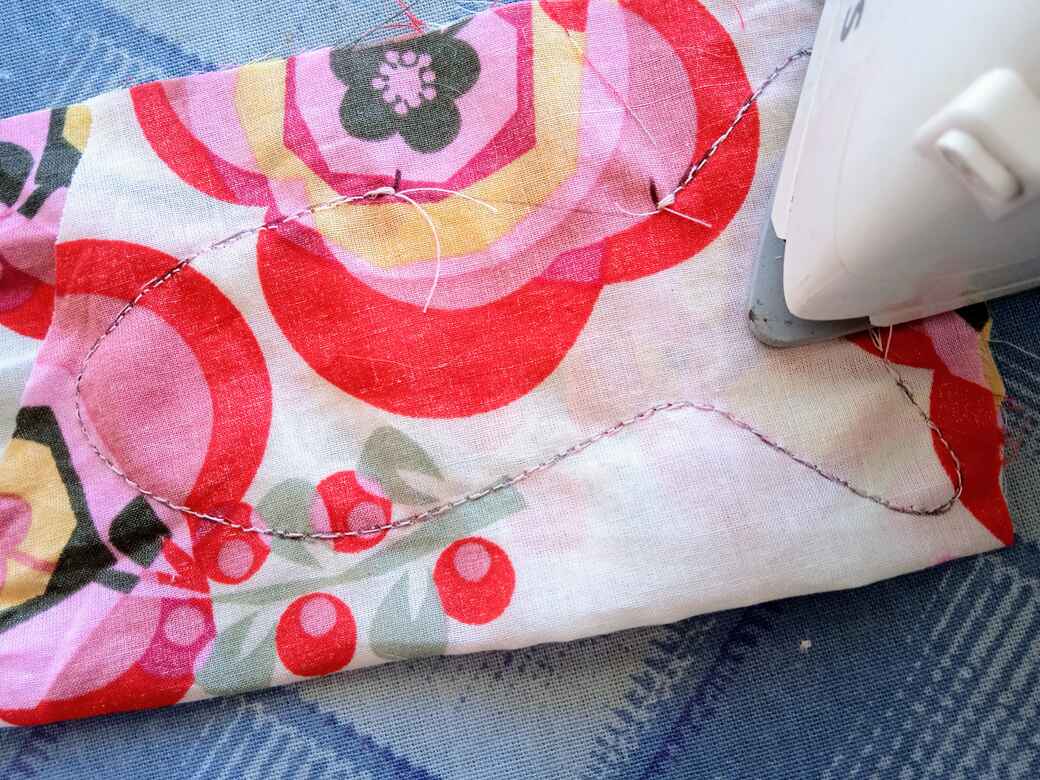
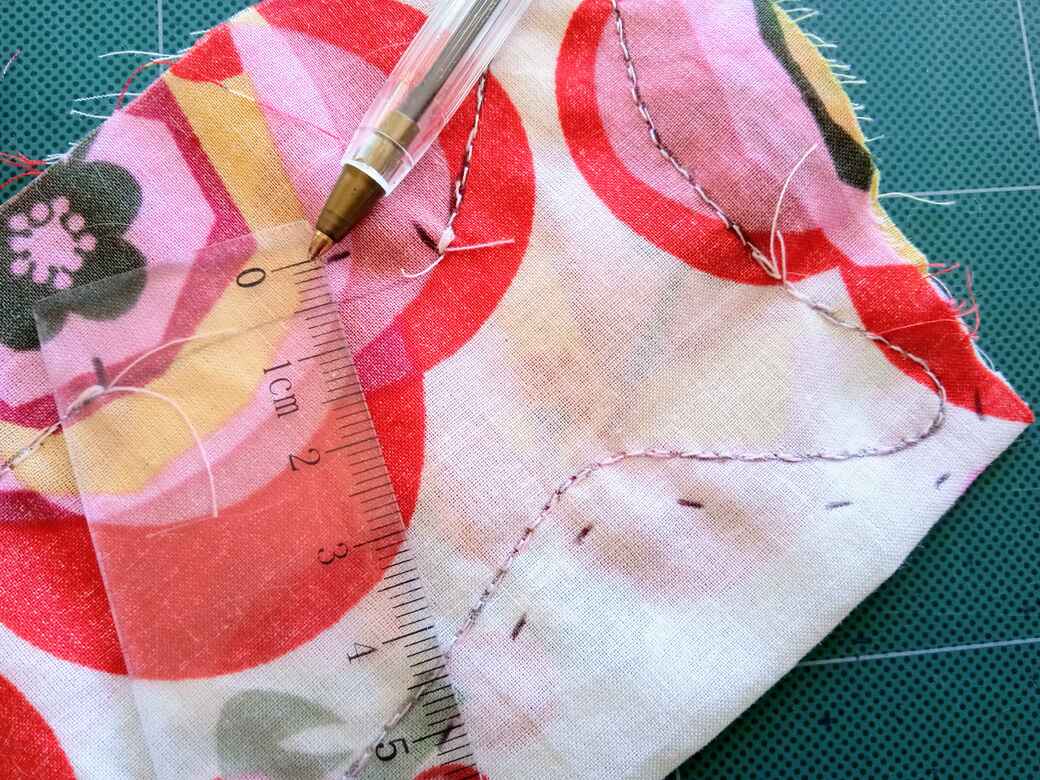
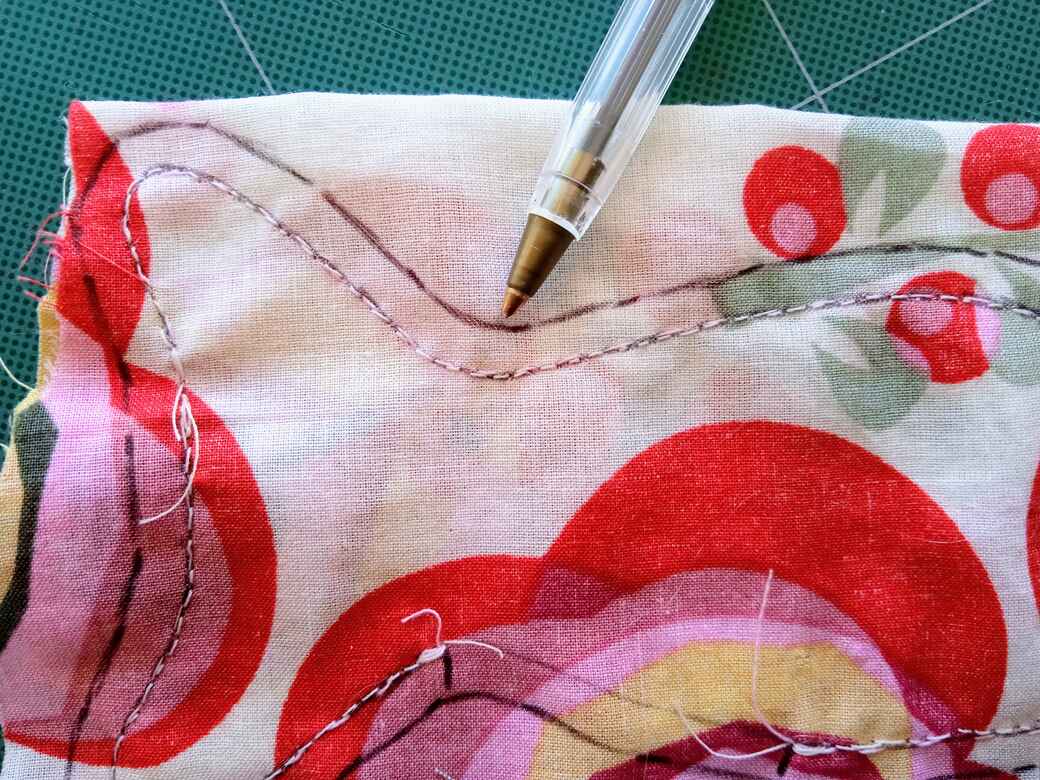
i) Optional – Iron your stitches, I like to iron my work before moving onto the next stage, I think it makes the stitches sit flatter on the fabric and helps shape definition. [i]
ii) With a ruler/tape measure and pencil/pen, mark 5 mm outside of the sewing line all the way around the fish. [j]
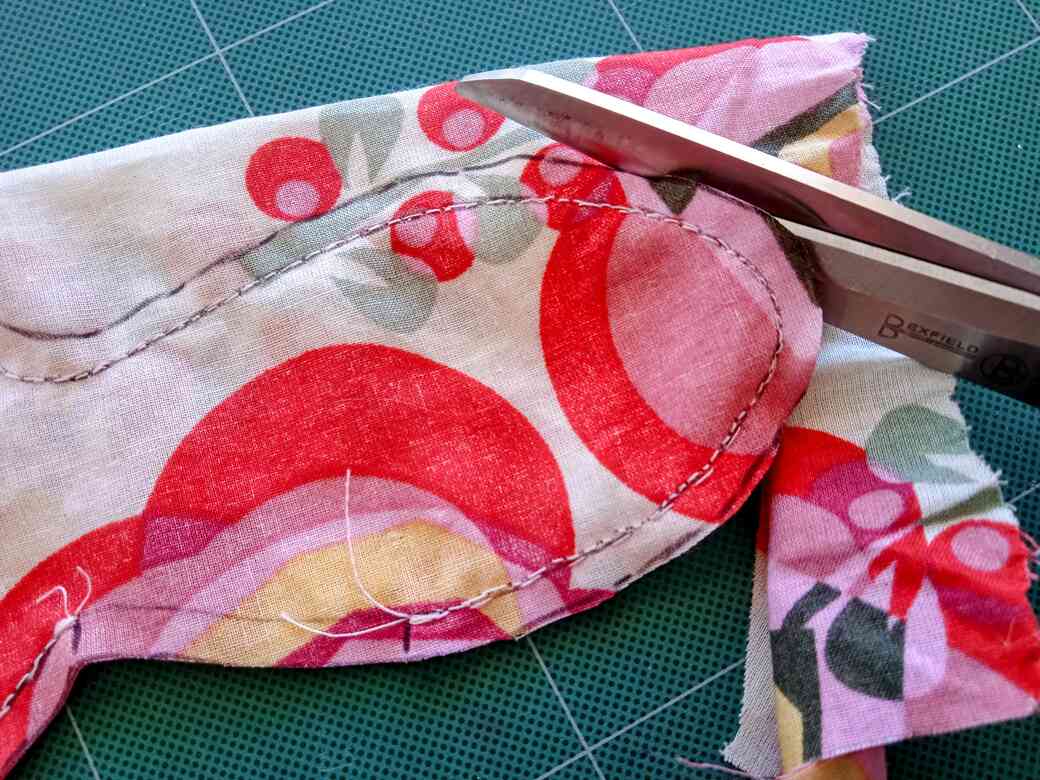
iii) Join the marks to create a cutting line that leaves a 5 mm seam all around the sewn fish shape. [k]
iv) Carefully cut along the line, all the way around the fish, taking care to not cut too close to your stitches. [l]
Step 6. Turn your fish right sides out and stuff.
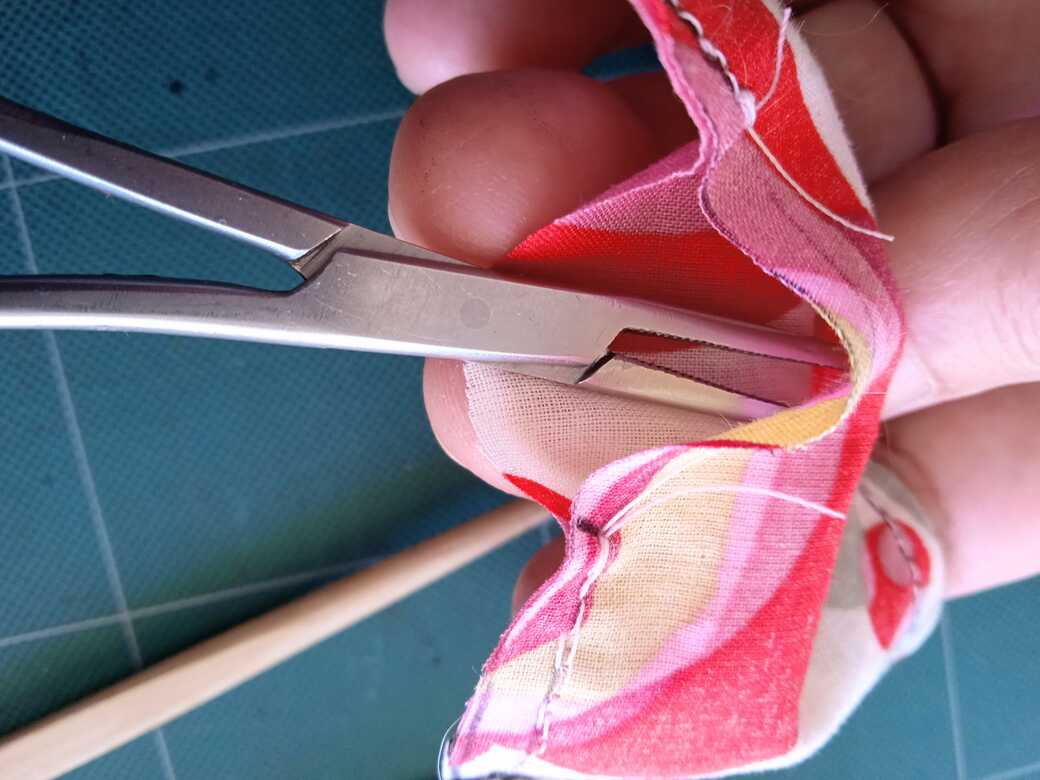
i) Turn your fish the right way out, (so the right side of the fabric is on the outside). Using tweezers or forceps carefully insert the tips into the opening between the two marks. [m]
ii) Grab a small amount of fabric with the tips and carefully tease the shape out. If the fabric starts to bunch up, gently push it back and try again.
It’s worth spending a bit of time on this step until you get the feel for it, as this is a make-or-break stage in doll-making. [n]
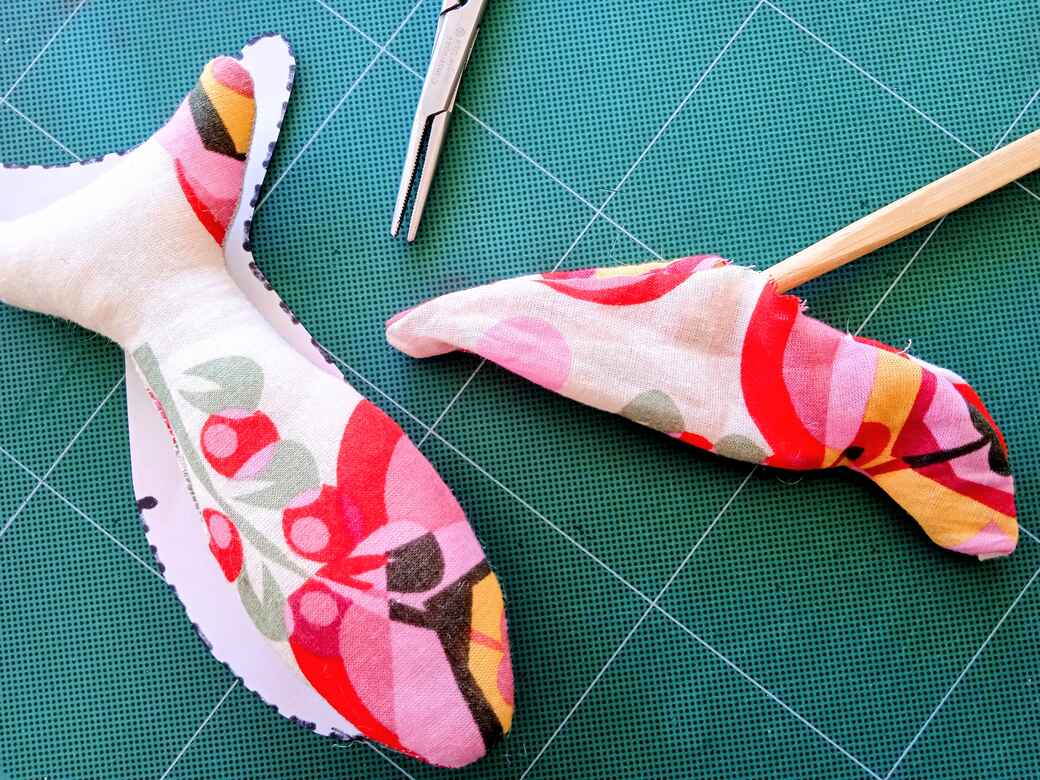
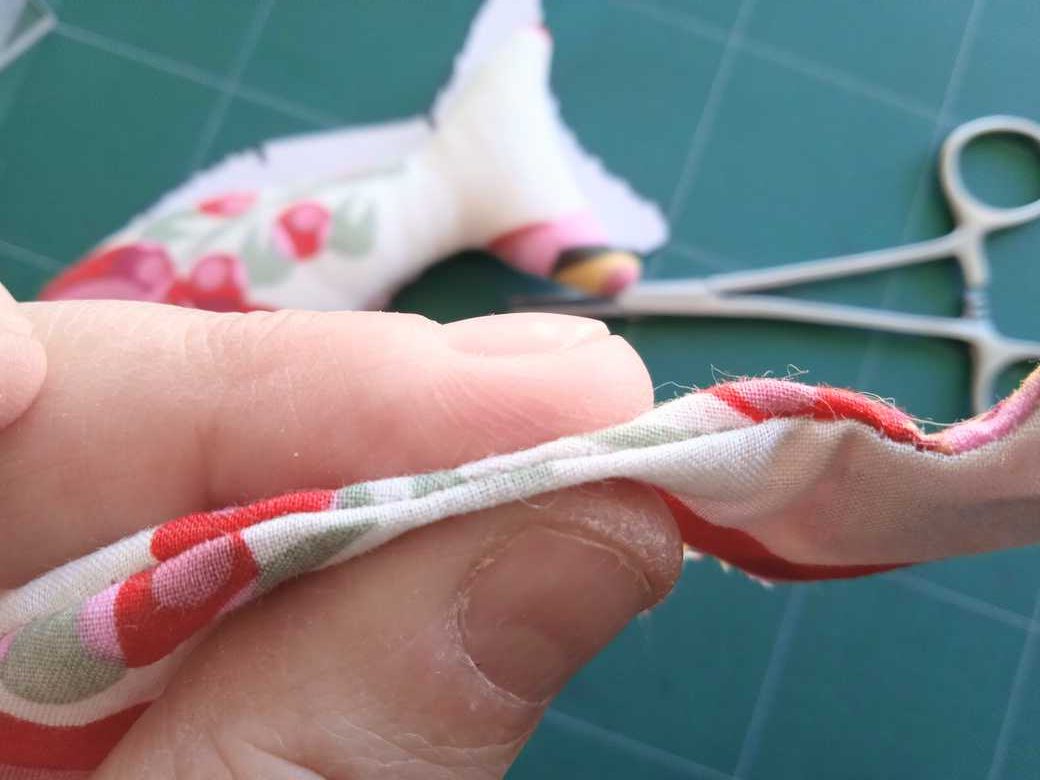
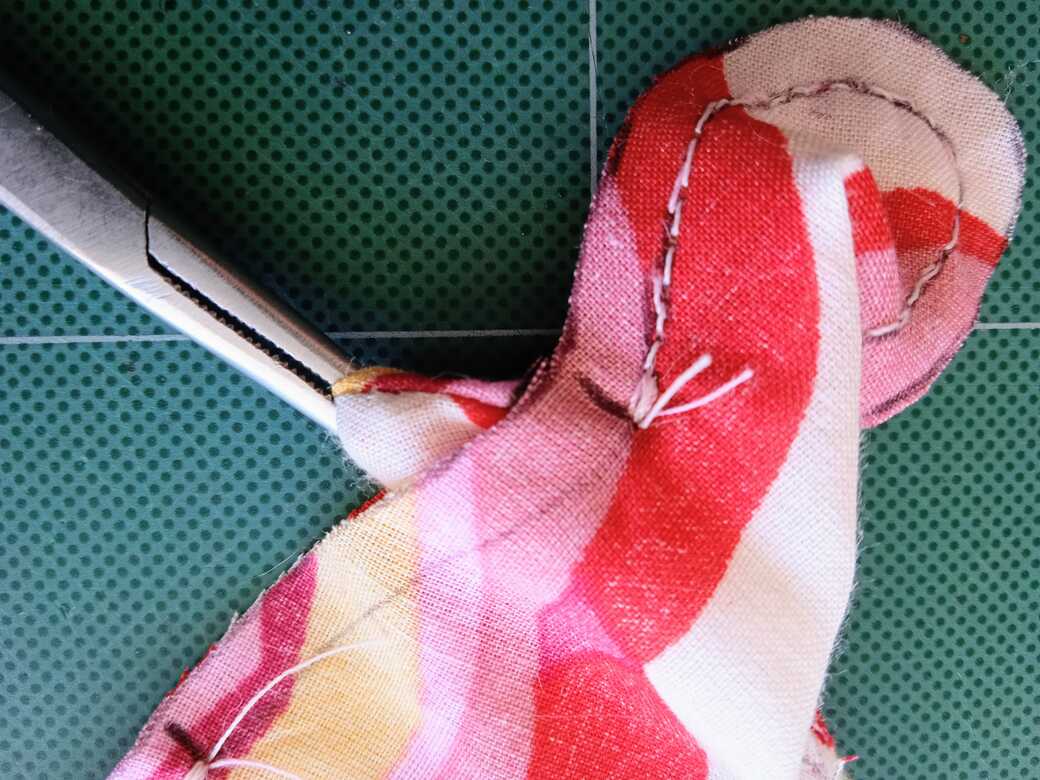
iii) Use a chopstick to carefully push out the shape from the inside. Pay special attention to the tail fins and do not push too hard or you may rip the stitches [o]
iv) Prepare to stuff our fishy doll. Using your thumb and forefinger hold your fishy doll with your thumb placed on one side and your forefinger on the other so you are holding your flat fish shape close to the sewn edge. Gentle roll the edge between your thumb and finger to define the edge and smooth out any bumps or points. [p]
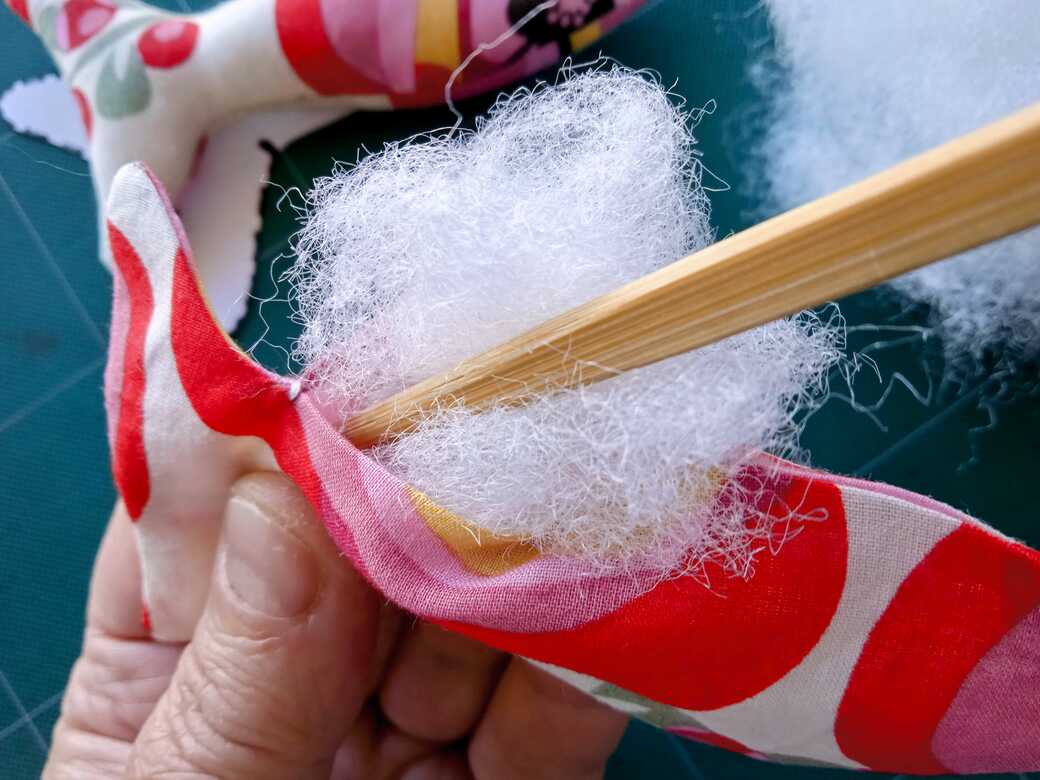
v) Stuff your fishy doll using polyester fibre filling and a chopstick. [q]
vi) Try not to make your fishy doll too firm to begin with, you can experiment later with different levels of firmness. Aim for a defined fish shape without stretching your stitches.
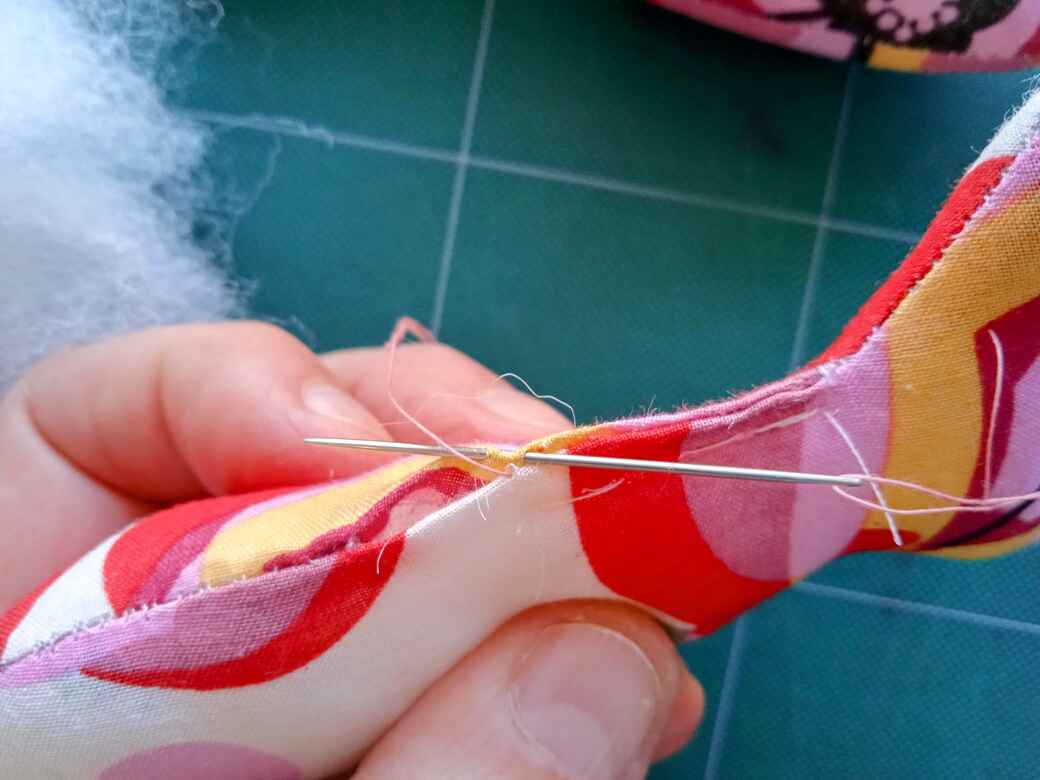
vii) Once you are happy with the firmness/softness of your fishy doll. Bring the 2 sides of the opening together, fold a 5 mm turning, along both sides of the opening, to the inside of the fish and secure with a couple of pins.
viii) Sew the opening closed using whip stitch. [r] Don’t forget to anchor the thread at the beginning and end of sewing to stop the stitches coming undone.
Step 7. Lose the thread inside the doll.
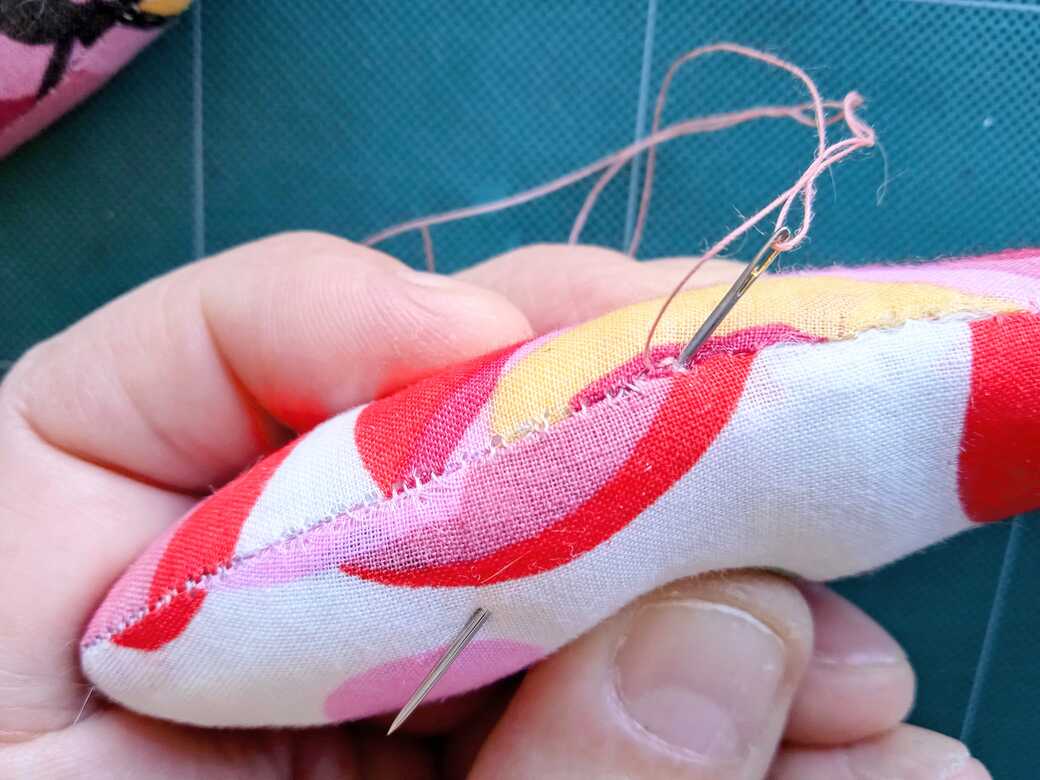
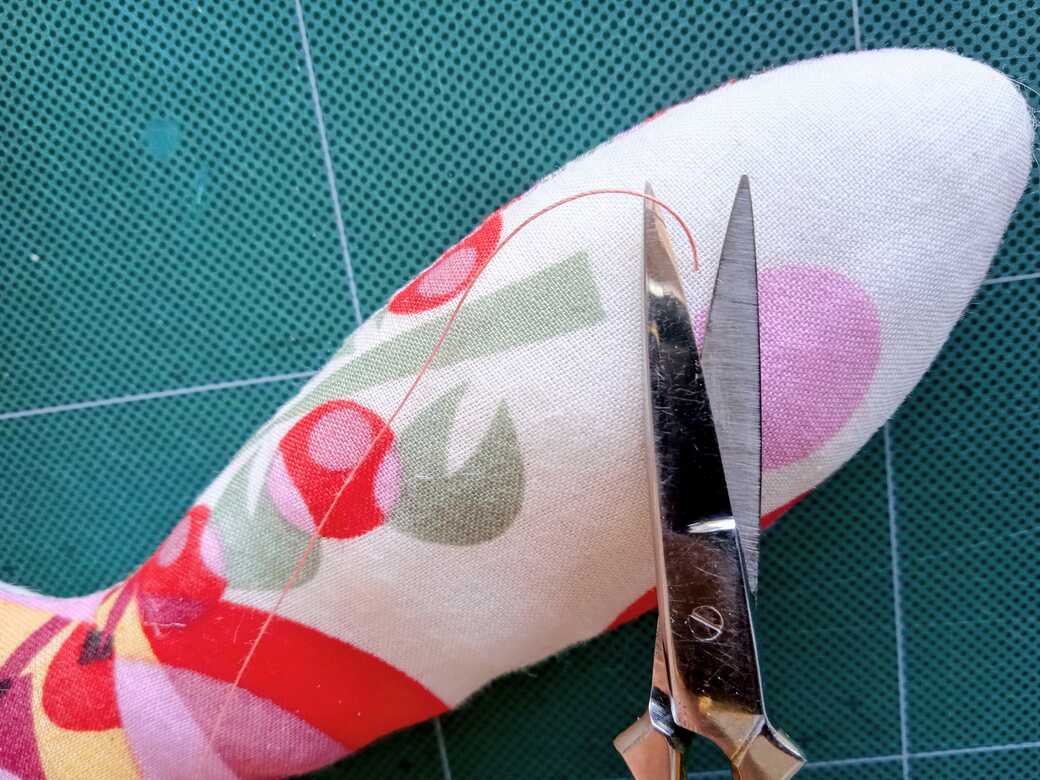
SEE PRO-TIP 3: LOSING THE THREAD INSIDE THE DOLL.
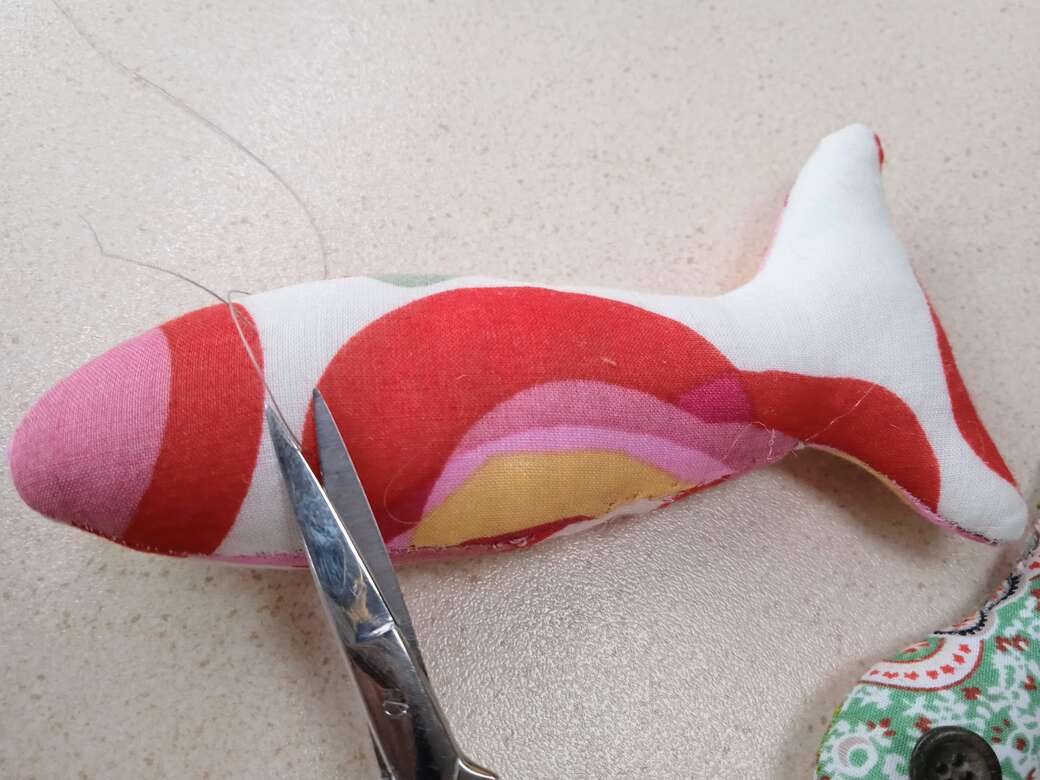
i) Push the threaded needle back into the body close to the last anchor stitch and bring it out at the side of the body. [s]
ii) Cut the thread close to the body, being careful not to cut the fabric. [t]
Step 8. Practise sewing on a button - Beginners step. OPTIONAL
If you already know how to sew on a button, move onto step 9.
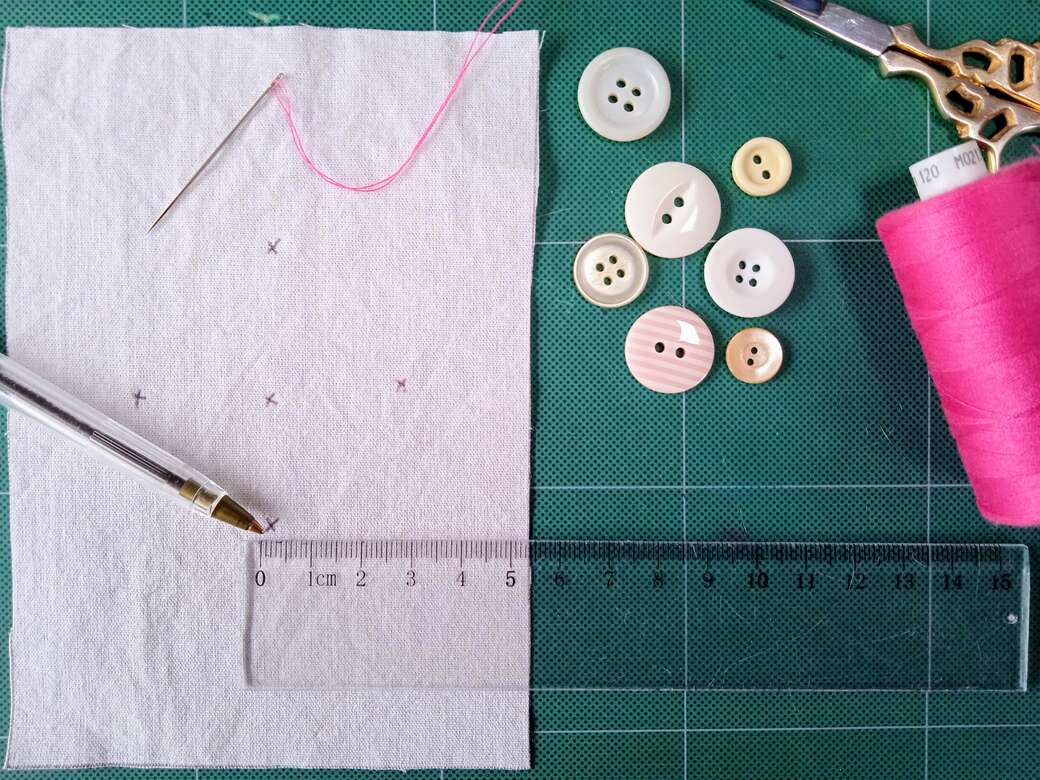
See Sewing Guide No 3. Sewing Techniques, for a tutorial on how to sew on a button, [u] before moving onto step 4.
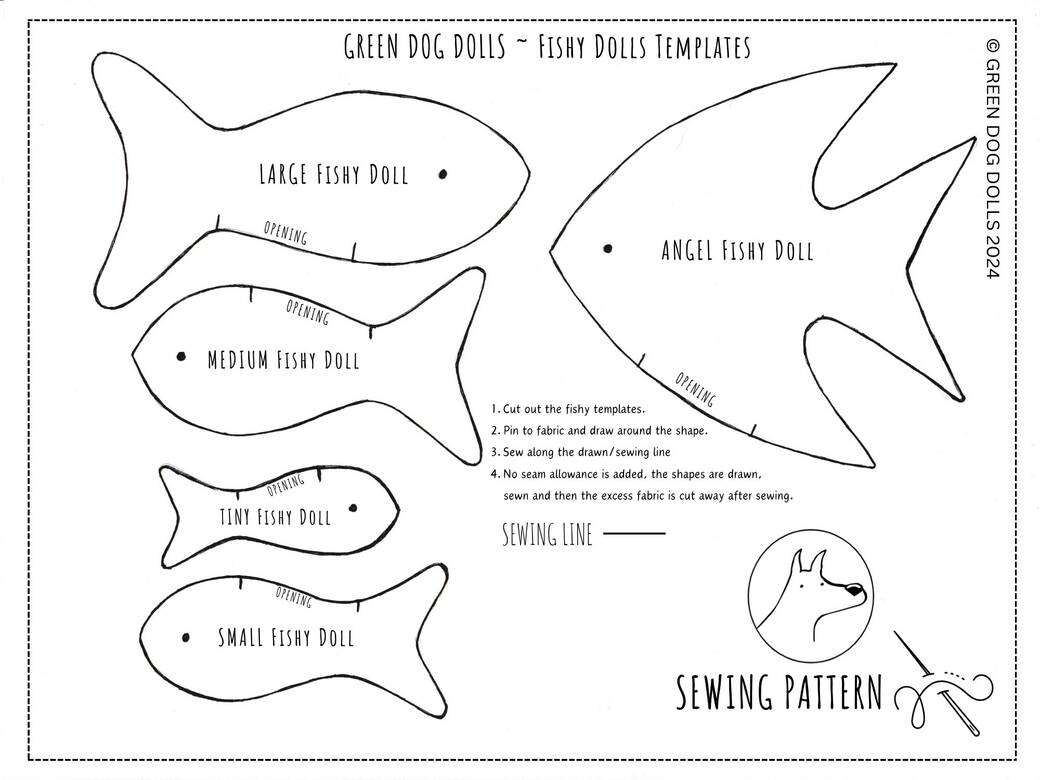
[v] The Fishy dolls Template comes in 4 sizes and as an added bonus, the Angelfish template is also included. You get all 5 templates on the one A4 page PDF to print out.
Step 8. Embellishment - Sewing on buttons for eyes. OPTIONAL

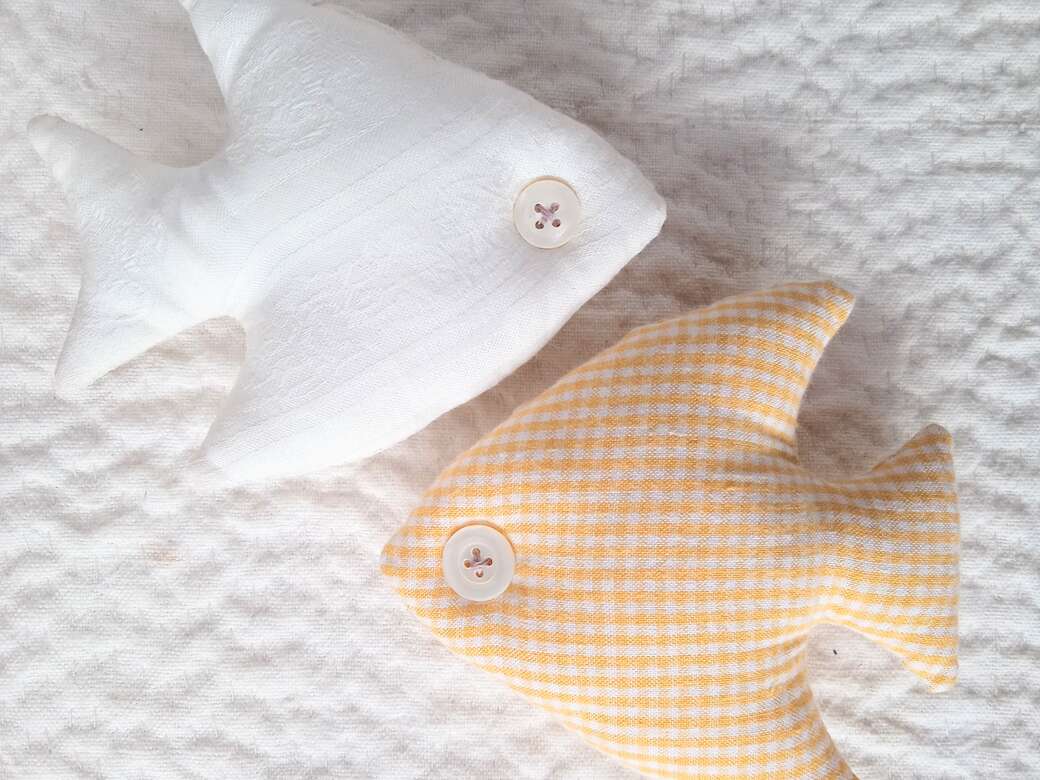
Sew on your buttons:
i) Choose a button for your eye, cut a length of general sewing thread (approx 50 cm), thread your needle, mark the eye position with a pin and then sew a few stitches at the pin marker, this anchors the thread and marks the position for the button eye, at the same time. Remove the pin. [A]
ii) Pass the threaded needle through the first hole in the centre of the button (It doesn’t matter which hole you choose as the first hole, there will usually be 2 or 4). I am using a four hole button. [B]
iii) Pass the needle through the next hole in the centre of the button. (Opposite to the first one, in the case of 4 holes, creating a diagonal stitch)[C]
iv) Make a stitch, in the same place as the eye-position marker stitches, on your fish [D].
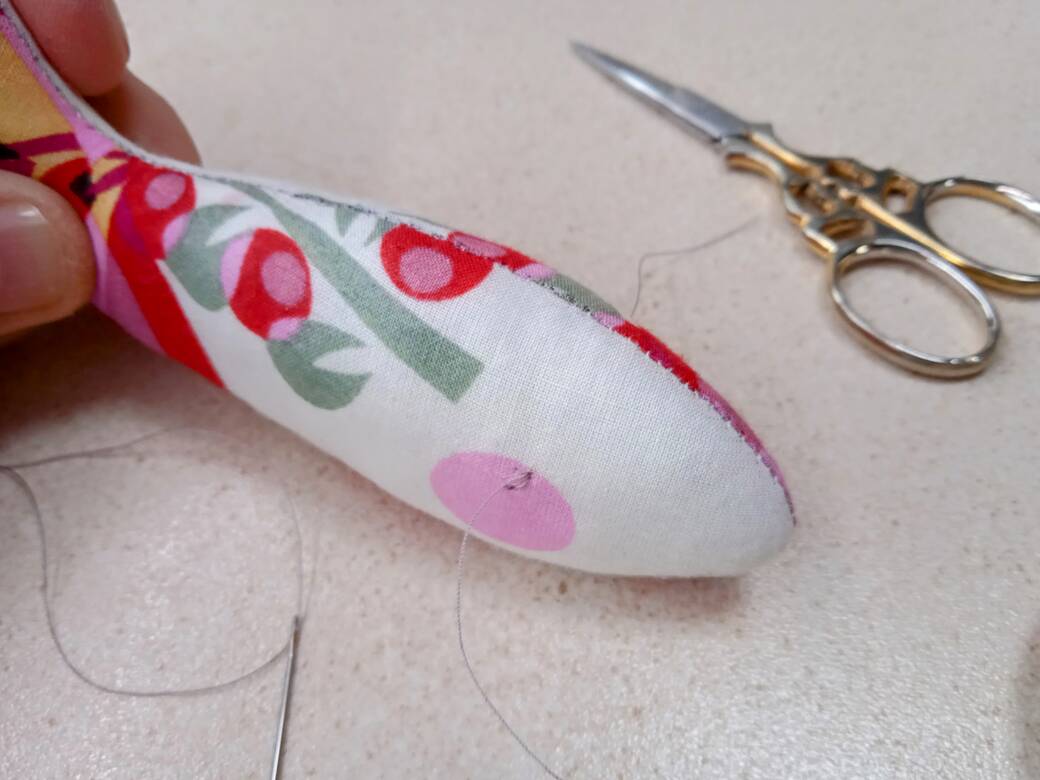
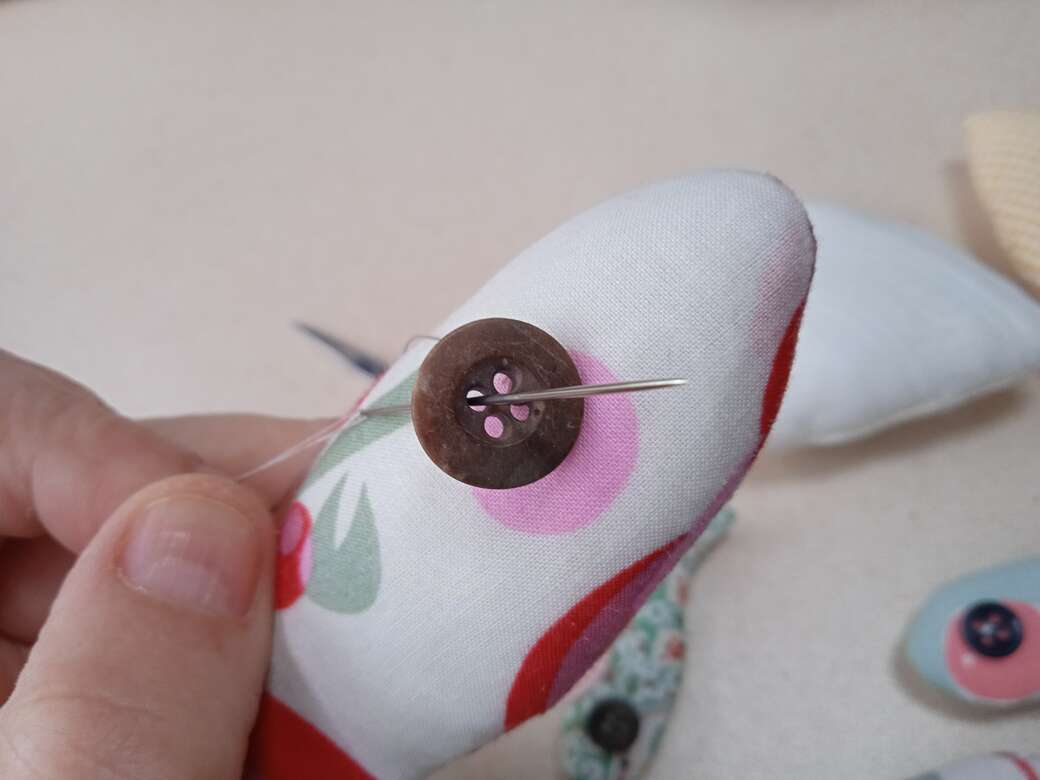
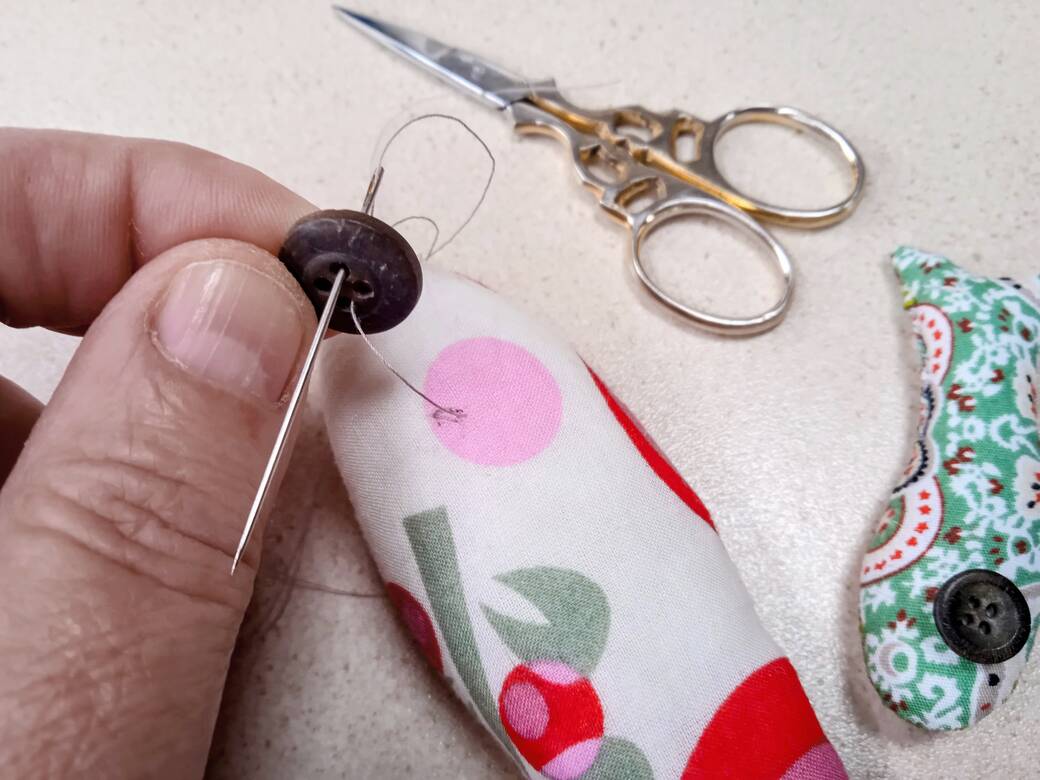
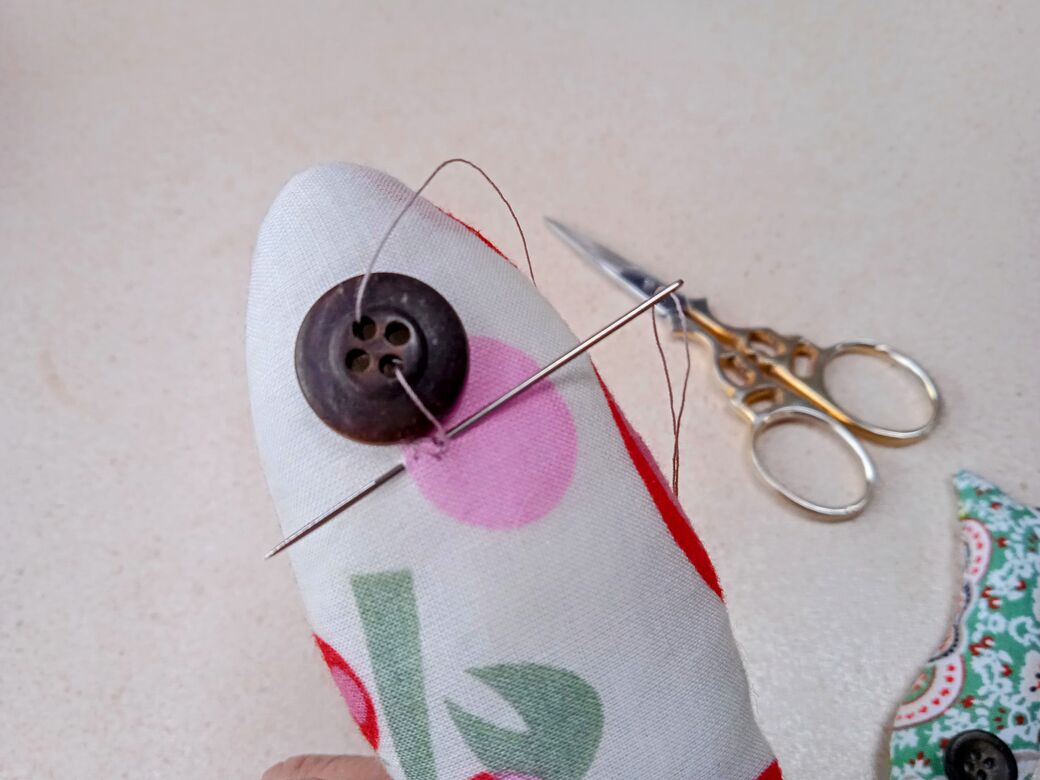
v) Pull the thread so the stitch holds the button firmly in place, flat against the side of your fish. [E]
vi) Repeat these three steps 3-5 more times: 1. Pass the needle up through one hole in the button. 2. Pass the needle down through another hole in the button. 3. Make a small stitch in the fish. These stitches securely attach the button to the fish. Finish with a few stitches under the button centre to anchor the thread. [F]
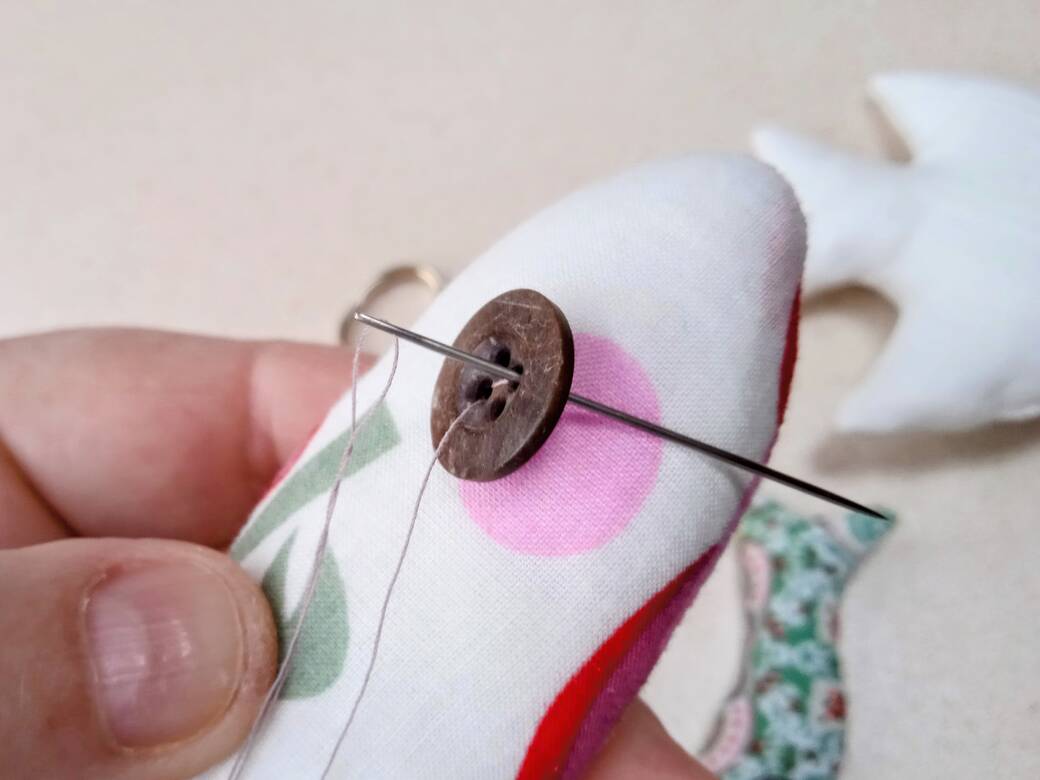
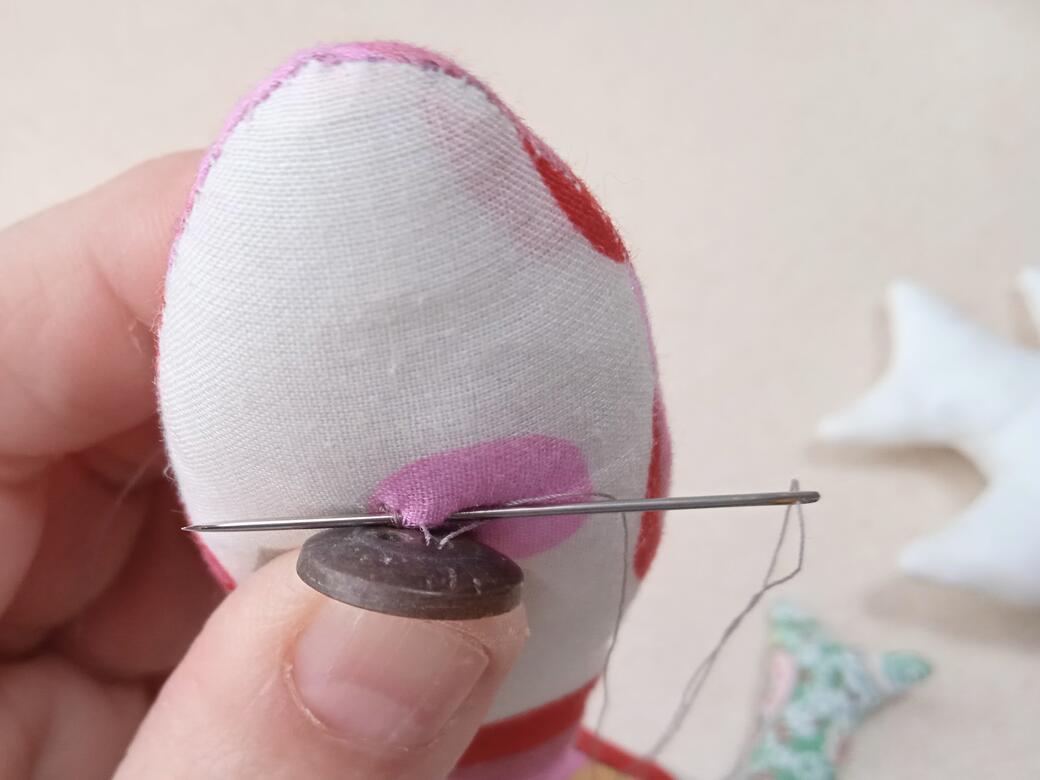
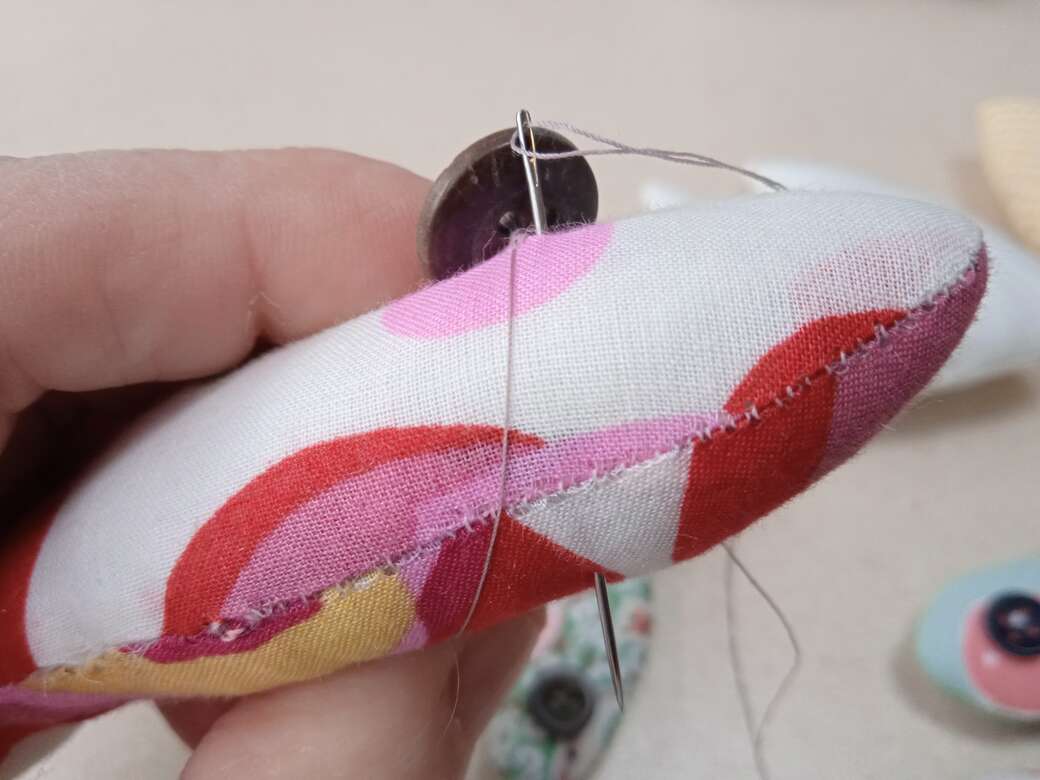
vii) Push the needle back through the fish, close to your anchor stitches, and out the opposite side.[G]
viii) Cut the thread close to the body, taking care not to cut the fabric. [H]
Step 10. Enjoy! - Why not practise your new skills by making some more Fishy Dolls in different sizes and styles?
SAFETY NOTE: Not suitable for children under 3 years of age.
This design includes small parts. Small parts can present a choking hazard for young children.
Please take extra care if giving ‘Fishy dolls’ to a child.
Make sure they are age appropriate. See website Terms and Conditions for full details.
© GREEN DOG DOLLS 2024
‘Fishy Dolls’ design, pattern and images and text remain the property of Green Dog Dolls and may be withdrawn at any time without notice.
Did you enjoy this FREE Tutorial and Pattern?
Would you like to see more?
YES!
Then please consider making a small donation using the donate button in the menu above.
There is no obligation whatsoever but your support is very much appreciated and helps to keep this site free from those pesky adverts.
Thank you x
COMING SOON…Fishy Dolls Free Hand-Sewing Tutorial for Beginners – Parts 2 & 3.
